Gluten-Free Chocolate Cake Cookies (Crumbl Copycat)
This post may contain affiliate links. See our disclosure policy for more.
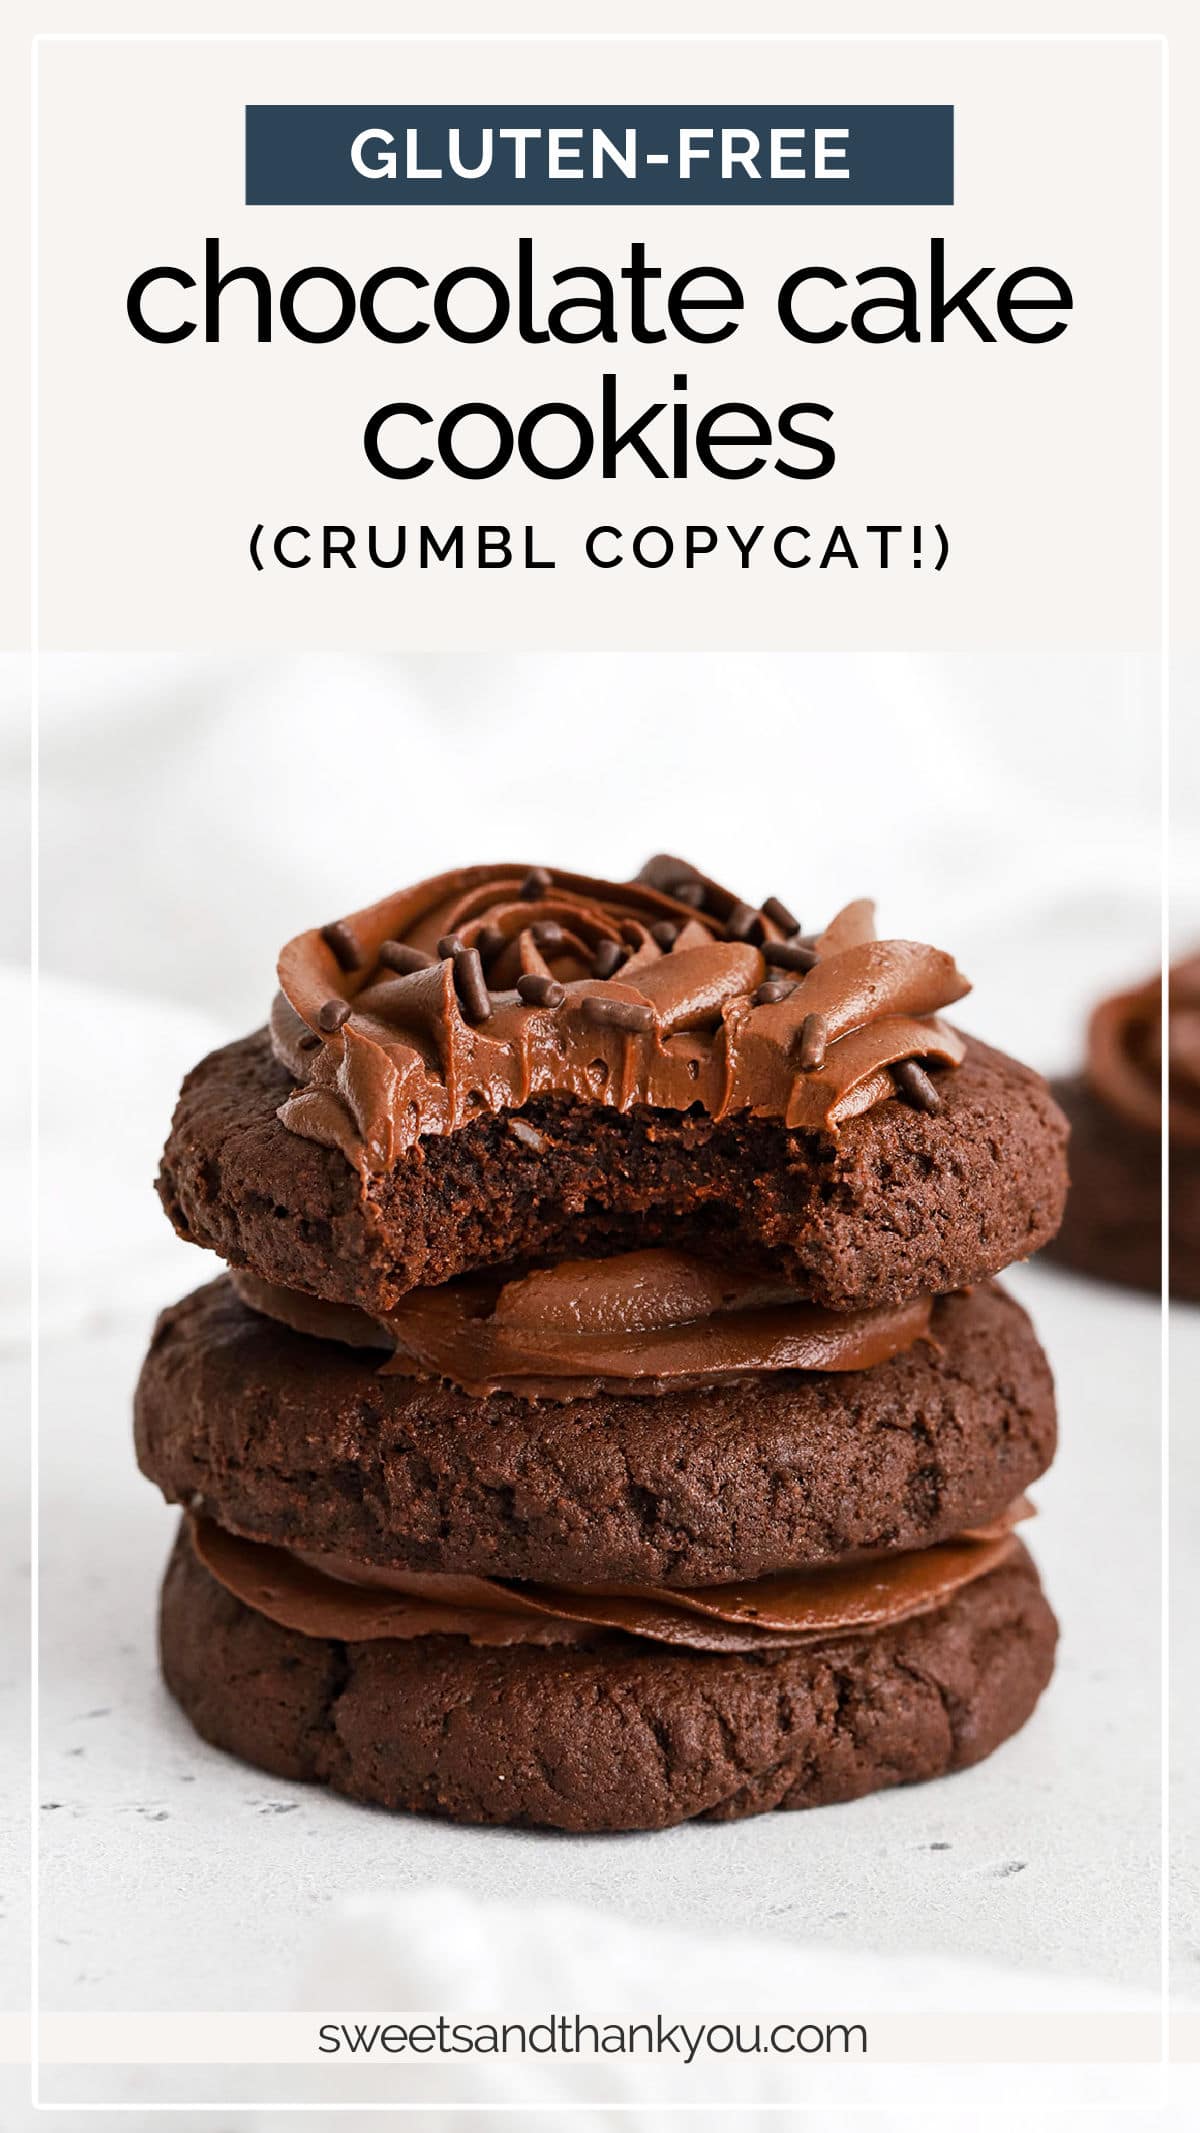
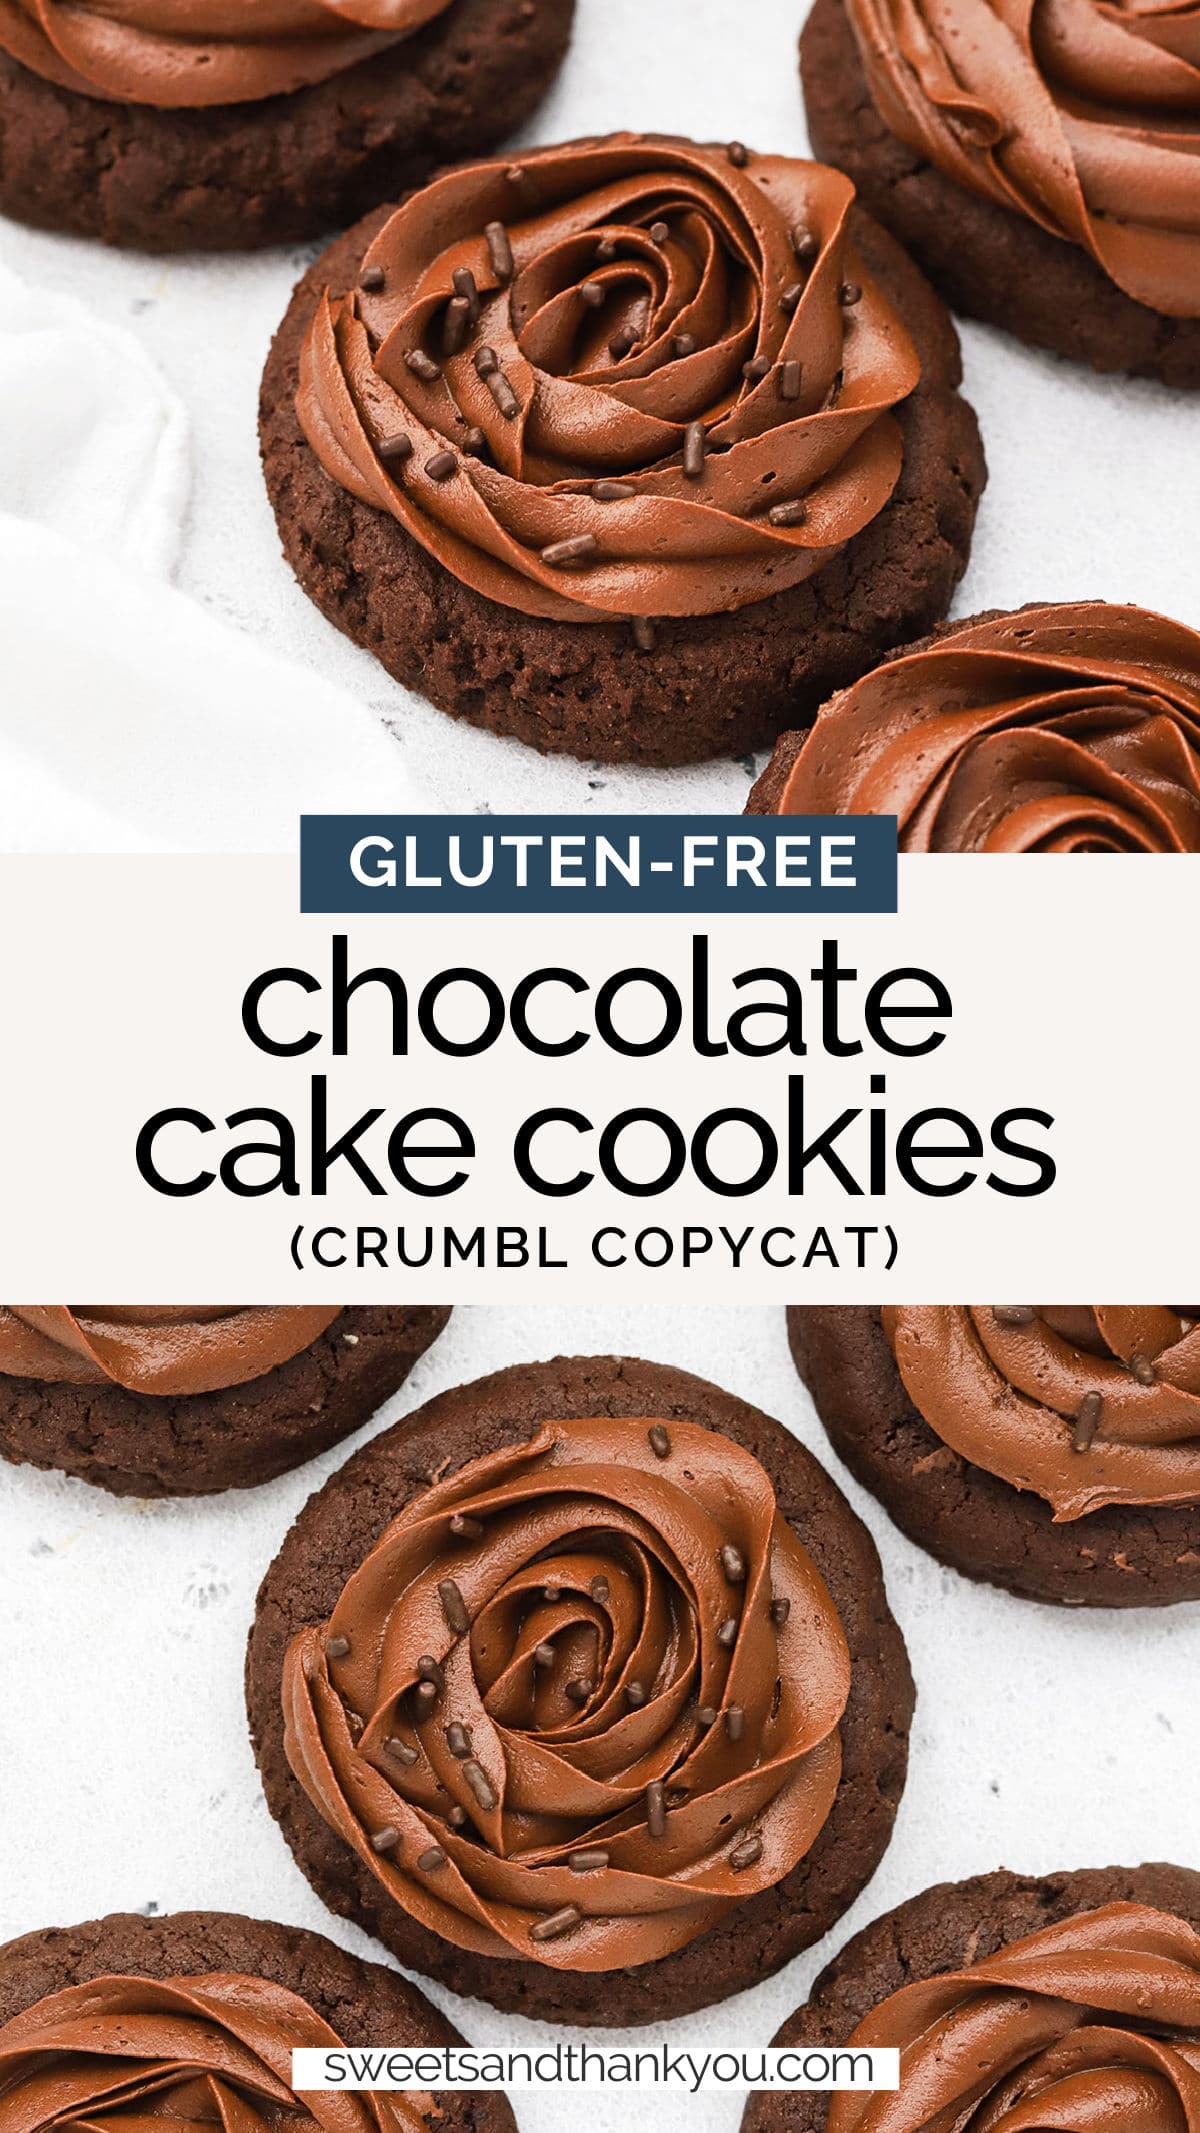
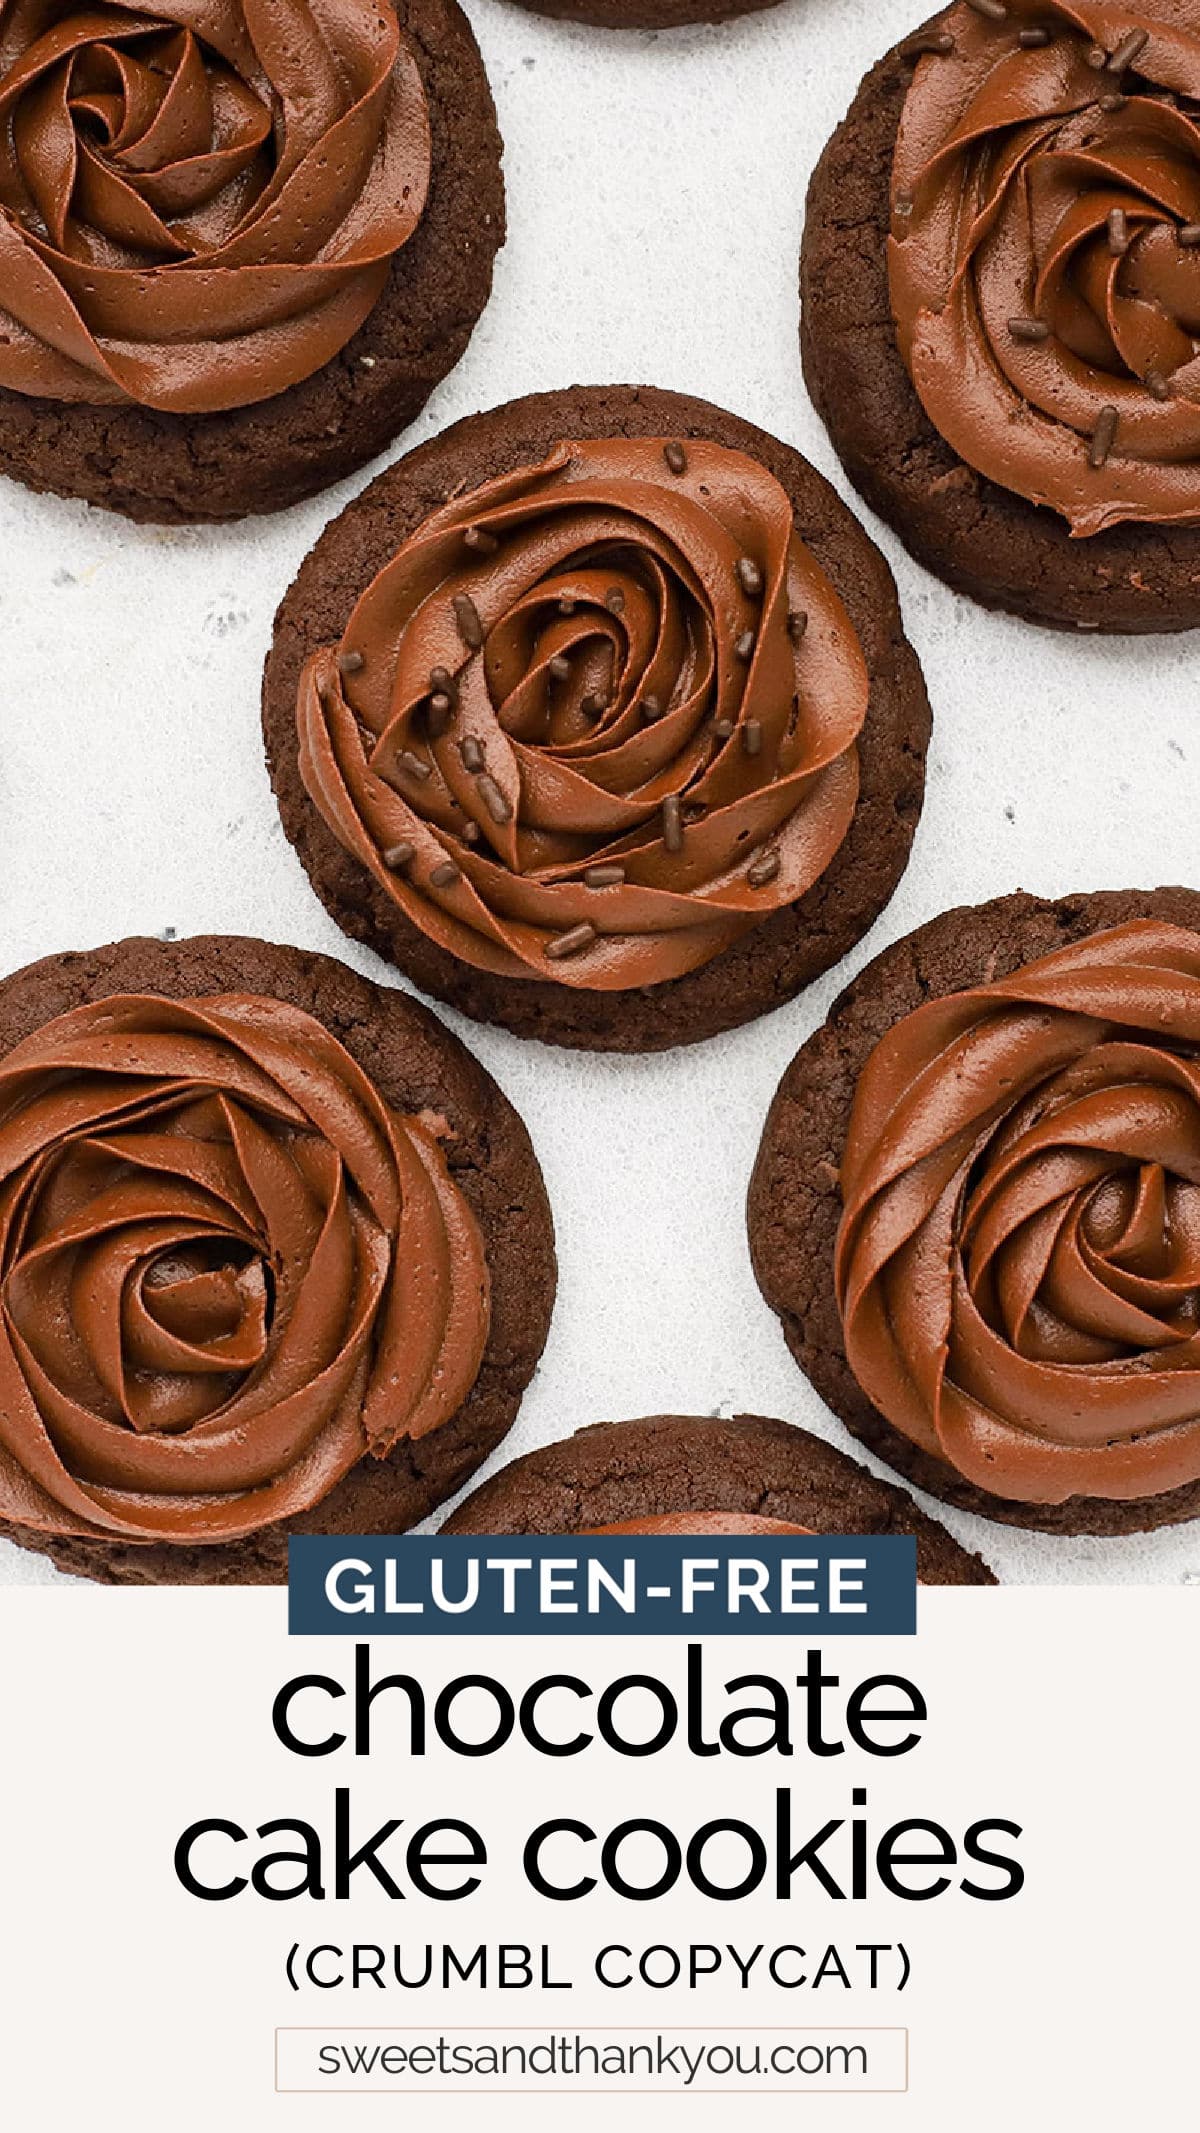
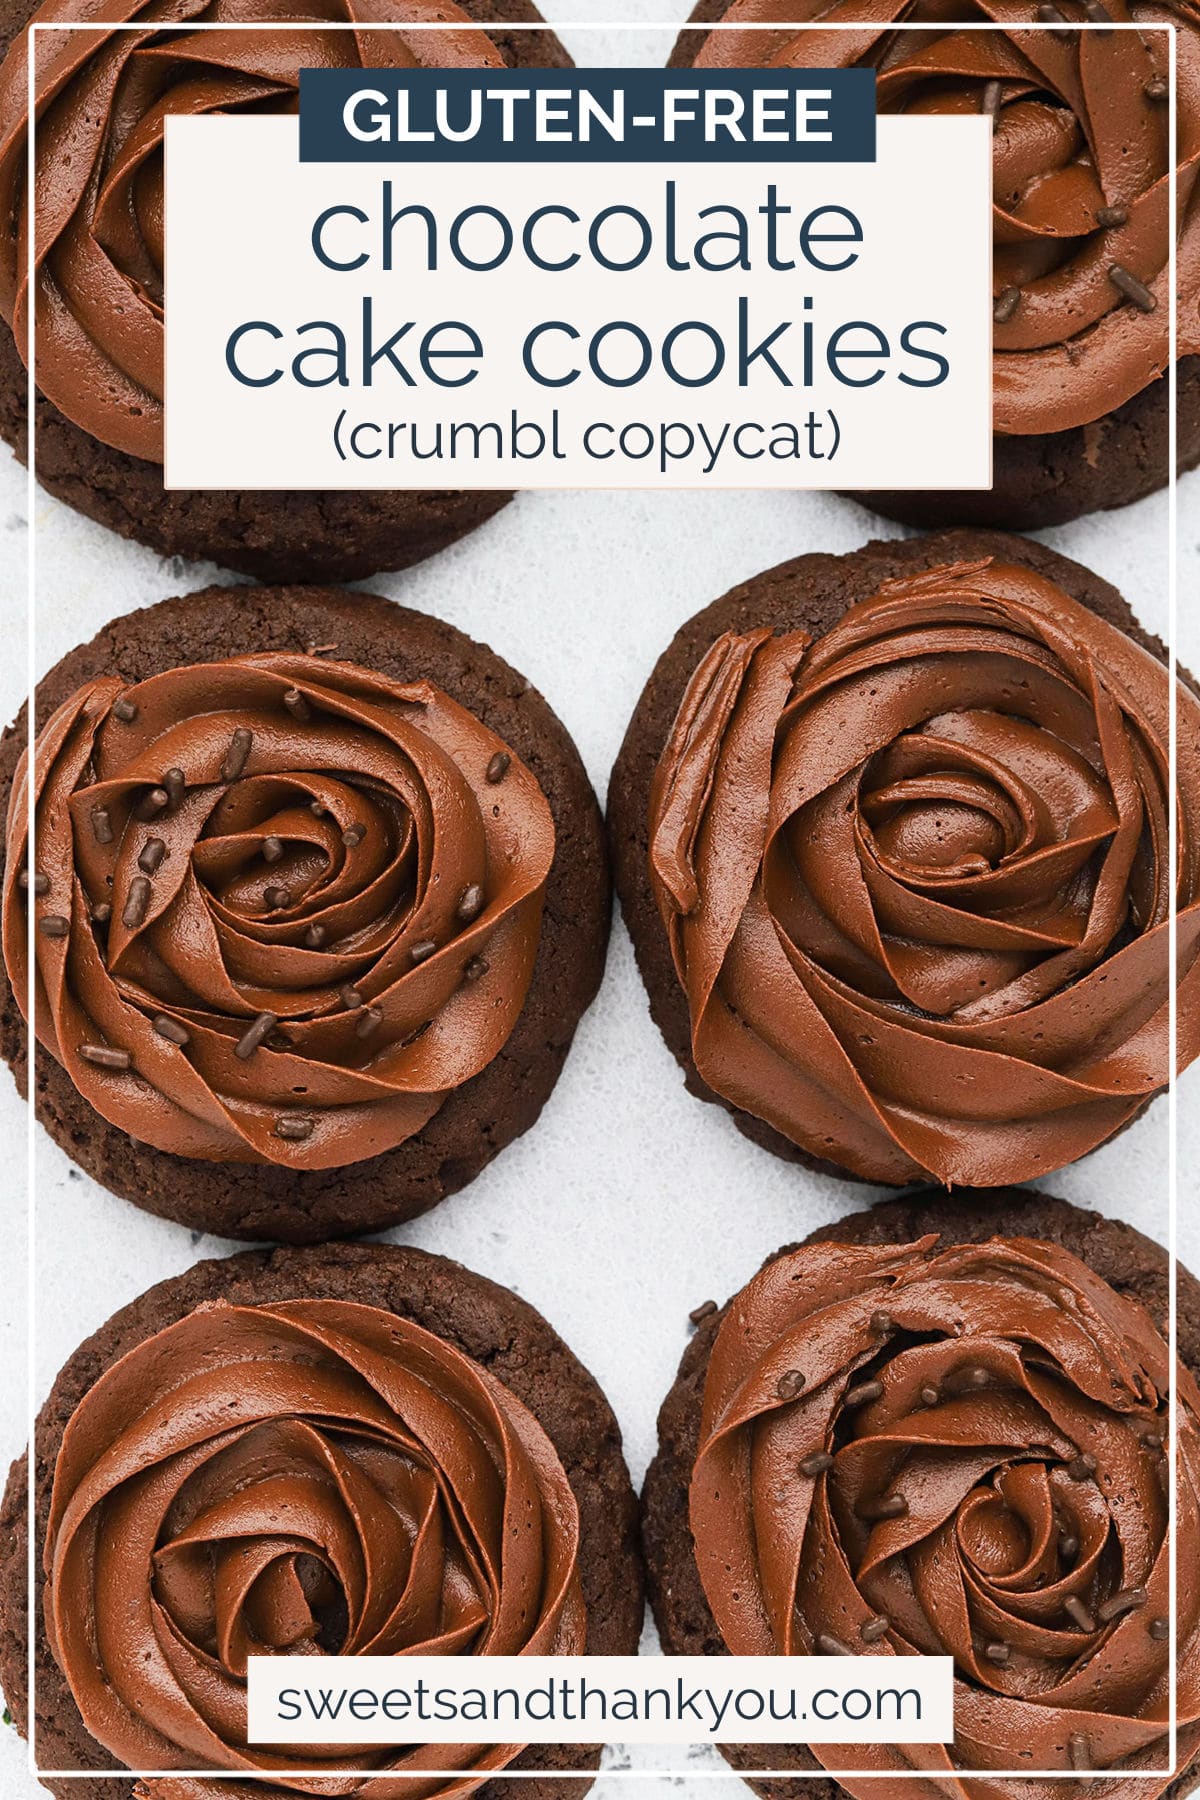
Gluten-Free Chocolate Cake Cookies – Our Crumbl copycat chocolate cake cookies with chocolate frosting are here to satisfy your next chocolate craving. You’ll love these pretty bakery-style cookies!
Not to be one of those people who starts every recipe post with a lengthy tale from their childhood, but like… I’m going to take 2 paragraphs, mmkay? So buckle up or press that “skip to the recipe” button up there if you’re not into it. 😉
I moved a lot when I was little, which was tough for me for a lot of reasons, one of which was that I have a birthday that falls right at the start of the school year. It’s kind of tough to celebrate a birthday with friends you don’t yet have in a place you’re new to when no one knows it’s your birthday. So thank goodness for the whole “bring treats for the class on your birthday” thing. Because giving the class dessert on a weekday was a real elementary school ice breaker for me.
And, back before we had to bring store-bought treats, my mom used to make these amazing chocolate cake cookies with chocolate frosting and sprinkles that were a total delight. I had several elementary school friendships that started with a mutual love of chocolate cookies. (Which, let’s be honest, is a GREAT place for a friendship to start.)
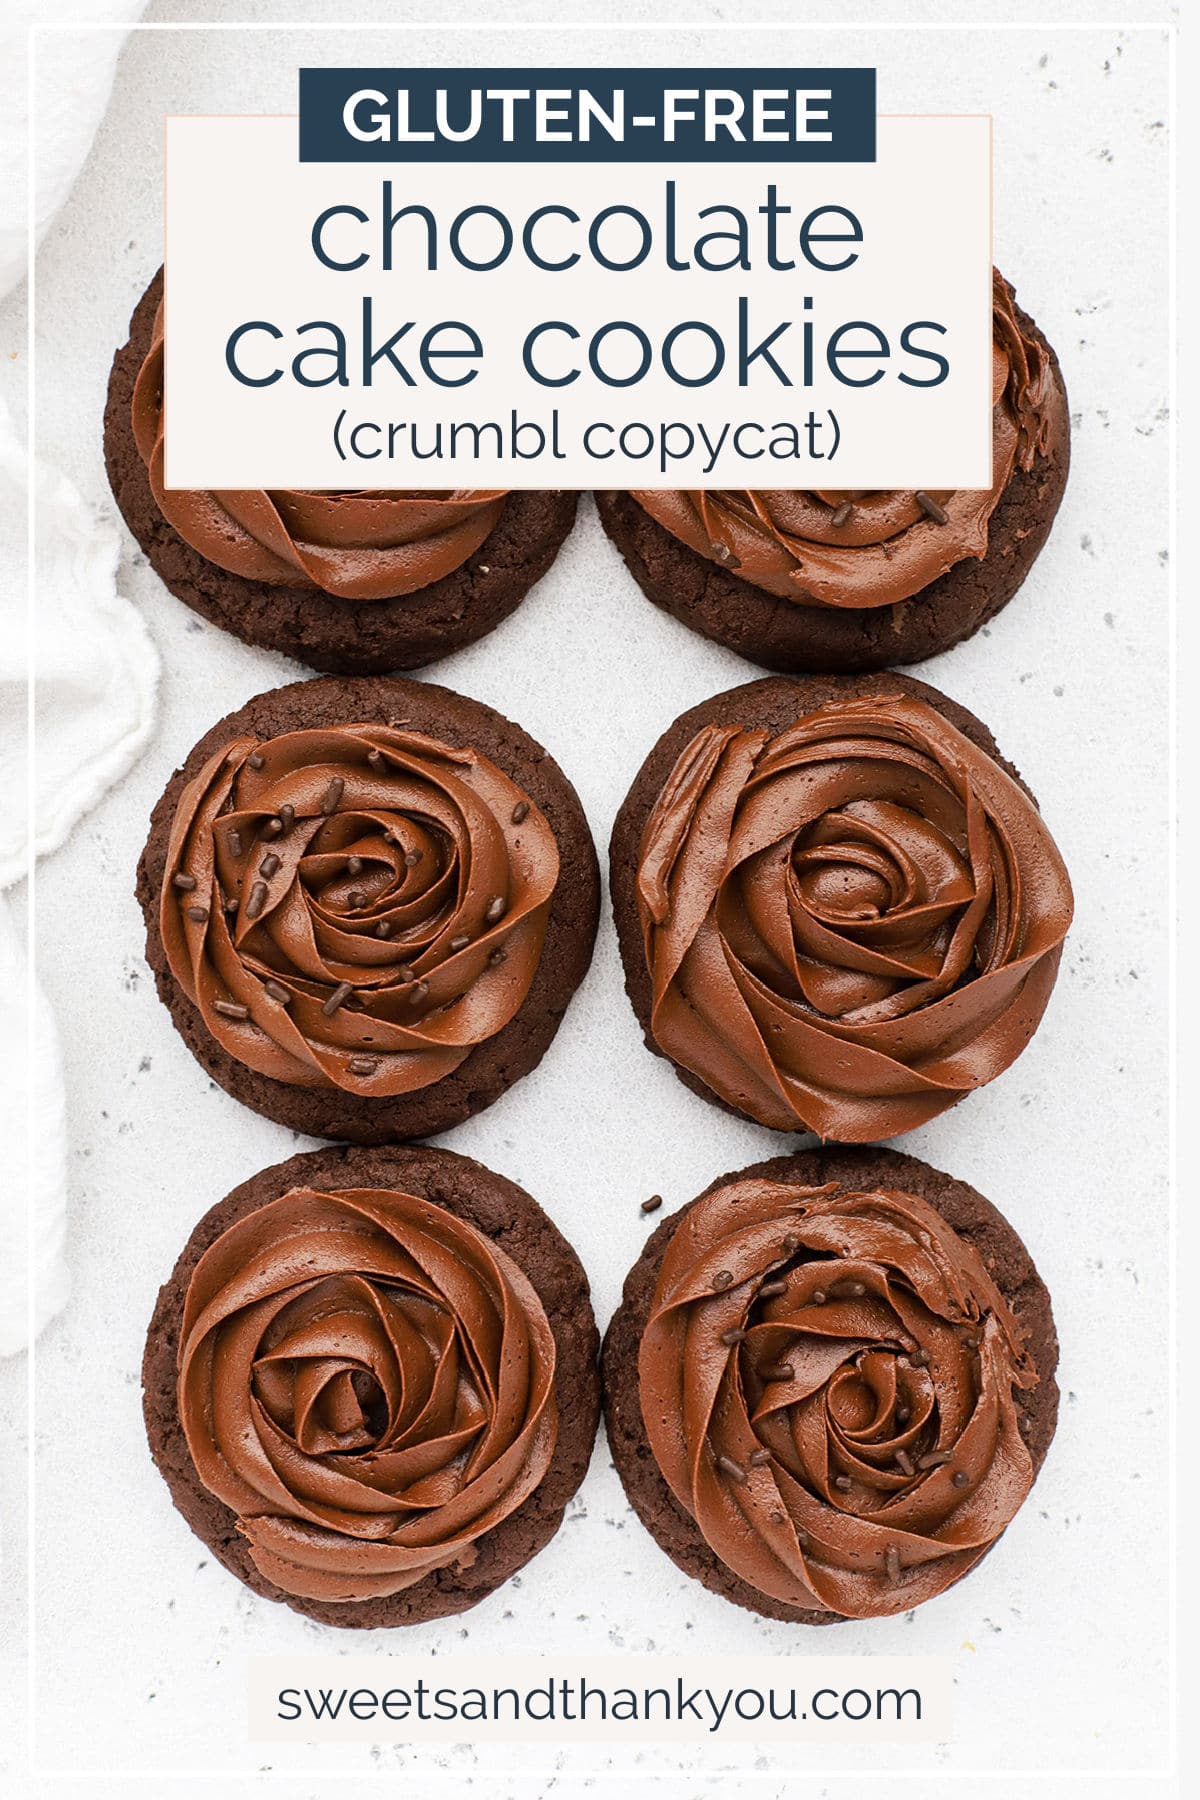
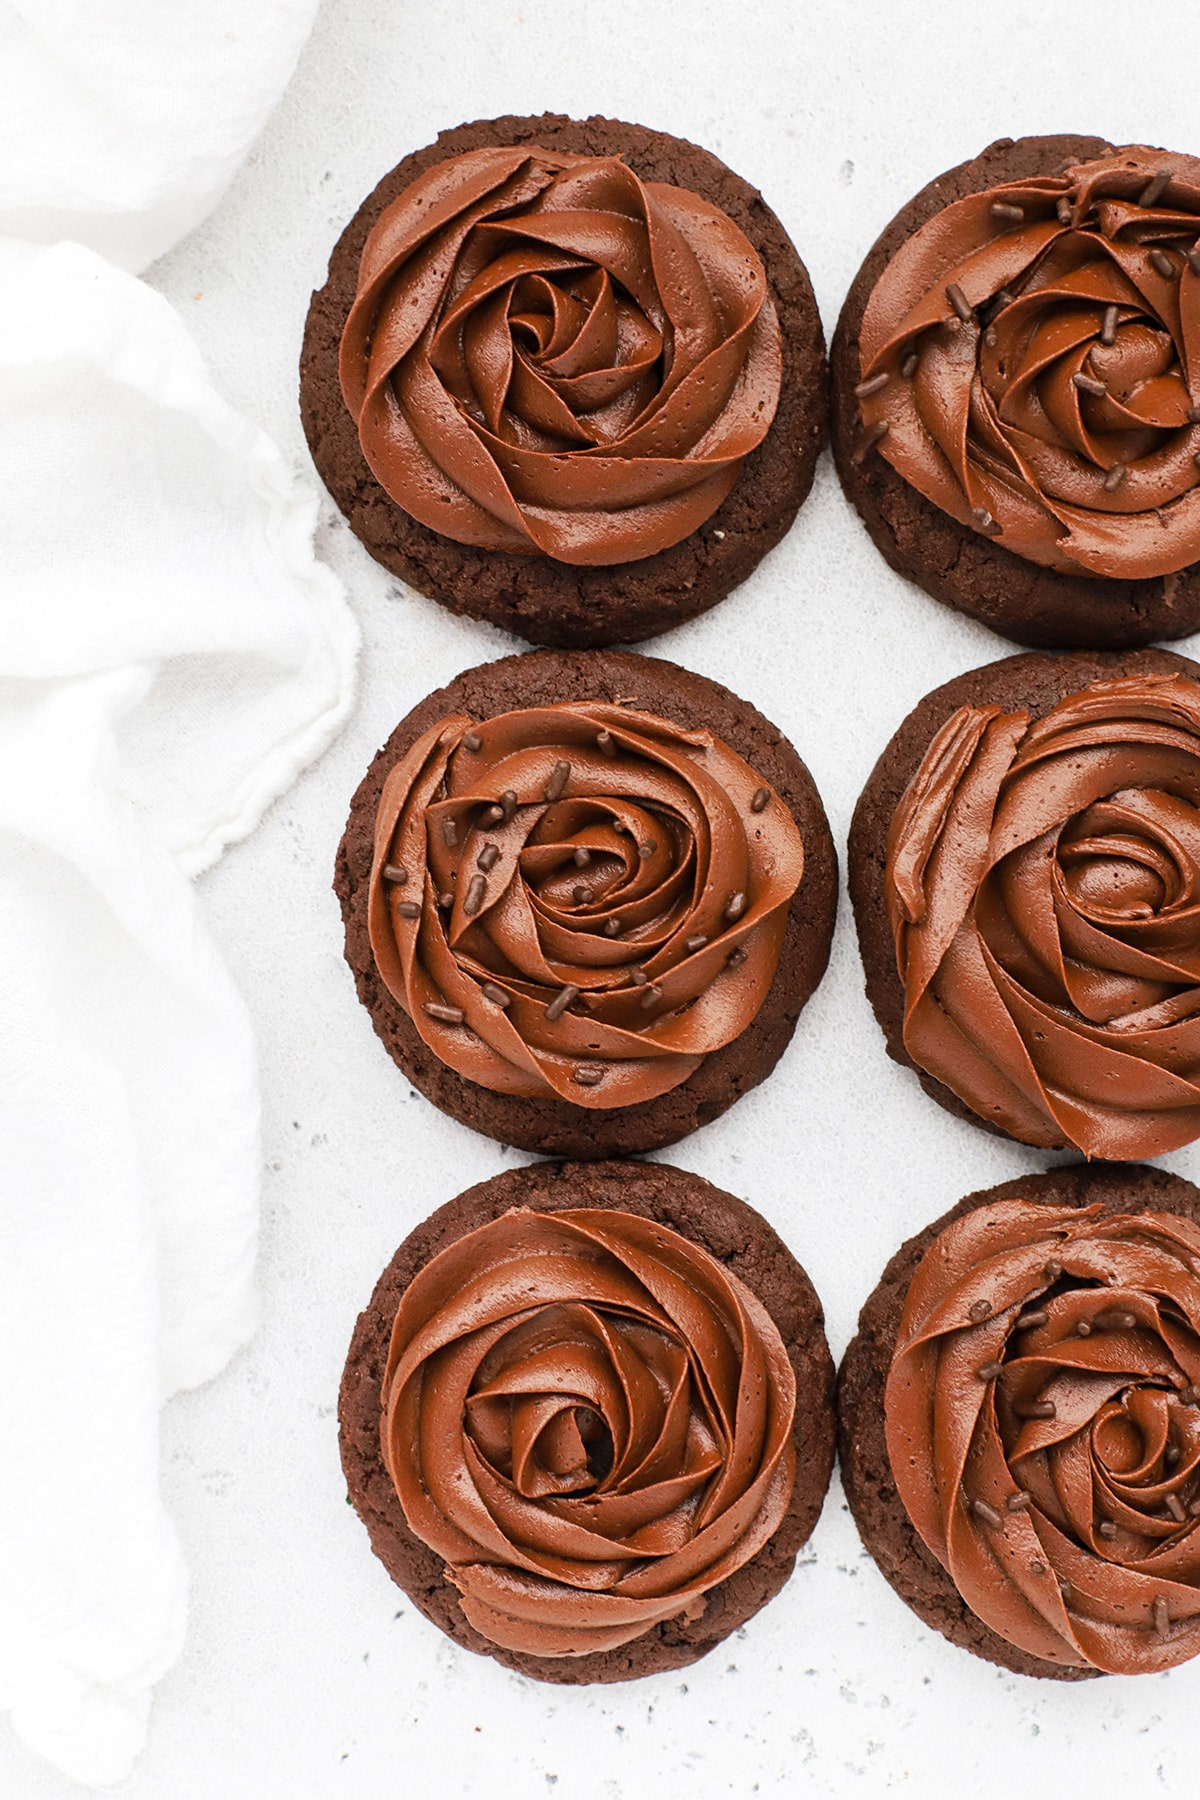
Fast-forward to now, and chocolate cake cookies are still one of my favorite treats. They’re the magic sweet spot between cookies (one of my favorite things on this planet) and chocolate cake (another undying love). These gluten-free chocolate cake cookies were modeled after the popular Crumbl chocolate cake cookies–soft, cakey cookies with a pretty swirl of chocolate frosting on top.
If you’re new here, I think we might just become friends over these Crumbl copycat chocolate cake cookies. (It’s happened before!)
Here’s what I think you’ll love about them…
Table Of Contents:
- 3 Things You’ll Love About These Gluten-Free Chocolate Cake Cookies
- How To Frost Chocolate Cake Cookies
- Tips To Nail The Texture Of Your Frosting
- FAQ + Tips And Tricks For The Best Crumbl Copycat Chocolate Cake Cookies
- Our Favorite Tools & Ingredients For These Gluten-Free Crumbl Copycat Cookies
- RECIPE: Gluten-Free Chocolate Cake Cookies (Crumbl Copycat)
3 Things You’ll Love About These Gluten-Free Chocolate Cake Cookies:
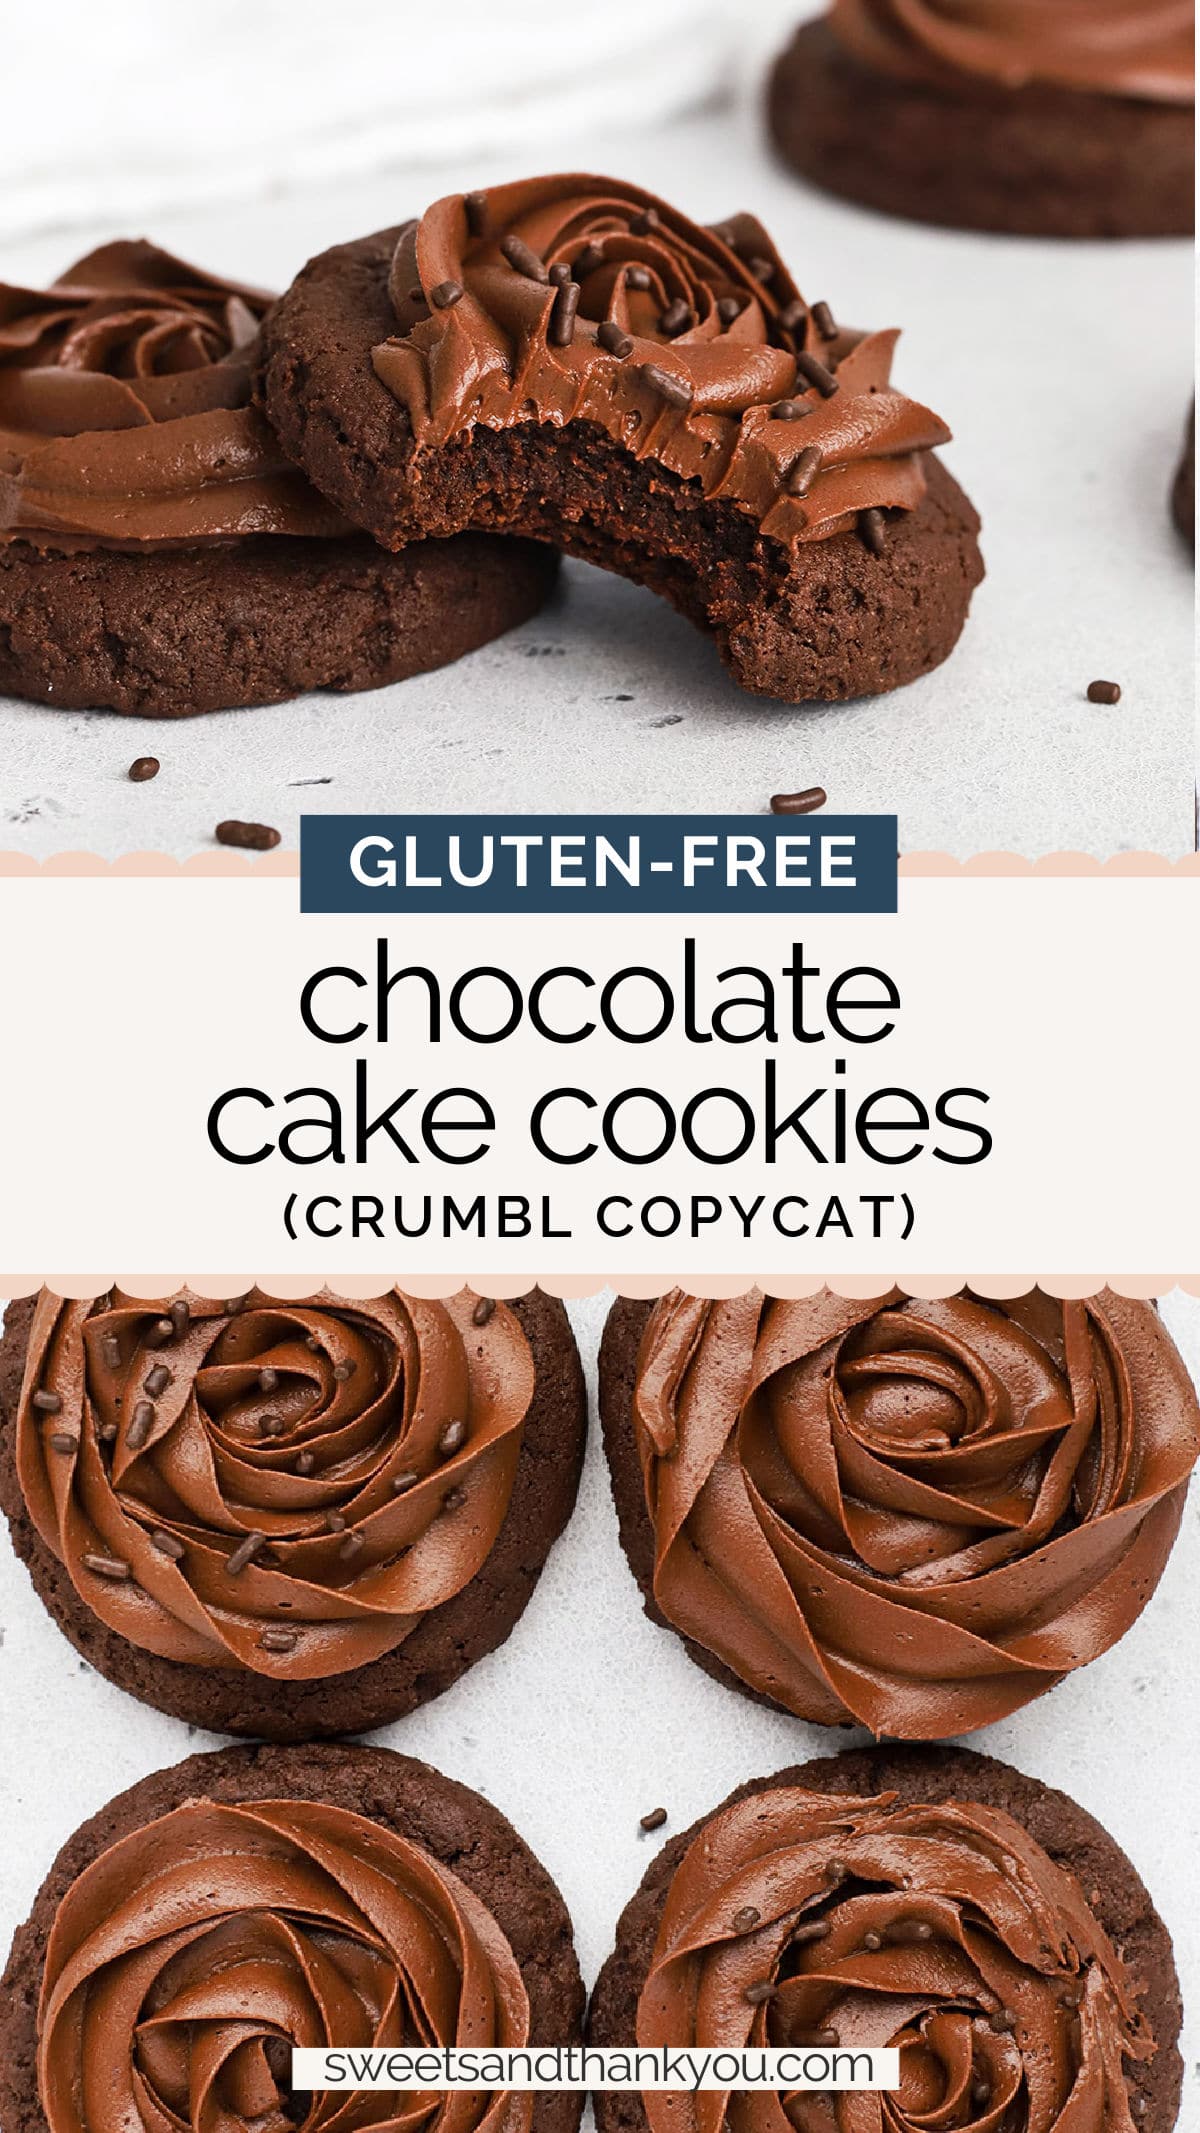
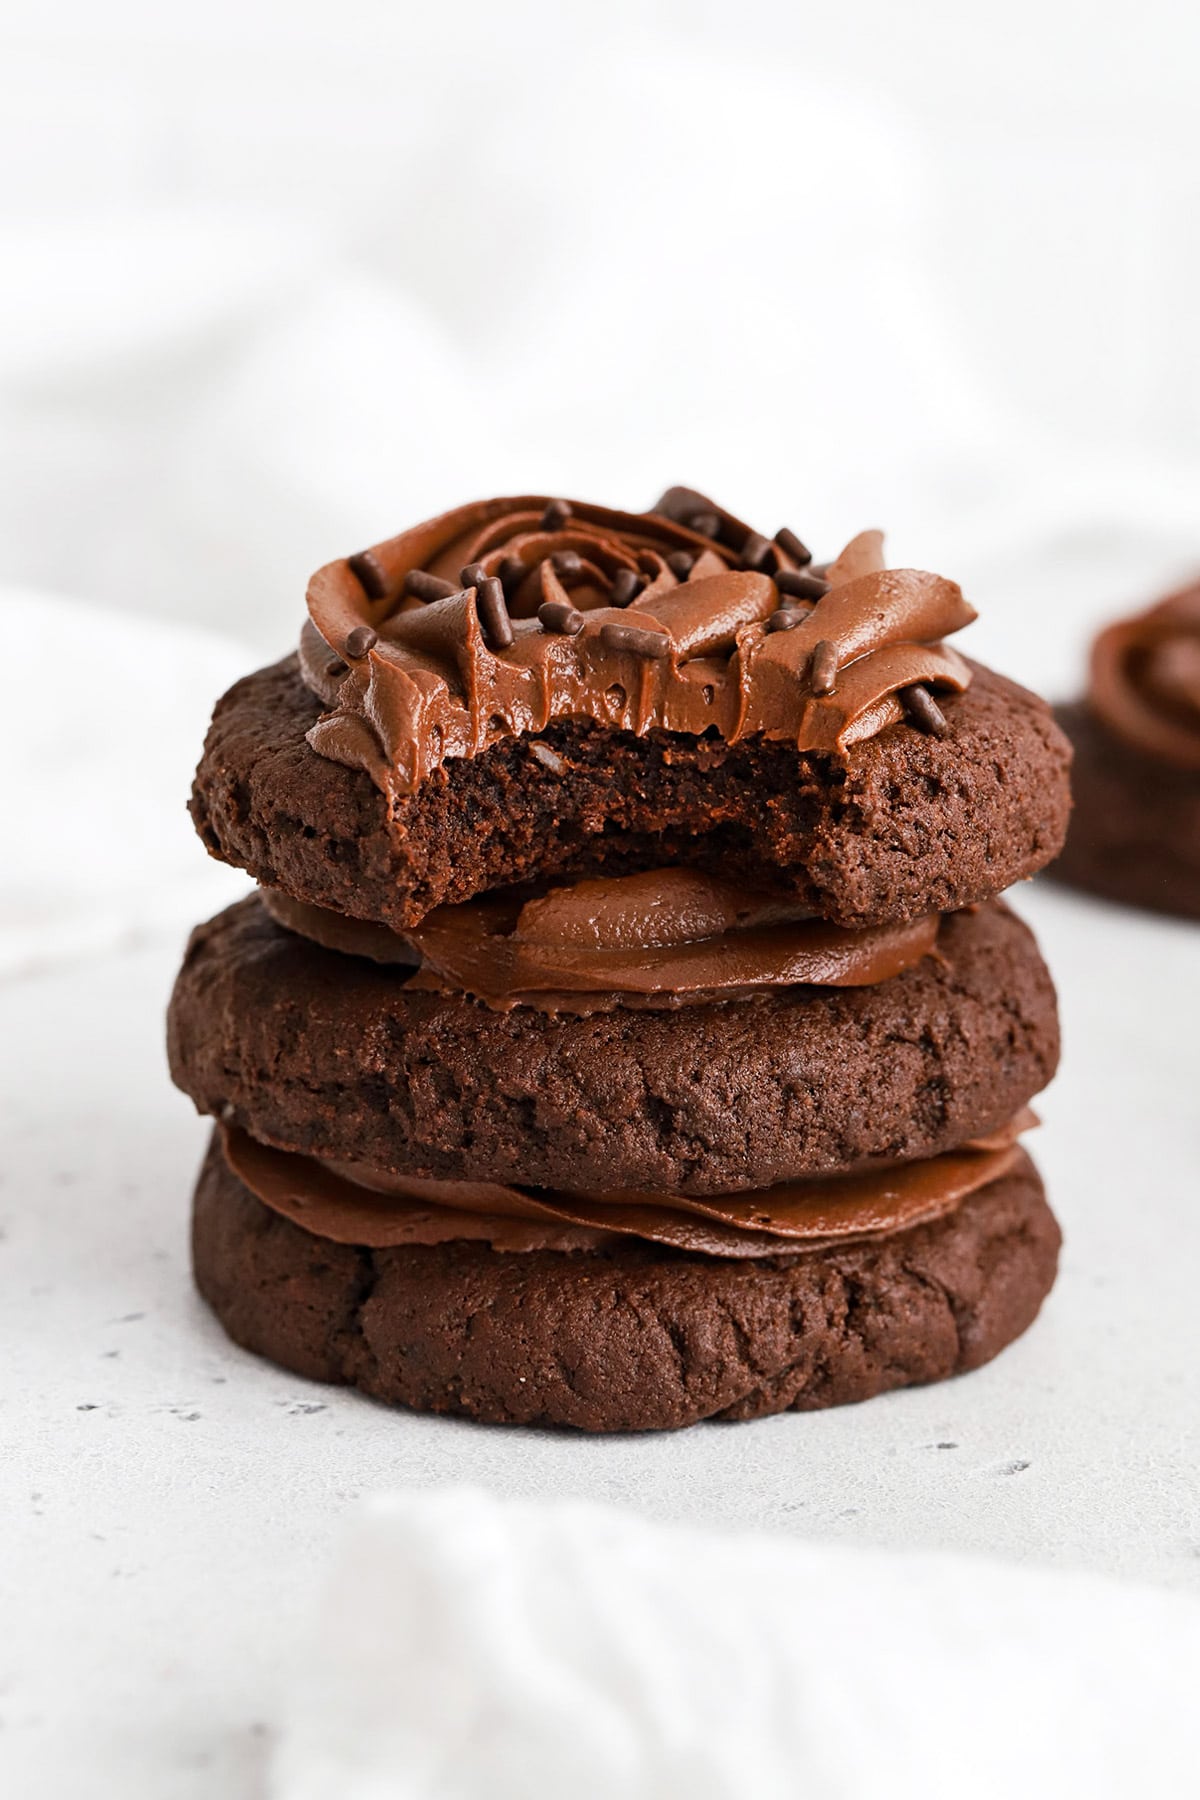
- Light Cakey Texture. Part of what makes these gluten-free chocolate cake cookies so special and unique is their texture. They absolutely match their name, and instead of a chewy or crisp texture, they have a gorgeous soft, cakey cookie texture. It’s LOVELY paired with the frosting–almost like a mini cookie cupcake!
- Intense Chocolate Flavor. I’m using dark cocoa powder here in both the cake cookies and the chocolate frosting, which adds a lot of gorgeous depth in color and flavor. Add to that the melted chocolate in the frosting, and they’re JUST what you’re looking for if you’ve got a chocolate craving.
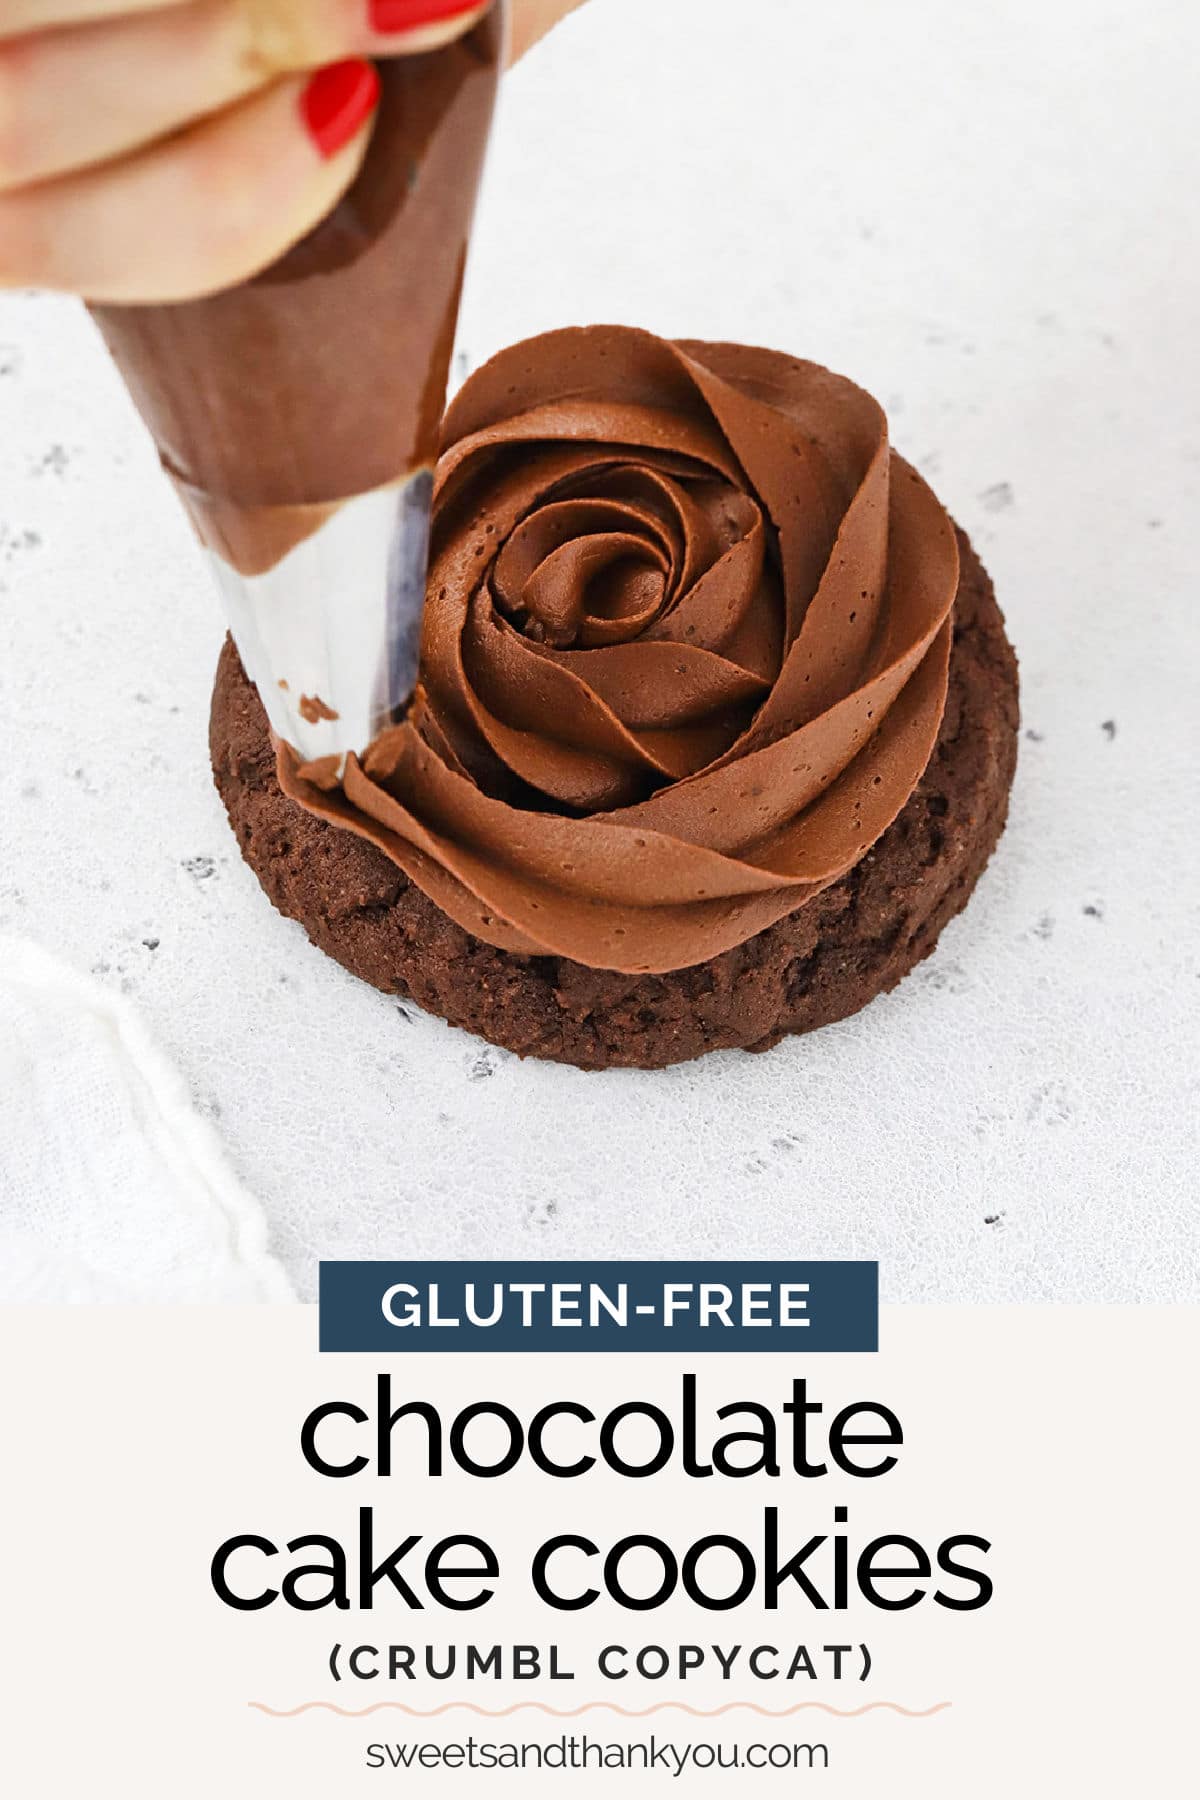
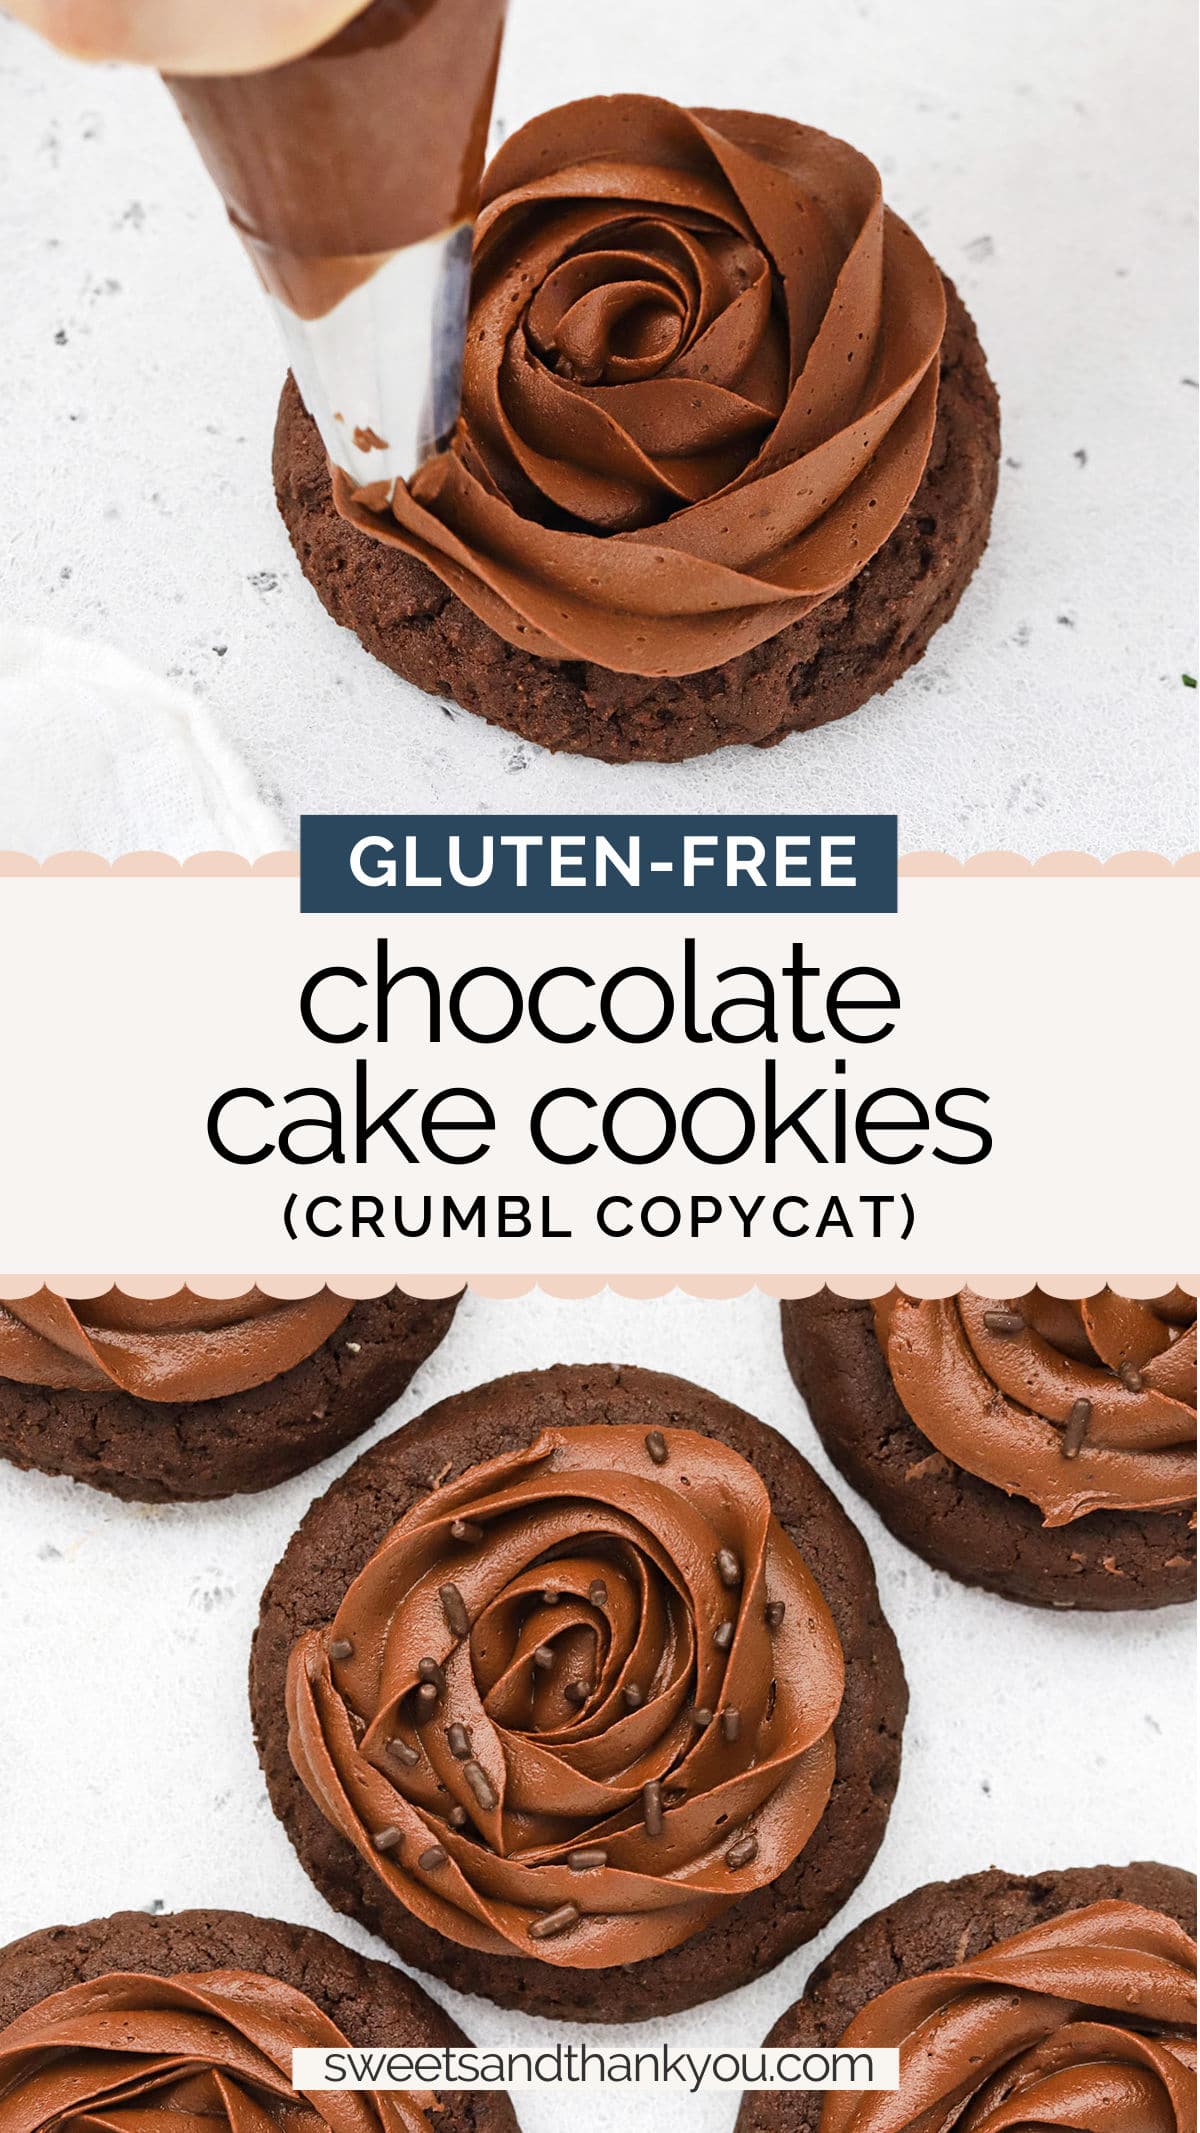
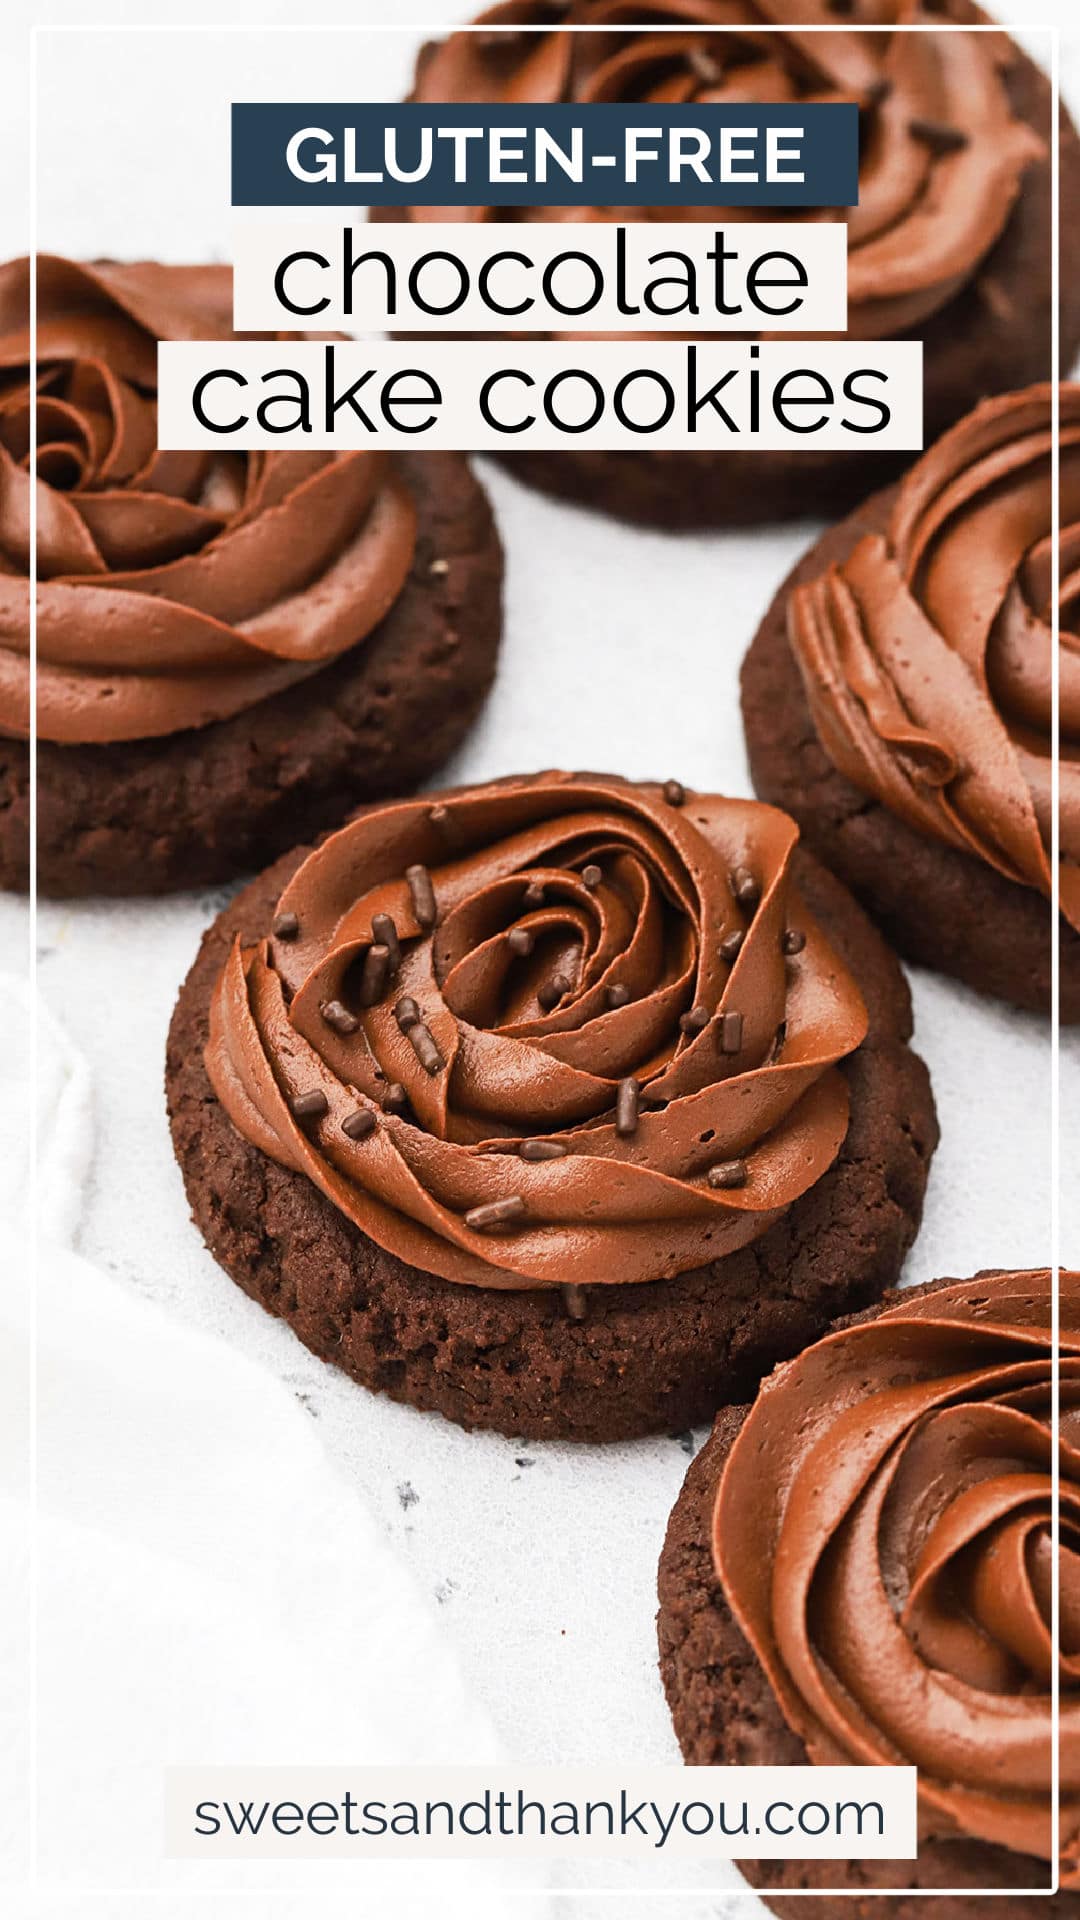
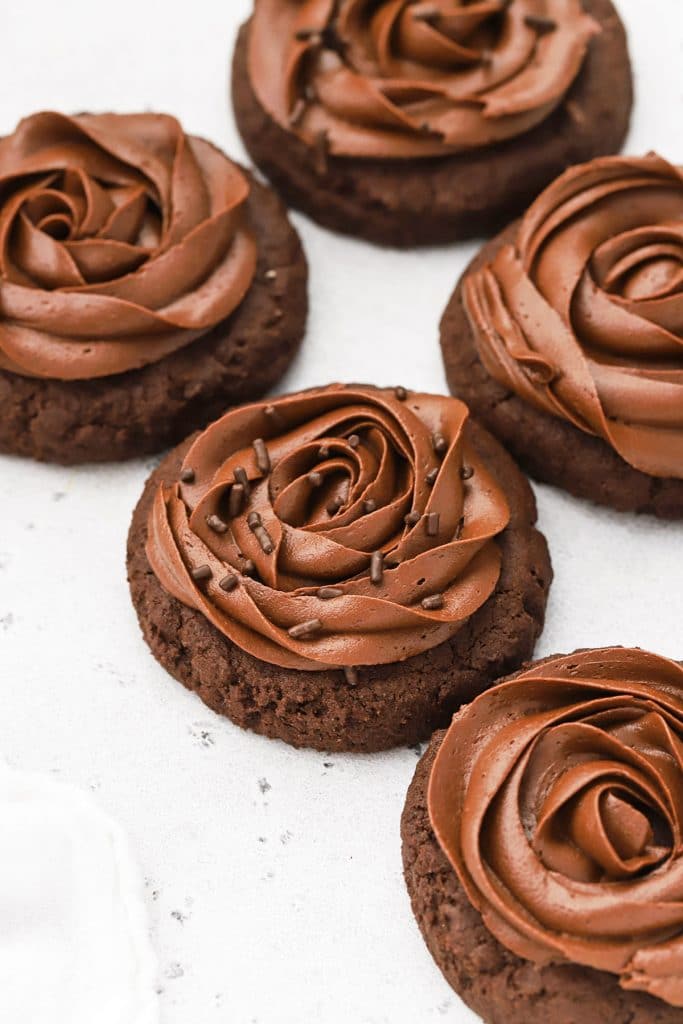
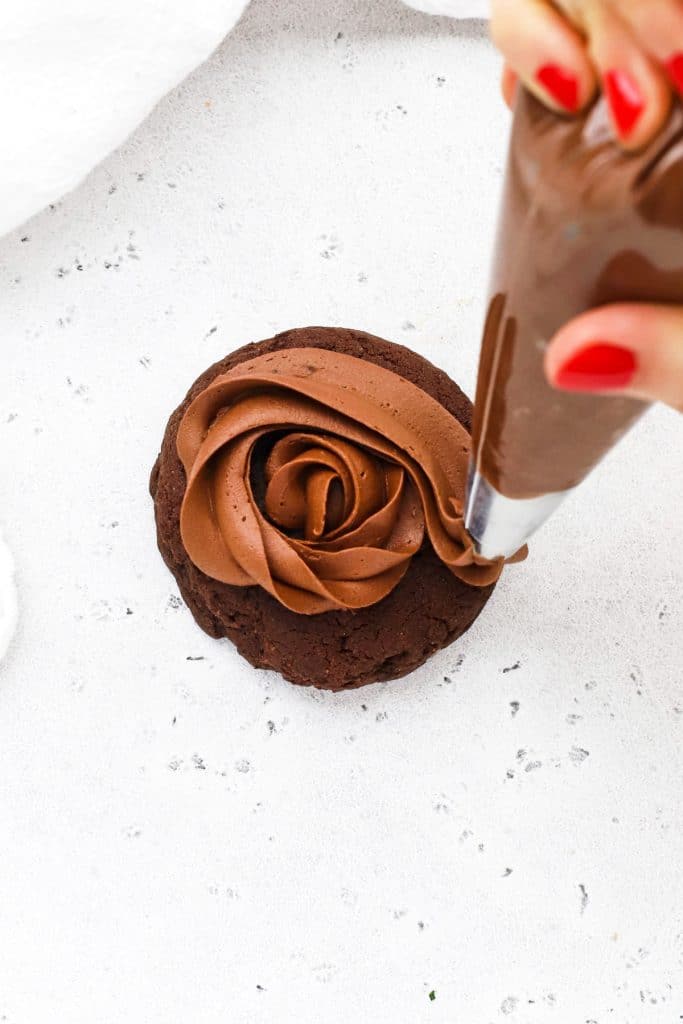
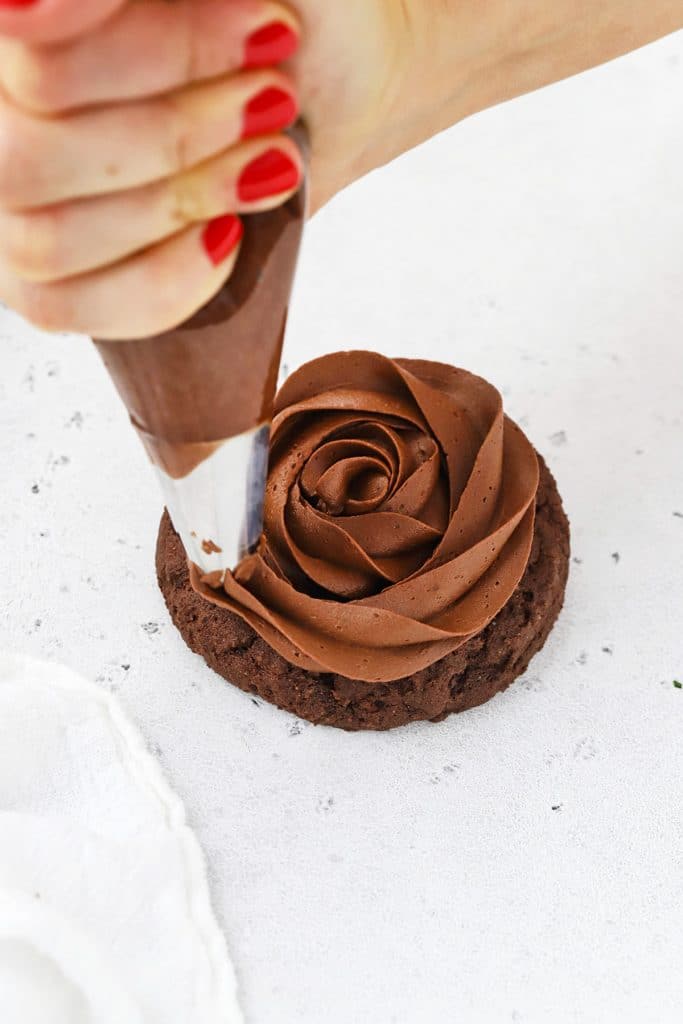
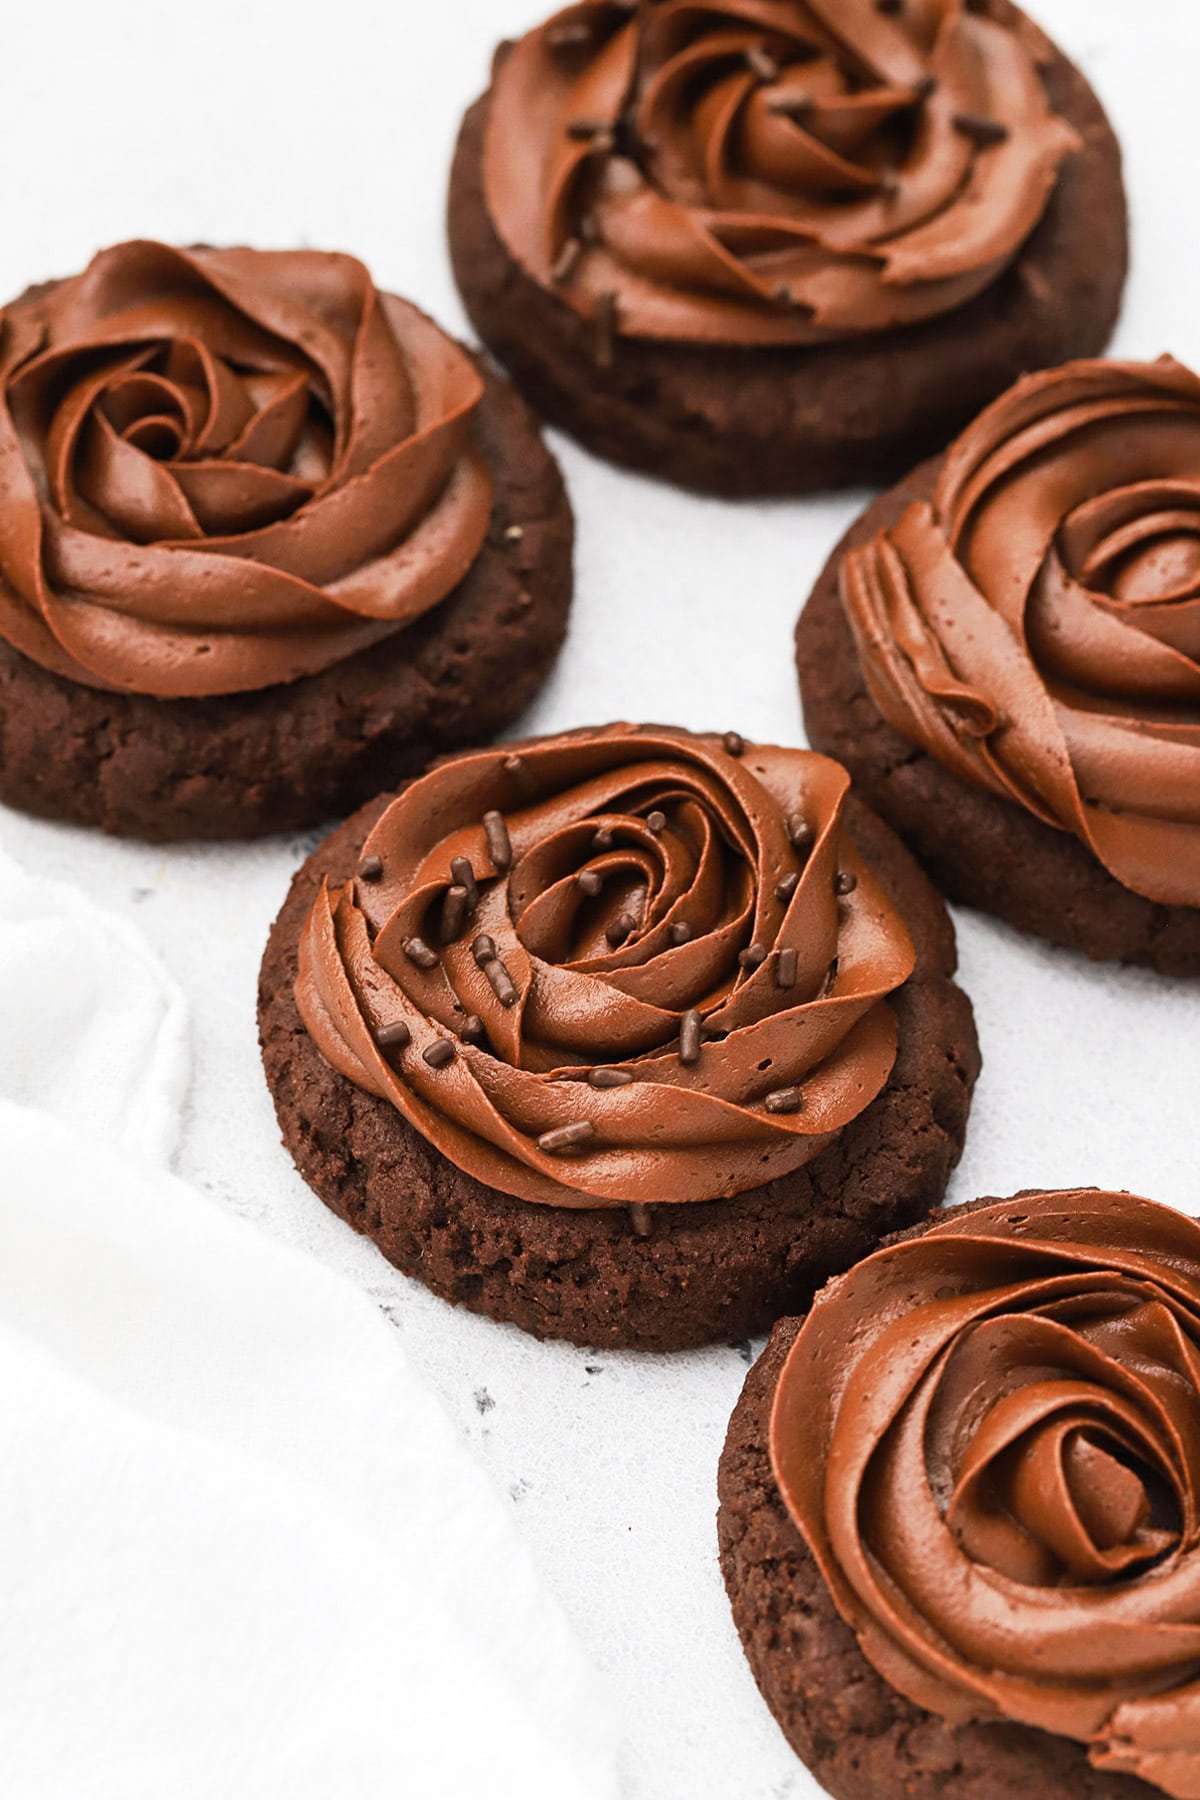
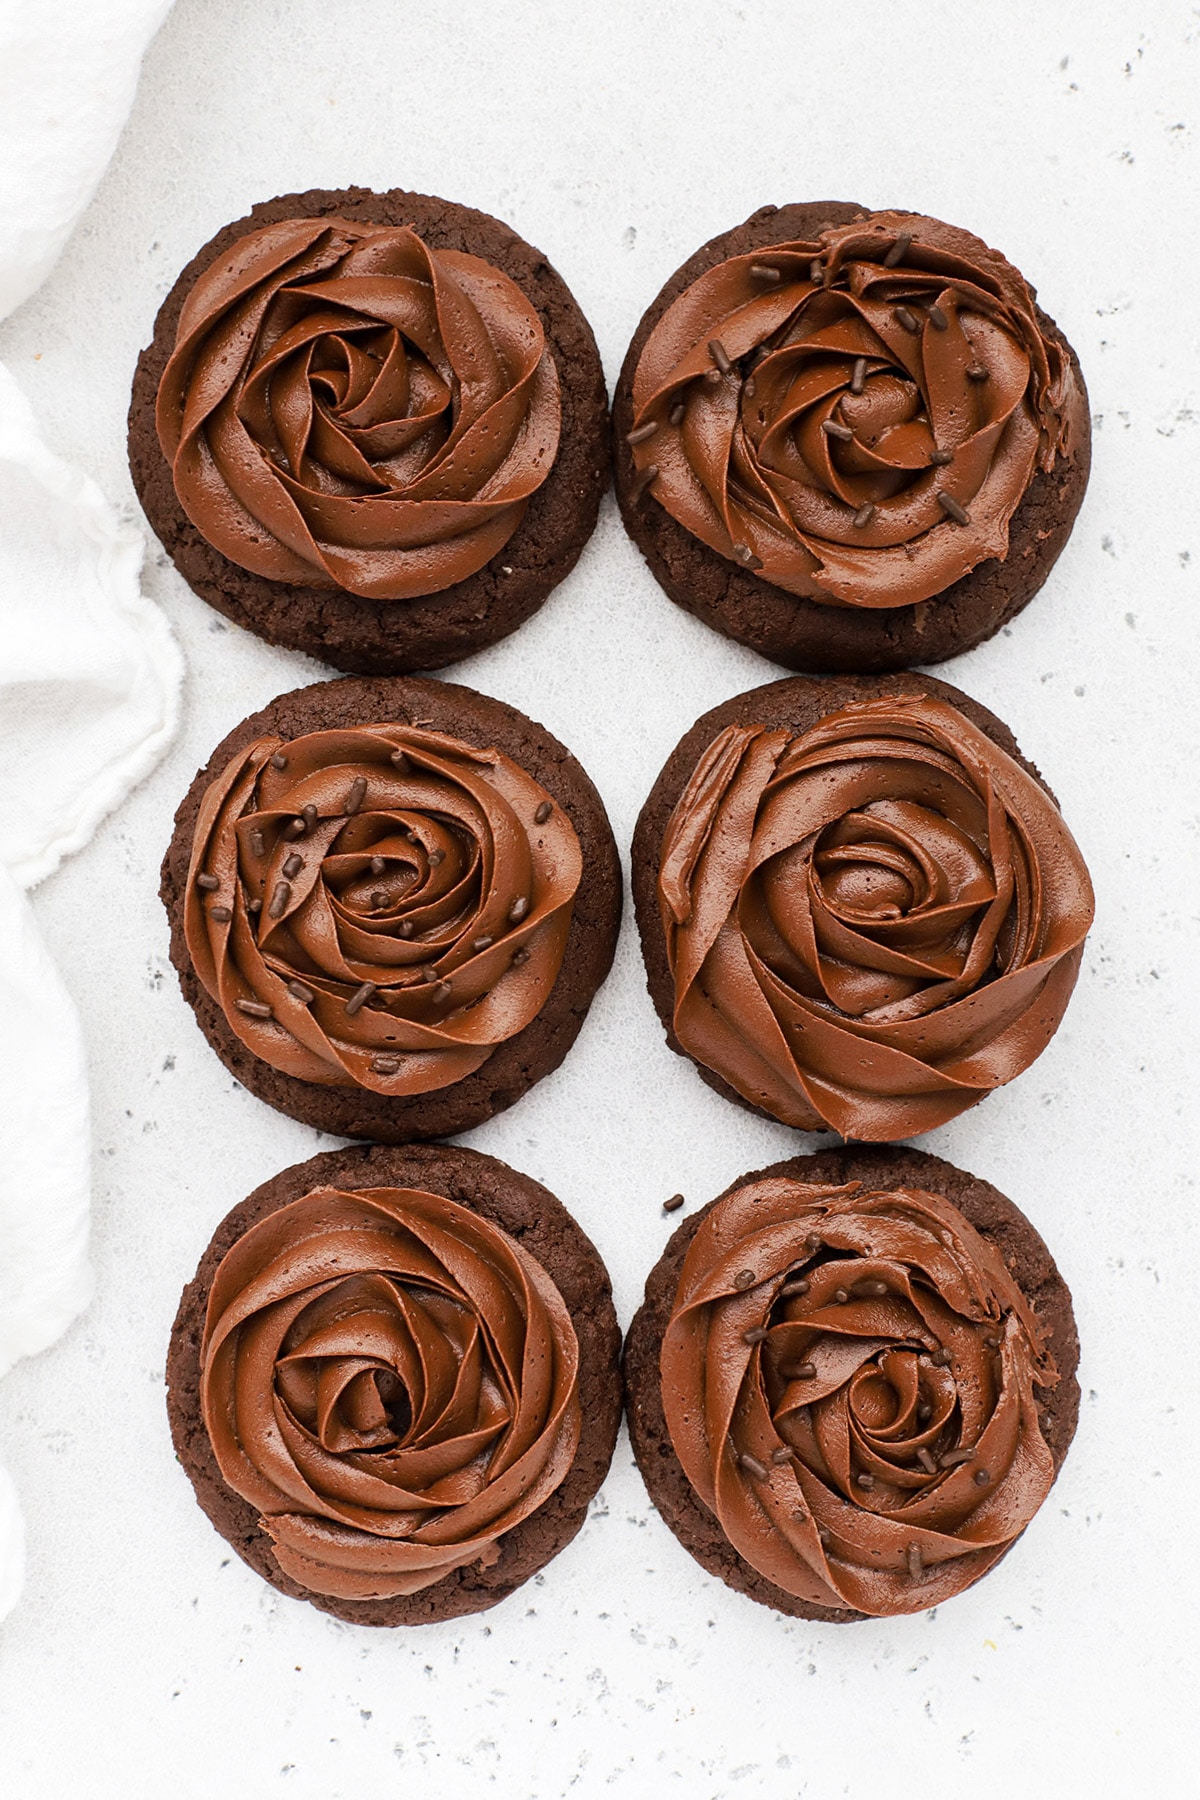
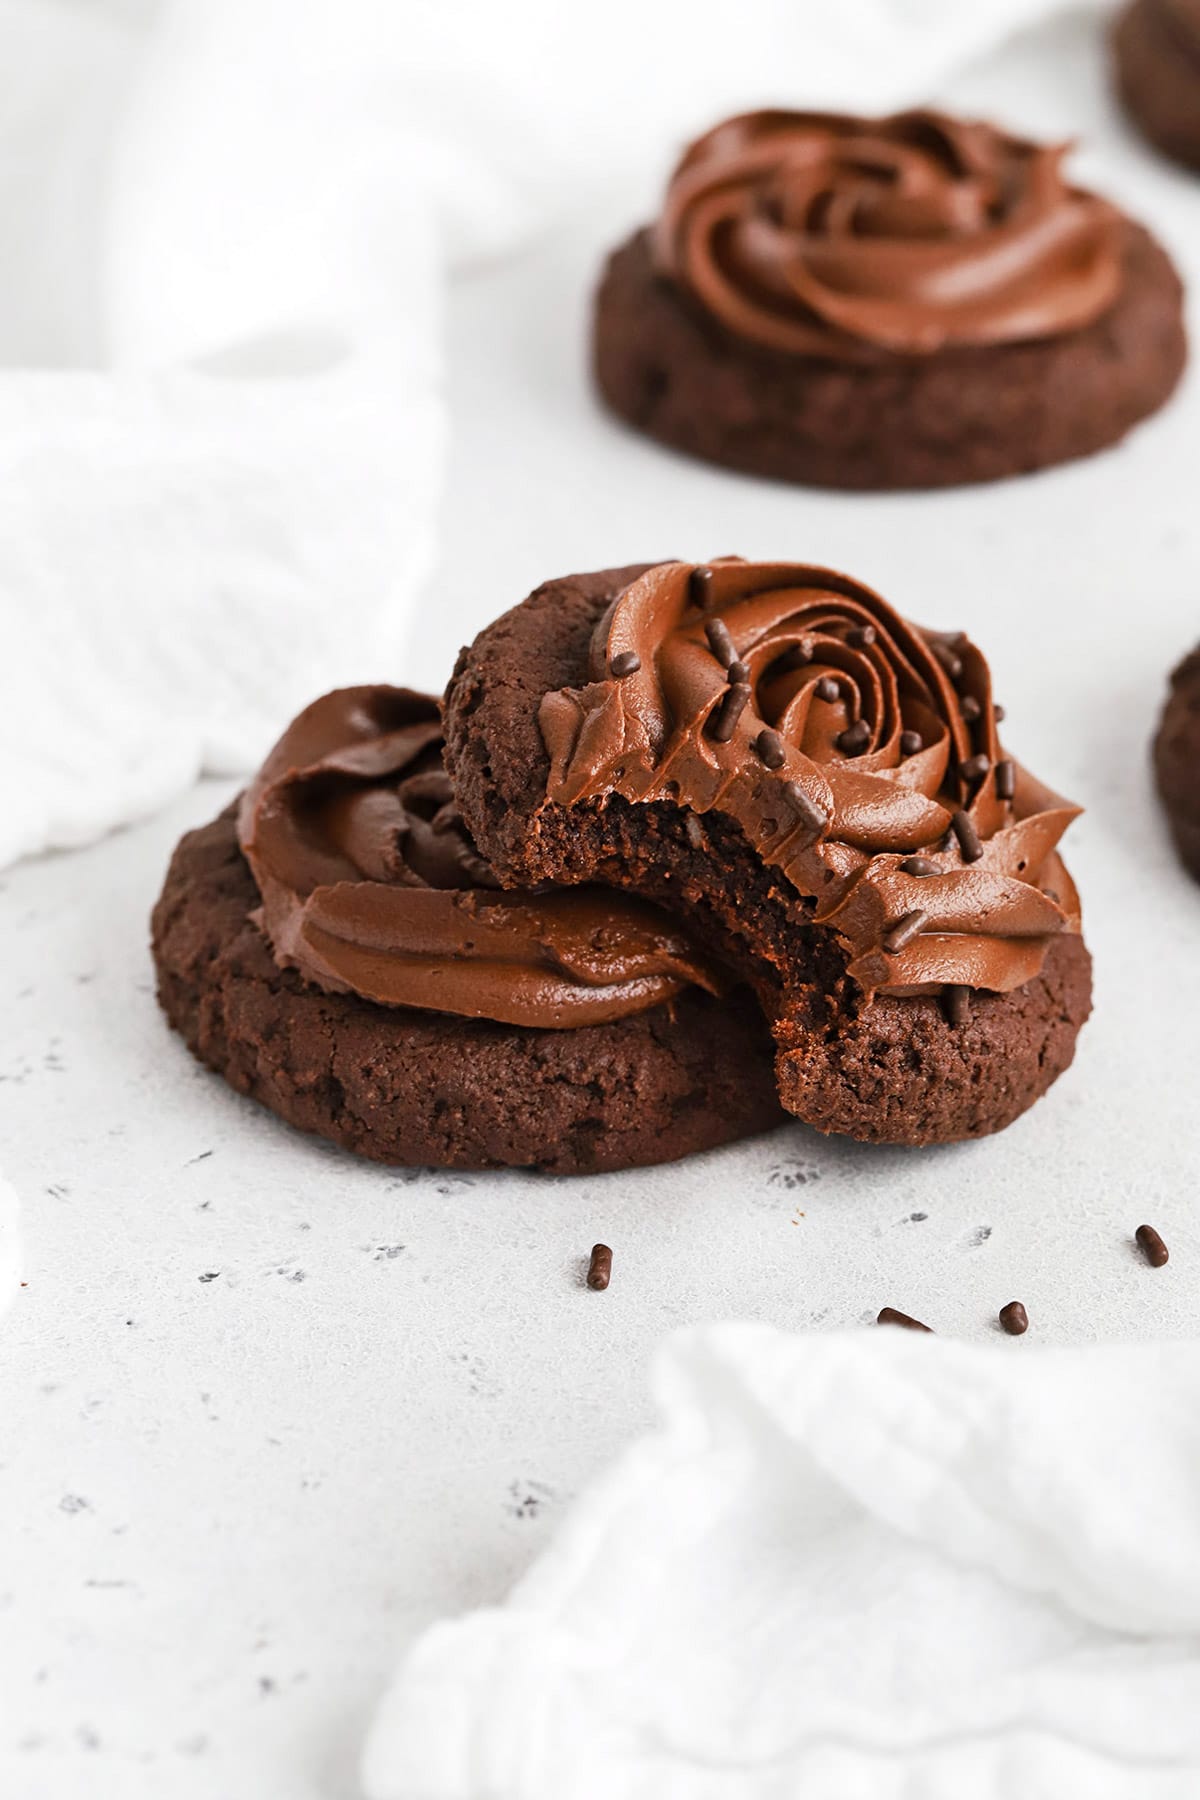
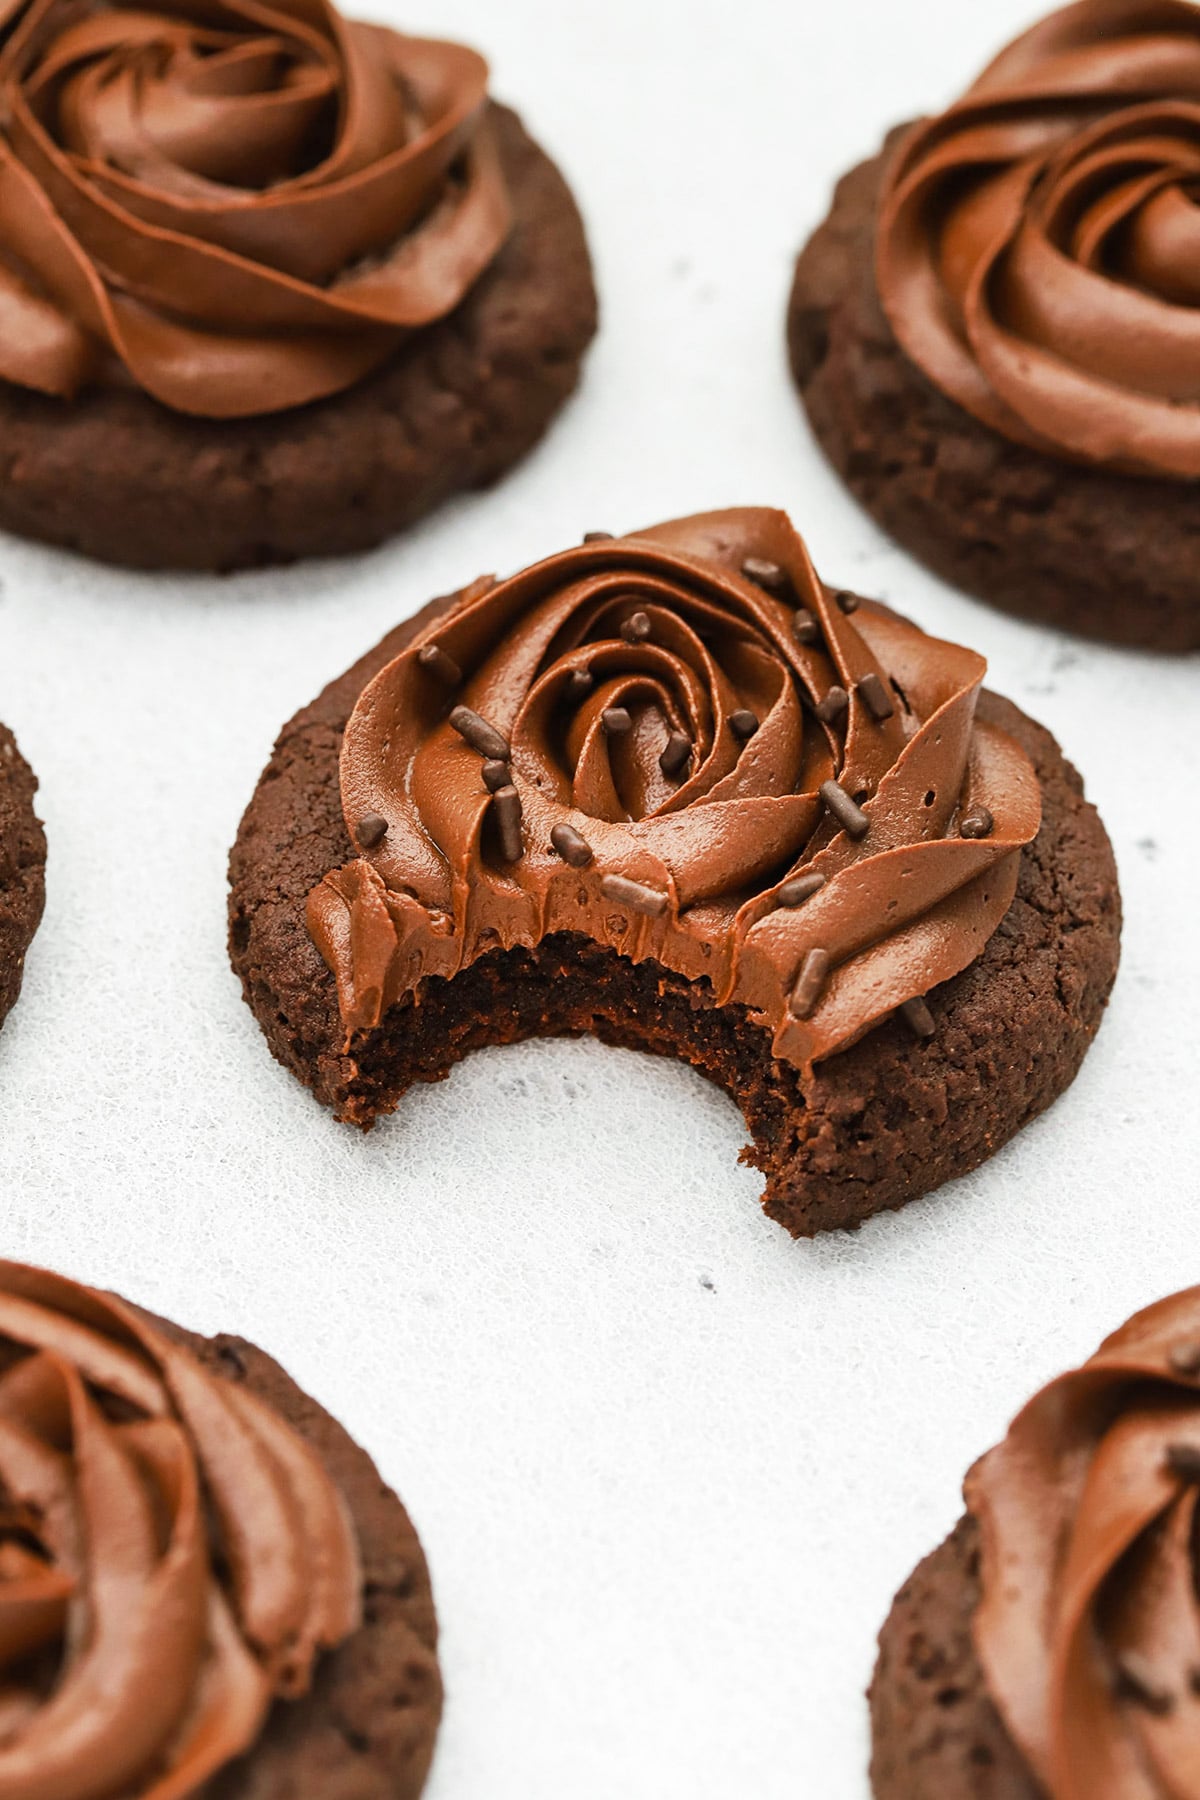
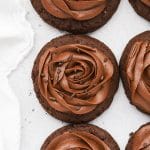
- Pretty Chocolate Frosting. Not only is that chocolate frosting delicious, but it’s SUPER pretty! I set out to mimic the Crumbl chocolate cake cookie frosting, so we’re using a Wilton 2D tip to pipe a simple, but beautiful rosette. (Don’t worry! It’s easy! I’ll walk you through exactly what you need to do, step-by-step.)
Let’s Talk About Frosting! Here’s How To Frost Chocolate Cake Cookies:
Since these are gluten-free Crumbl copycat chocolate cake cookies, we’re frosting ours the same way they frost theirs: with a simple rosette. The piping tip (I’m using a Wilton 2D) actually does most of the work for you in making these look extra pretty, but here’s how to make that signature frosting rosette, step-by-step:
- Let the cookies cool all the way before you start. If you try to frost chocolate cake cookies when they’re even the tiniest bit warm, they’ll melt the frosting. I promise–PROMISE!–it’s worth waiting until your cookies are completely cool before you start.
- Fill your piping bag with chocolate frosting. Snip the end off your piping bag and fit it with a drop flower tip (like the Wilton 2D I used) or an open star tip (like the Wilton 1M), and fill the piping bag with your frosting. This post gives great tips for filling a piping bag!
- Get your grip ready. Hold the piping bag in your dominant hand (I have better control of pressure with my dominant hand) and use your other hand in the front as a guide. I recommend using your thumb to secure the twist at the top of your bag, and using your fingers to create the pressure that will push the frosting out of the piping tip.
- Start in the center and work outward in a spiral to make a rosette shape. Using medium pressure, squeeze the frosting toward the front of the piping back with your dominant hand and use the other hand to help guide the tip as you move the frosting in a spiral motion.
- When you get to the end, release the pressure of your squeezing hand, but keep moving in a circular direction to nail that tapered edge.
- Add sprinkles, if you want! Crumbl chocolate cake cookies usually don’t include sprinkles, but they sure make cookies look extra happy, so I sometimes add them. Go with chocolate sprinkles (like I did) for a more subtle look, or add colorful sprinkles to match the holiday or occasion!
Tips To NAIL The Texture Of Your Chocolate Frosting:
- Let The Cookies Cool Before You Start. In case you missed this tip above, this is CRUCIAL. If your cookies are even a little bit warm, it’ll melt the frosting and just make a mess. Make sure the cookies are cooled to room temperature before frosting.
- Use Soft But Still Cool Butter. Sally’s Baking Addiction has a great post about softened butter that walks you through what this really means, but this is REALLY important. Using warm or totally soft butter might make your frosting more loose and soft, so it won’t hold its shape as well and might require more powdered sugar. Go for soft but still somewhat cold.
- Let The Melted Chocolate Cool Before Adding It To The Frosting. Again, you can melt your frosting if you use warm chocolate. Let the melted chocolate cool before adding it to the frosting!
- Troubleshoot As Needed. As with all baking, there are a LOT of conditions that can affect your bakes–ambient temperature in the room, the temperature of your butter and melted chocolate, the humidity, etc. If your frosting is too soft to hold its shape, add more powdered sugar 2 Tbsp. at a time until it’s stiff enough to hold its shape. If it’s too stiff, add more liquid 1 tsp. at a time until it loosens up.
FAQ + Tips For The Best Crumbl Copycat Chocolate Cake Cookies:
Don’t let your butter get too soft. The temperature of your butter can have a big impact on the texture and structure of your bakes. Aim for softened but still cool to the touch. It shouldn’t be warm or fully room temperature all the way through. You should be able to make an indent with your finger when you press it, but your finger shouldn’t go all the way through the butter easily.
How To Store Frosted Chocolate Cake Cookies: Since they’re frosted, I recommend storing these gluten-free chocolate cake cookies in a single layer in the refrigerator. They’ll keep 3-4 days in the refrigerator. Or, you can freeze them in a single layer on a baking sheet to set the frosting, then transfer to an airtight bag. They’ll keep 3-4 weeks in the freezer frosted. (You can freeze them unfrosted up to 6 weeks before adding the frosting.)
Can You Make Chocolate Cake Cookies In Advance? Sort of! The cookies can be baked and frozen unfrosted up to 6 weeks in advance. Once you’ve added the frosting, they’re best eaten within 3-4 days. The frosting can be made in advance and stored in the refrigerator 3-4 days in advance. You’ll want to let it soften at room temperature until it’s soft enough to stir. Then, add to your piping bag and frost the cookies.
What’s The Best Gluten-Free Flour For Cookies? We’ve tried lots, but we consistently use and recommend King Arthur Measure-For-Measure gluten-free flour. I love the texture it adds to baked goods and feel like it has a more neutral taste than many of the flour blends out there.
Our Favorite Tools & Ingredients For These Gluten-Free Crumbl Copycat Cookies:
- The Best Gluten-Free Flour – makes light cakes & muffins, fudgy brownies, and gorgeous cookies!
- Quality Baking Cocoa – The better the quality of your cocoa powder, the better your cookies will taste! (We also love this brand and this brand)
- Light Colored Sheet Pans – For even baking. These last forever!
- Pre-Cut Parchment Sheets – Make lining pans a breeze!
- Large Cookie Scoop – The perfect size for making large bakery-style cookies like these!
- Wilton 2D Piping Tip & Piping Bags – This drop flower tip makes such pretty swirls and rosettes!

Gluten-Free Chocolate Cake Cookies (Crumbl Copycat)
- Total Time: 45 minutes
- Yield: 10–12 cookies* 1x
- Diet: Gluten Free
Description
Our Crumbl copycat chocolate cake cookies with chocolate frosting are your new favorite way to satisfy a chocolate craving. You’ll love these pretty cookies!
Ingredients
For The Gluten-Free Chocolate Cake Cookies:
- 1/2 cup (4 oz/1 stick) butter, slightly softened but still somewhat cool
- 3/4 cup packed brown sugar
- 1 eggs + 1 egg yolk
- 1 tsp. vanilla extract
- 1/2 tsp. baking soda
- 1/4 tsp. salt
- 3/4 cup (60 g.) unsweetened Dutch-processed cocoa powder (dark cocoa)
- 1 1/2 cup (180g.) gluten-free measure-for-measure flour (scooped & leveled)
For The Chocolate Frosting
- 1/2 cup (3 oz.) dark or semi-sweet chocolate chips
- 1/2 cup (4 oz/1 stick) butter, slightly softened but still somewhat cool
- 1 cup powdered sugar
- 2 Tbsp. unsweetened Dutch-processed cocoa powder (dark cocoa)
- 1/2 tsp. vanilla
- tiny pinch salt (~1/8 tsp. salt)
Instructions
For The Gluten-Free Chocolate Cake Cookies:
- Preheat the oven to 350 degrees F. Line a baking sheet with parchment paper.
- In a stand mixer or large bowl, combine butter and brown sugar. Beat 2-3 minutes, or until light and fluffy, scraping down the edges of the bowl now and then as needed.
- Add egg and egg yolk and beat to combine.
- Add vanilla and beat to incorporate.
- Scrape down the edges of the bowl and add baking soda, salt, cocoa powder, and gluten-free flour.
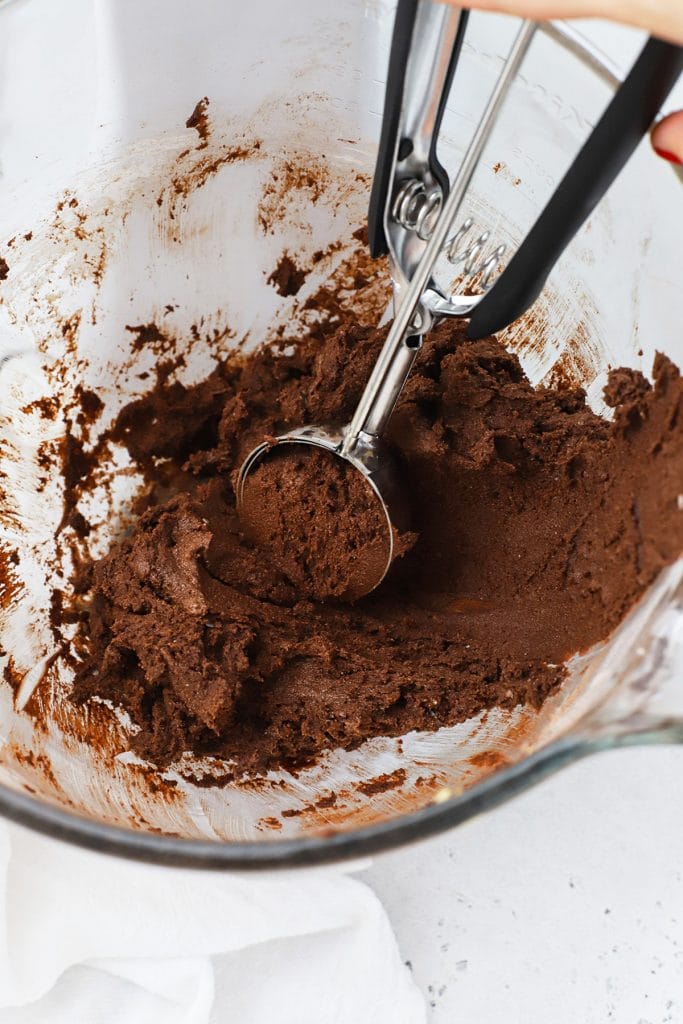
- Mix until the flour is just incorporated. The dough will be thick and sticky.
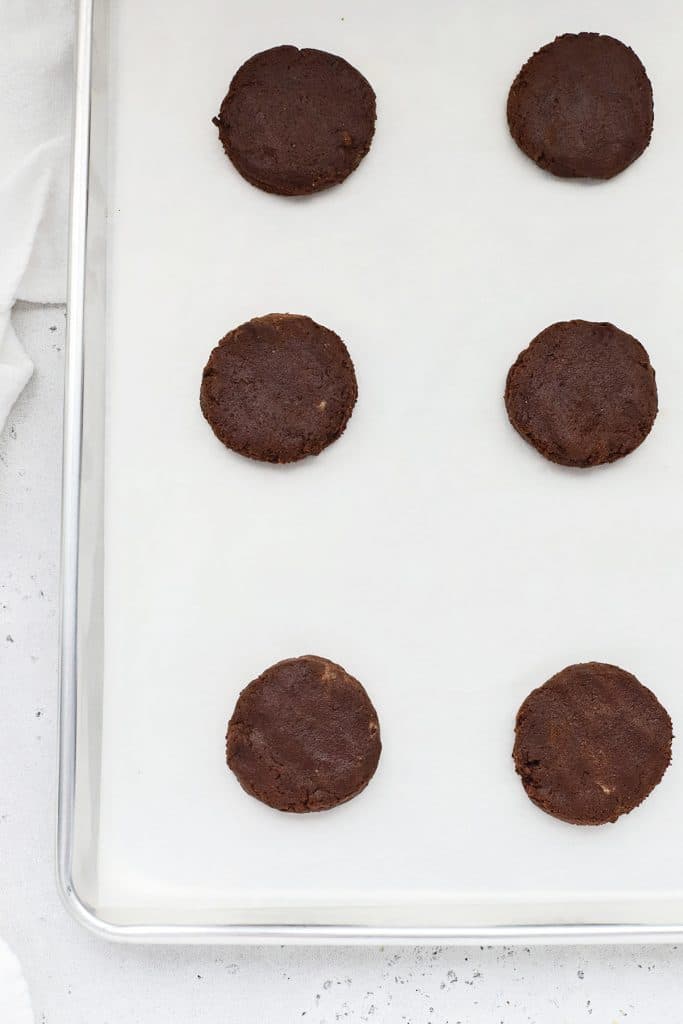
- Use a large (3 Tbsp.) cookie scoop to scoop the dough into balls* and place 6 on a baking sheet at a time, spacing the cookie dough balls out evenly.
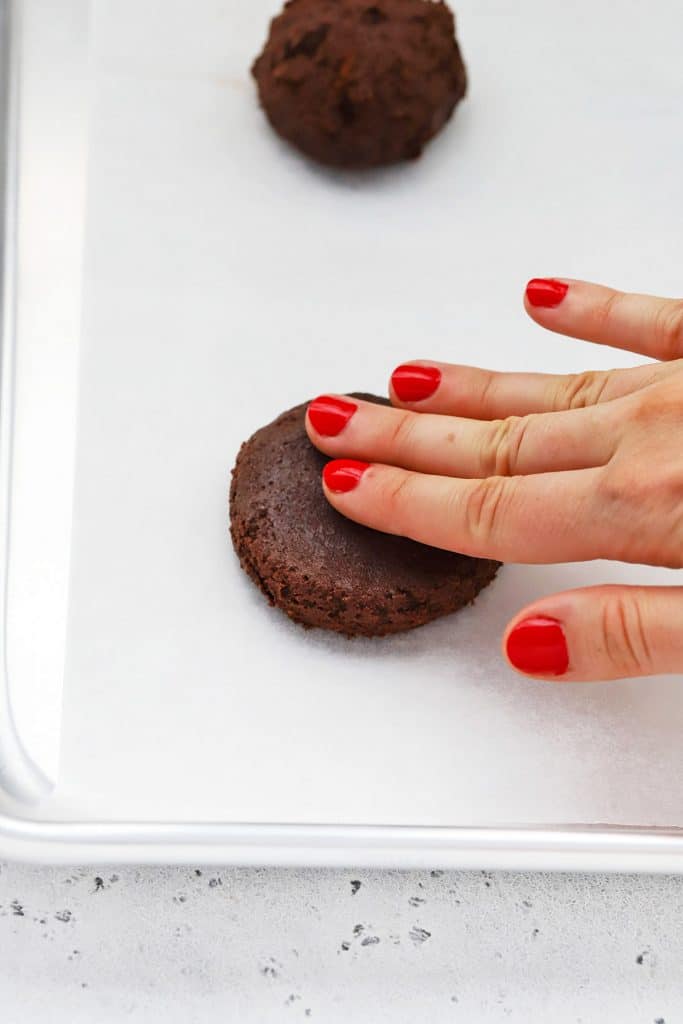
- Gently pat the cookie dough balls into discs with about 1/2″ thick and 2 1/2 inches wide. (I find using just 2-3 fingers moving in circles, helps me pat them out evenly.) This will help them spread properly and set properly when baked.
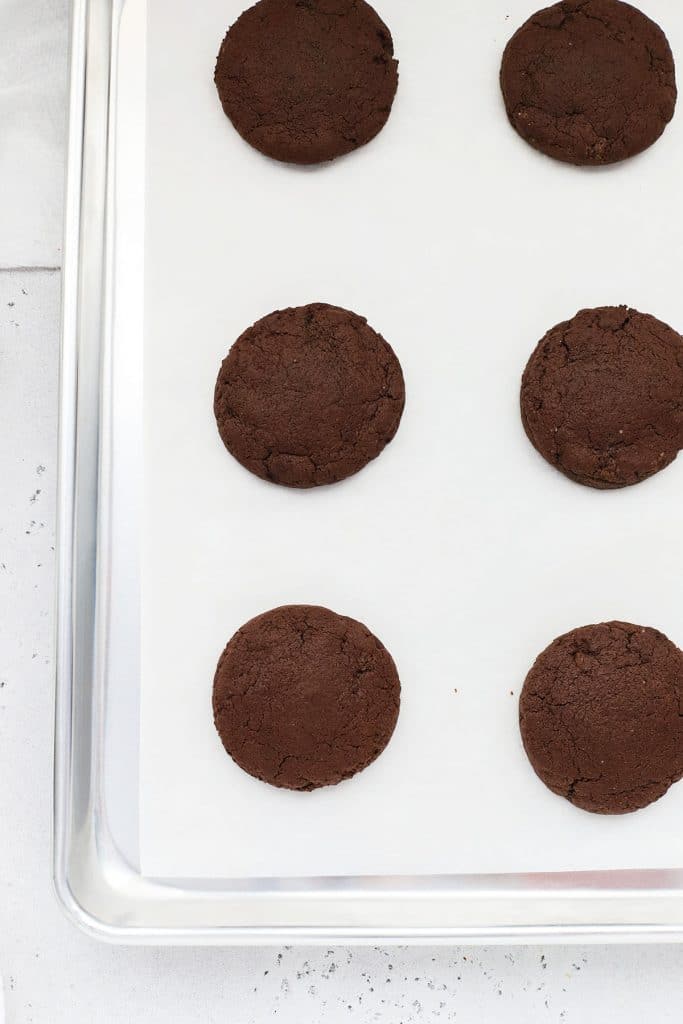
- Bake cookies at 350 degrees 8-9 minutes, or until the centers are just no longer wet/glossy and look just set. The cookies will give slightly when you gently press the centers with your fingers.
- Allow the cookies to cool on the baking sheet 2-3 minutes before transferring to a cooling rack to cool completely.
- Repeat with remaining dough until all cookies are baked. Cool cookies completely before frosting them. (Don’t skip this step!)
For The Chocolate Frosting:
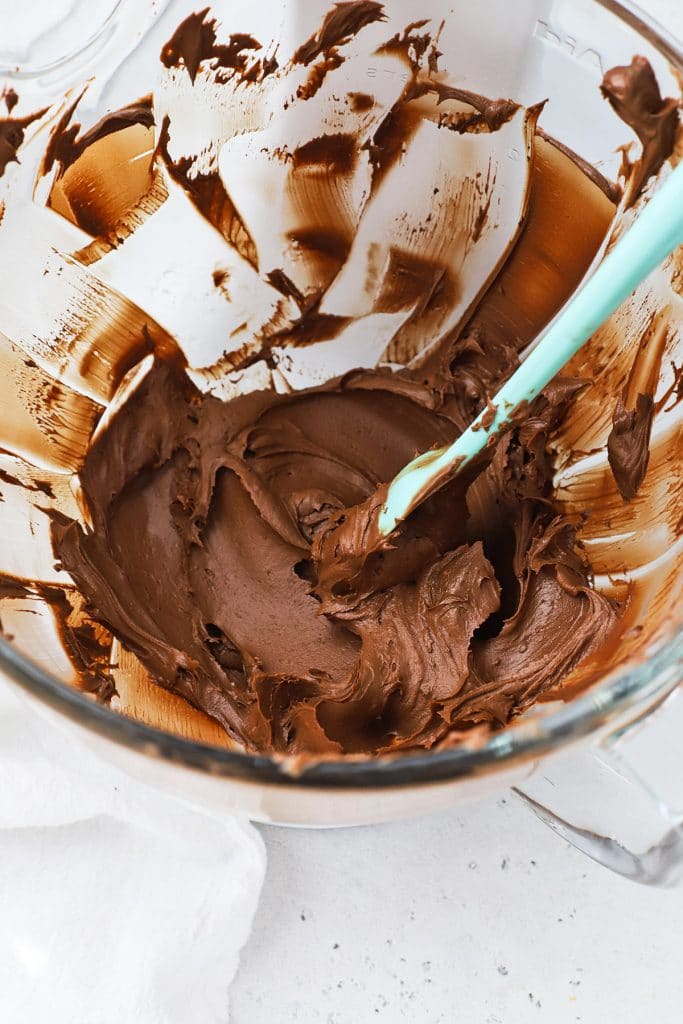
- In a microwave-safe bowl, gently melt the chocolate 10-15 seconds at a time, stirring between each interval, until the chocolate is smooth and glossy. (I like to stop heating it when there are just a few small pieces of chocolate chip left and let the residual heat melt the chocolate the rest of the way. This helps me avoid scorching the chocolate.)
- Let the melted chocolate cool before you add it to the frosting.
- In a stand mixer or mixing bowl, combine softened butter, powdered sugar, cocoa powder, vanilla, and salt. Beat for 2-3 minutes, or until it’s light and fluffy. At first, it will look dry and crumbly. Just keep beating! (See the video for a visual).
- Scrape down the edges of the bowl and add the cooled melted chocolate (make sure it’s cooled so it doesn’t melt the butter!).
- Beat another 1-2 minutes, or until the chocolate is incorporated and the frosting is light and fluffy.
- Add frosting to a piping bag fitted with a drop flower or star tip (I’m using a Wilton 2D) and pipe the frosting in a spiral on each cookie to form a rosette. Start in the middle of the cookie and work outward in a spiral to make a rosette. Garnish with sprinkles, if desired.
Troubleshoot As Needed. As with all baking, there are a LOT of conditions that can affect your bakes–ambient temperature in the room, the temperature of your butter and melted chocolate, the humidity, etc. If your frosting is too soft to hold its shape, add more powdered sugar 2 Tbsp. at a time until it’s stiff enough to hold its shape. If it’s too stiff, add more liquid 1 tsp. at a time until it loosens up.
Notes
*If you want to get exactly 12 cookies out of this batch, make sure to slightly under-fill a large (3 Tbsp.) cookie scoop. If you fill the cookie scoop exactly level, you’ll get 11 cookies. If you slightly over-fill, you’ll get 10.
- Prep Time: 30 minutes
- Cook Time: 16 minutes
- Category: Cookies
- Method: Baking
- Cuisine: American
