How To Make Marshmallow Snowflakes
This post may contain affiliate links. See our disclosure policy for more.
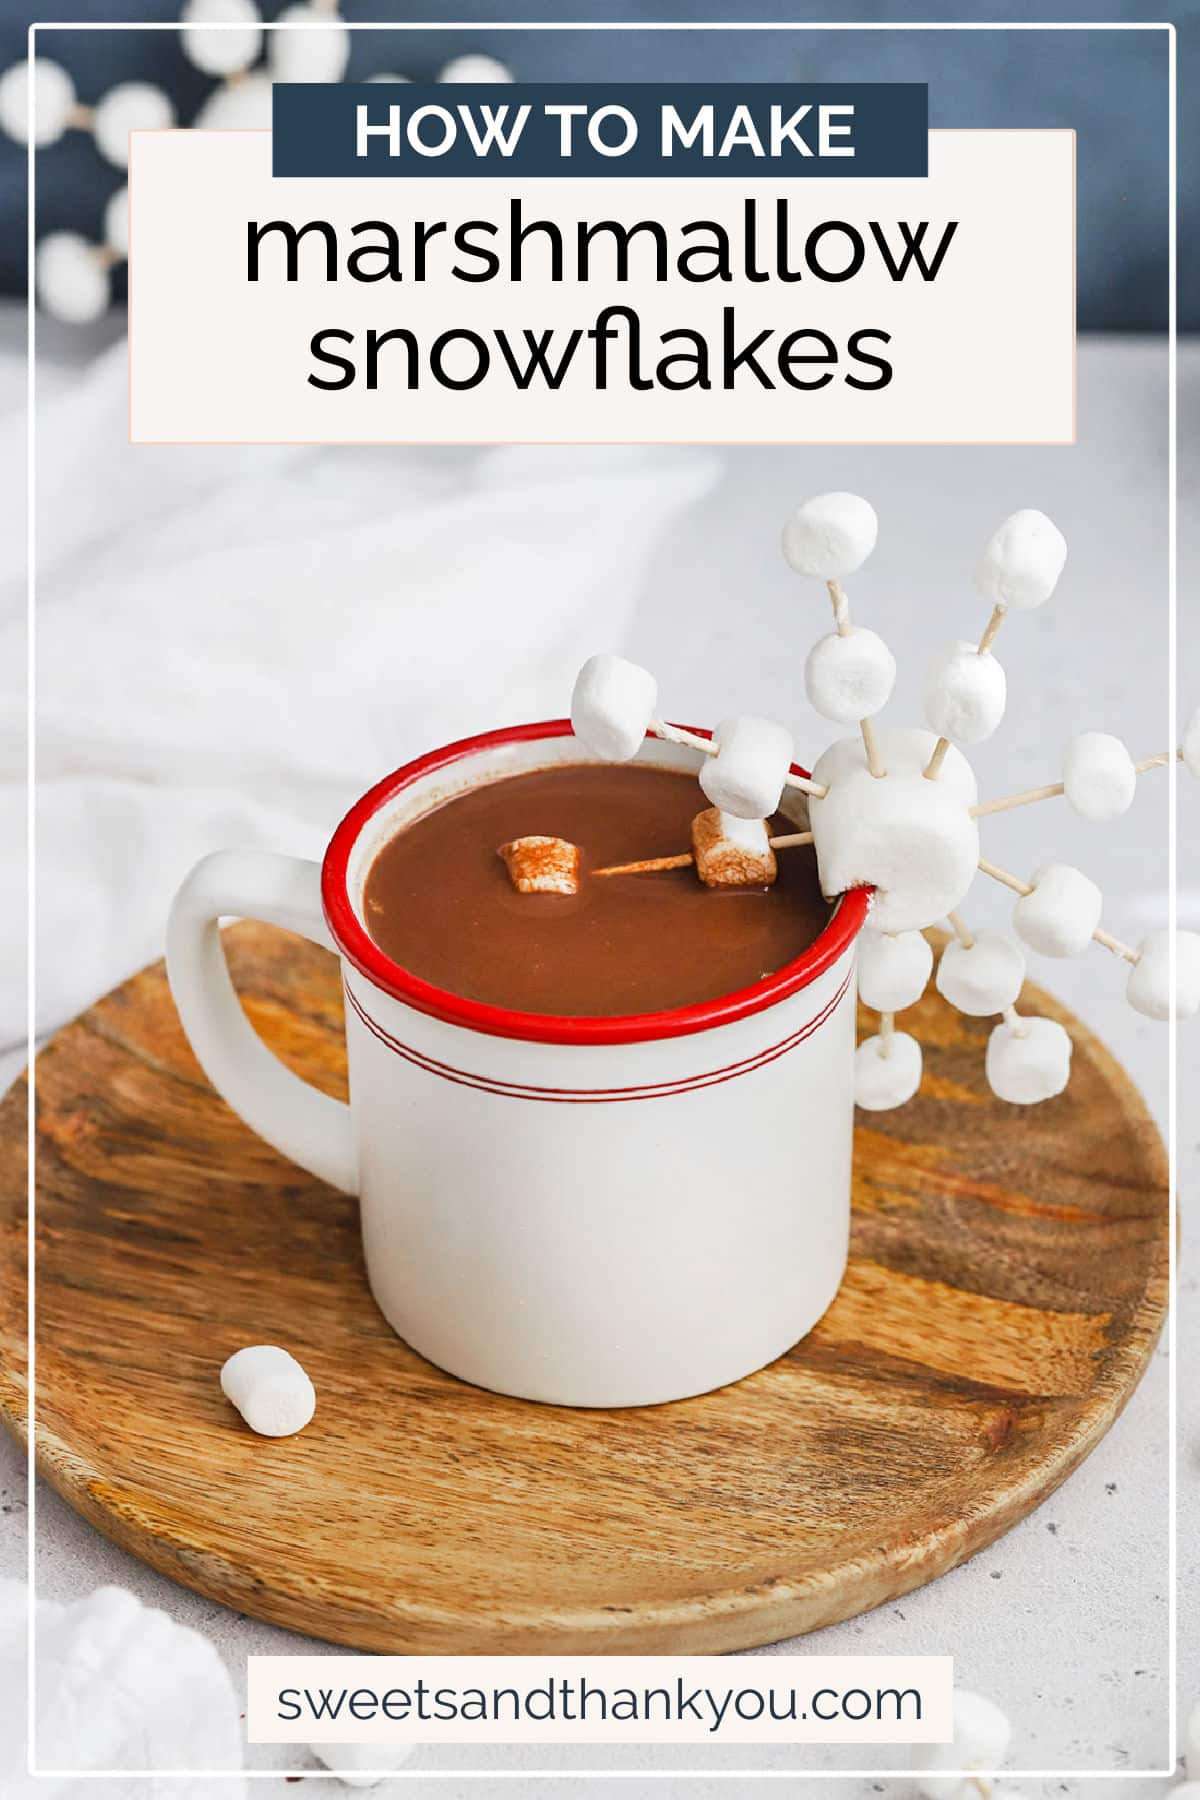
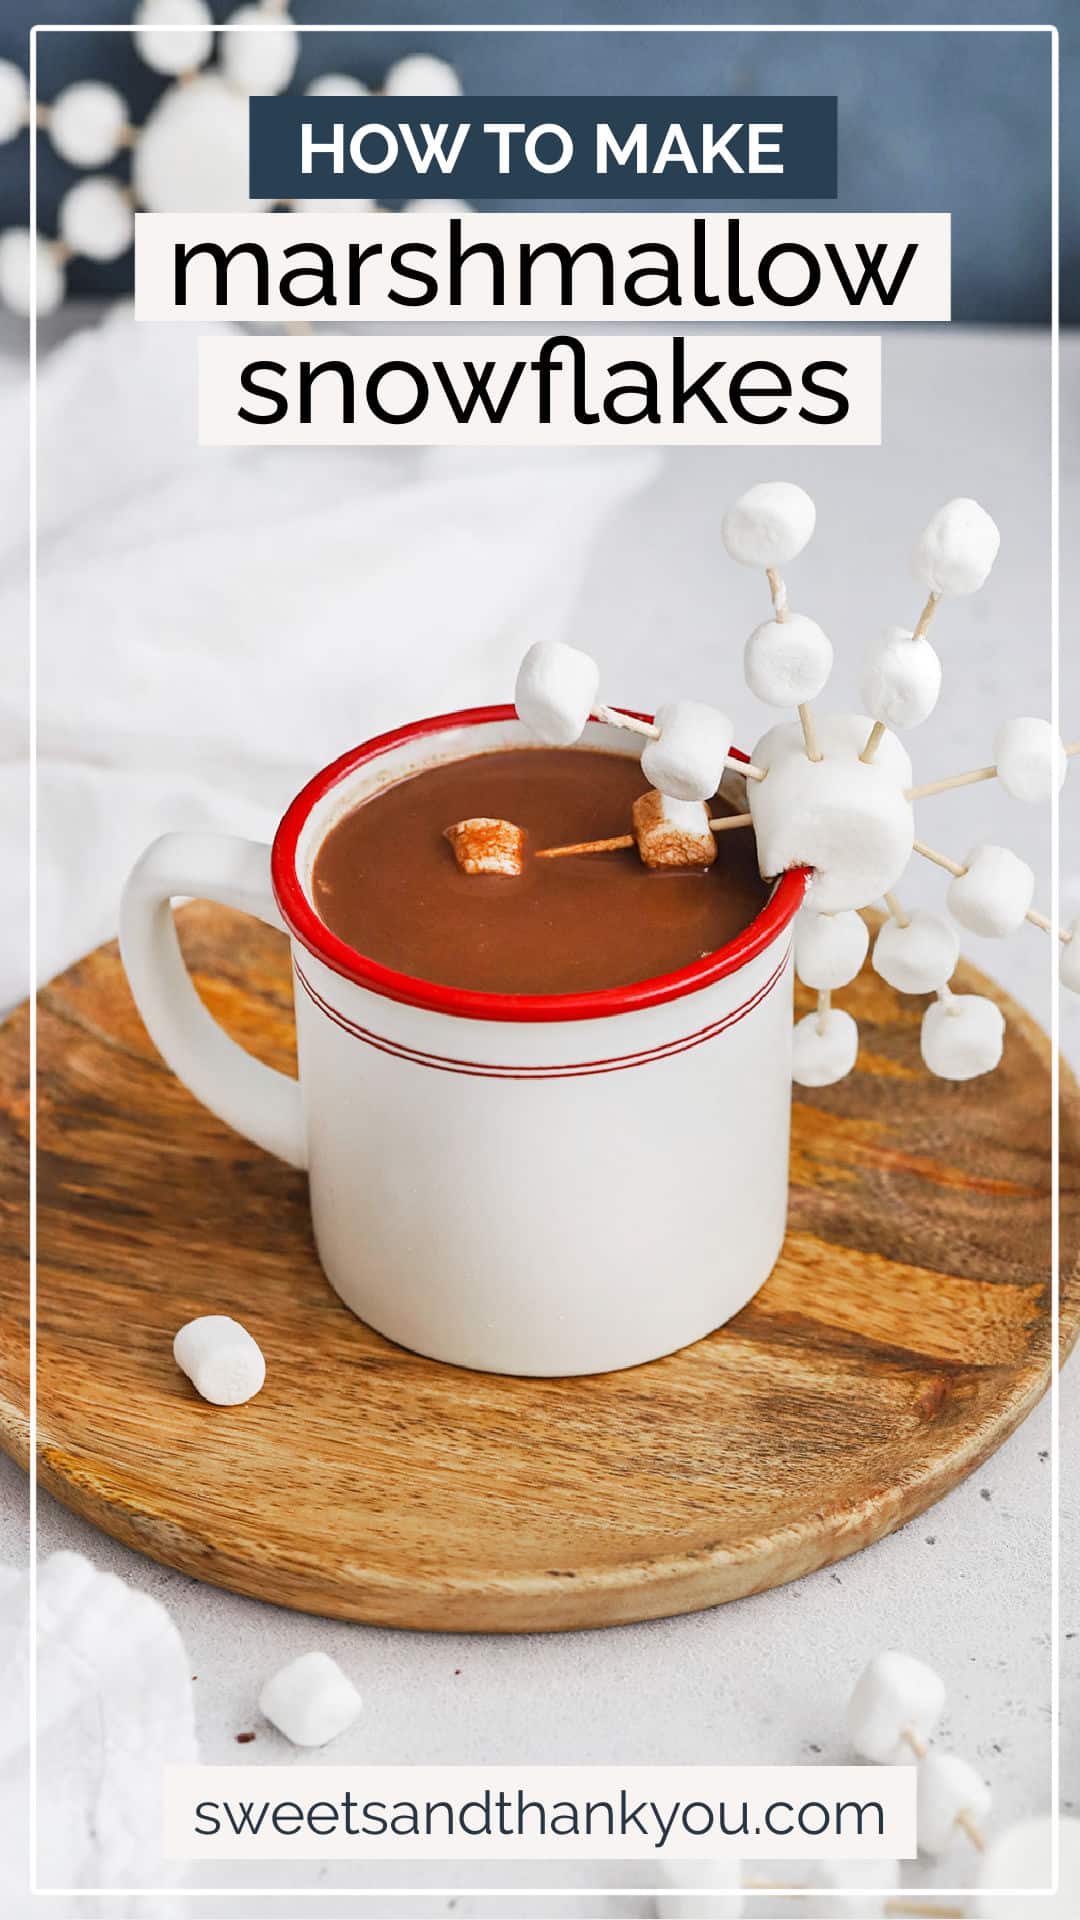
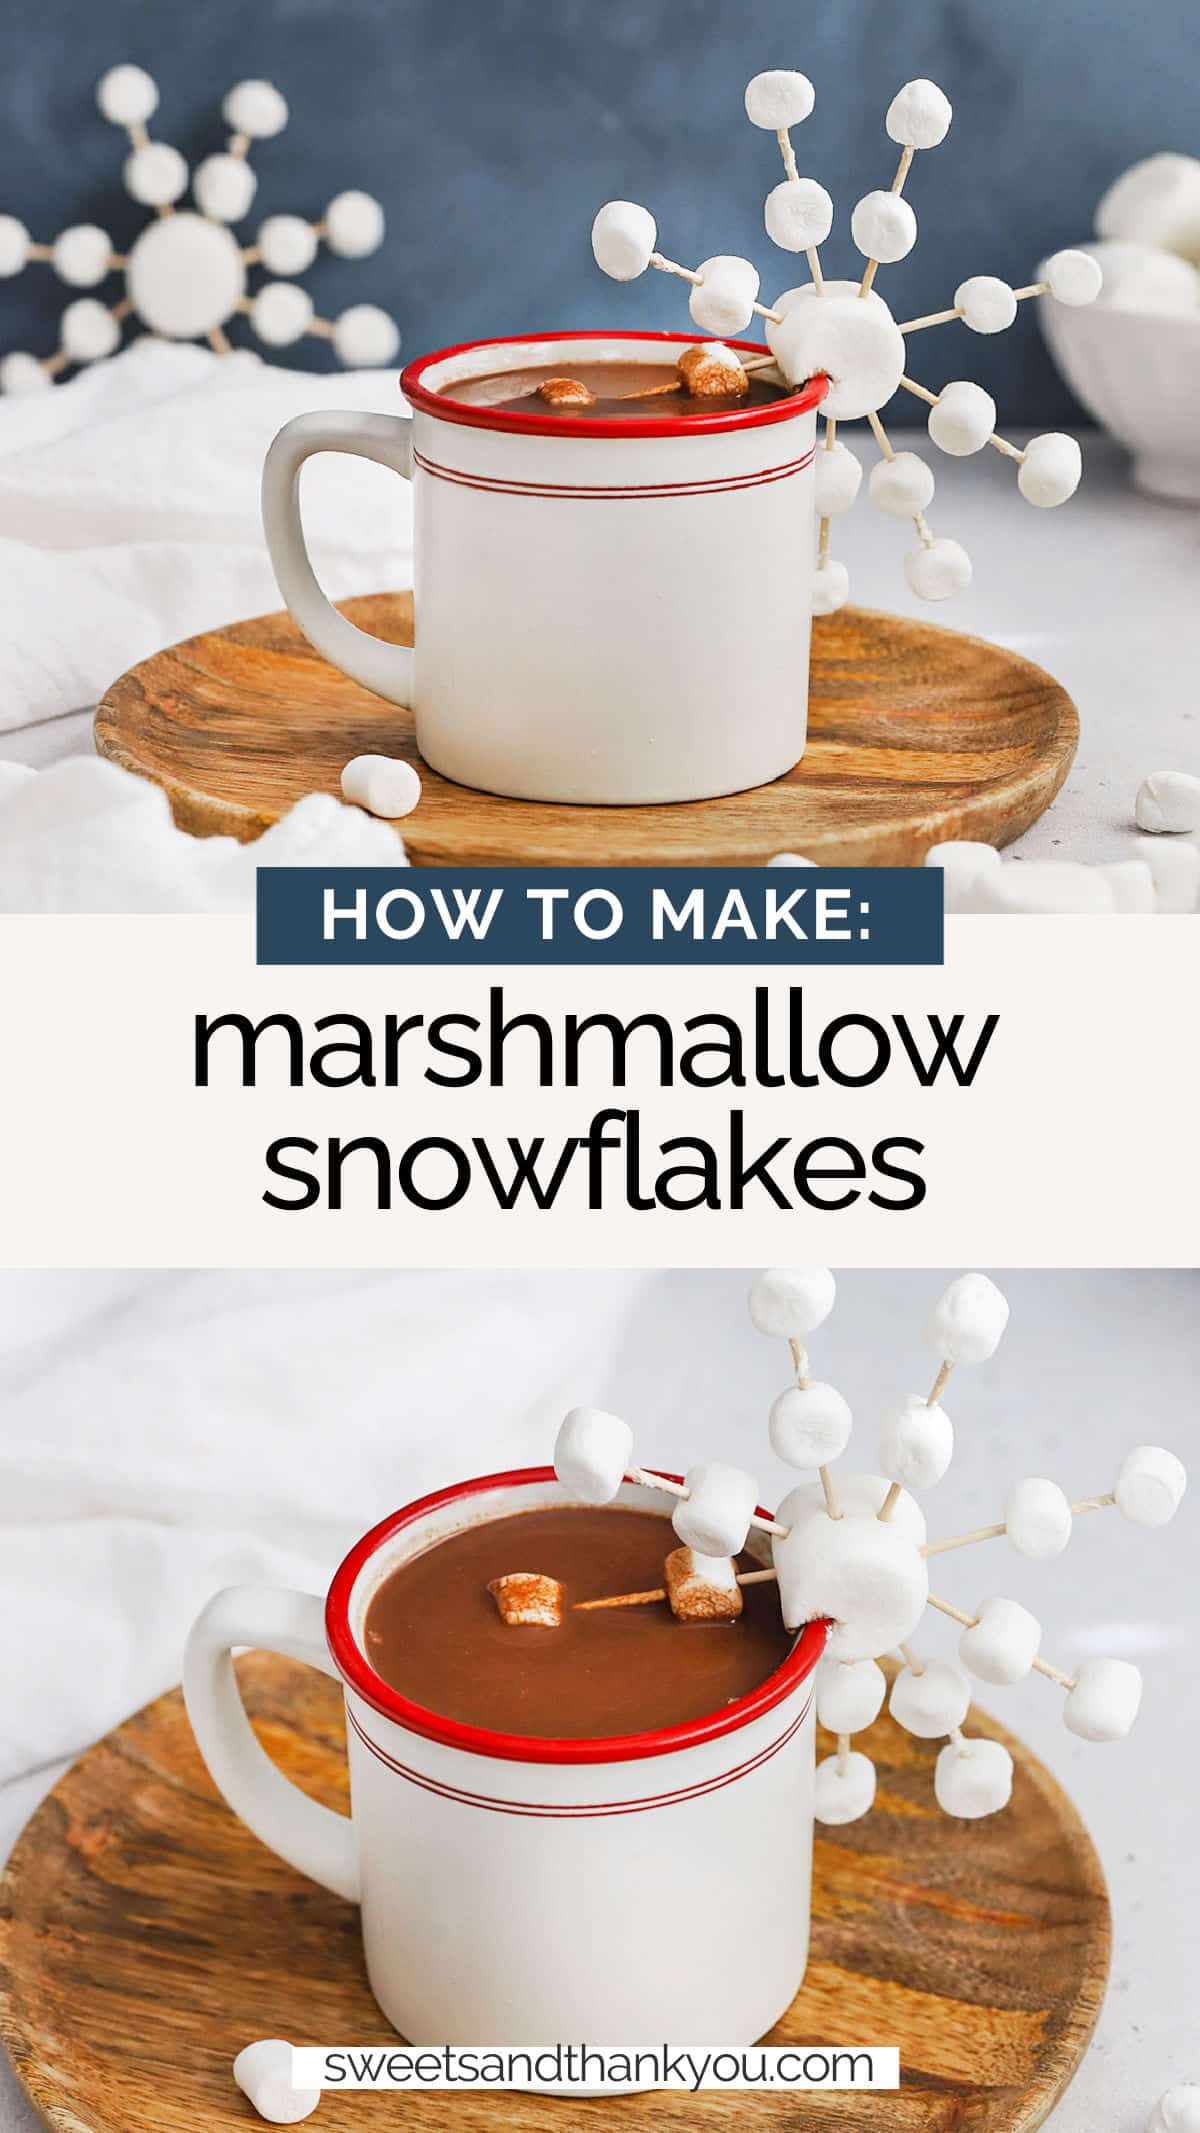
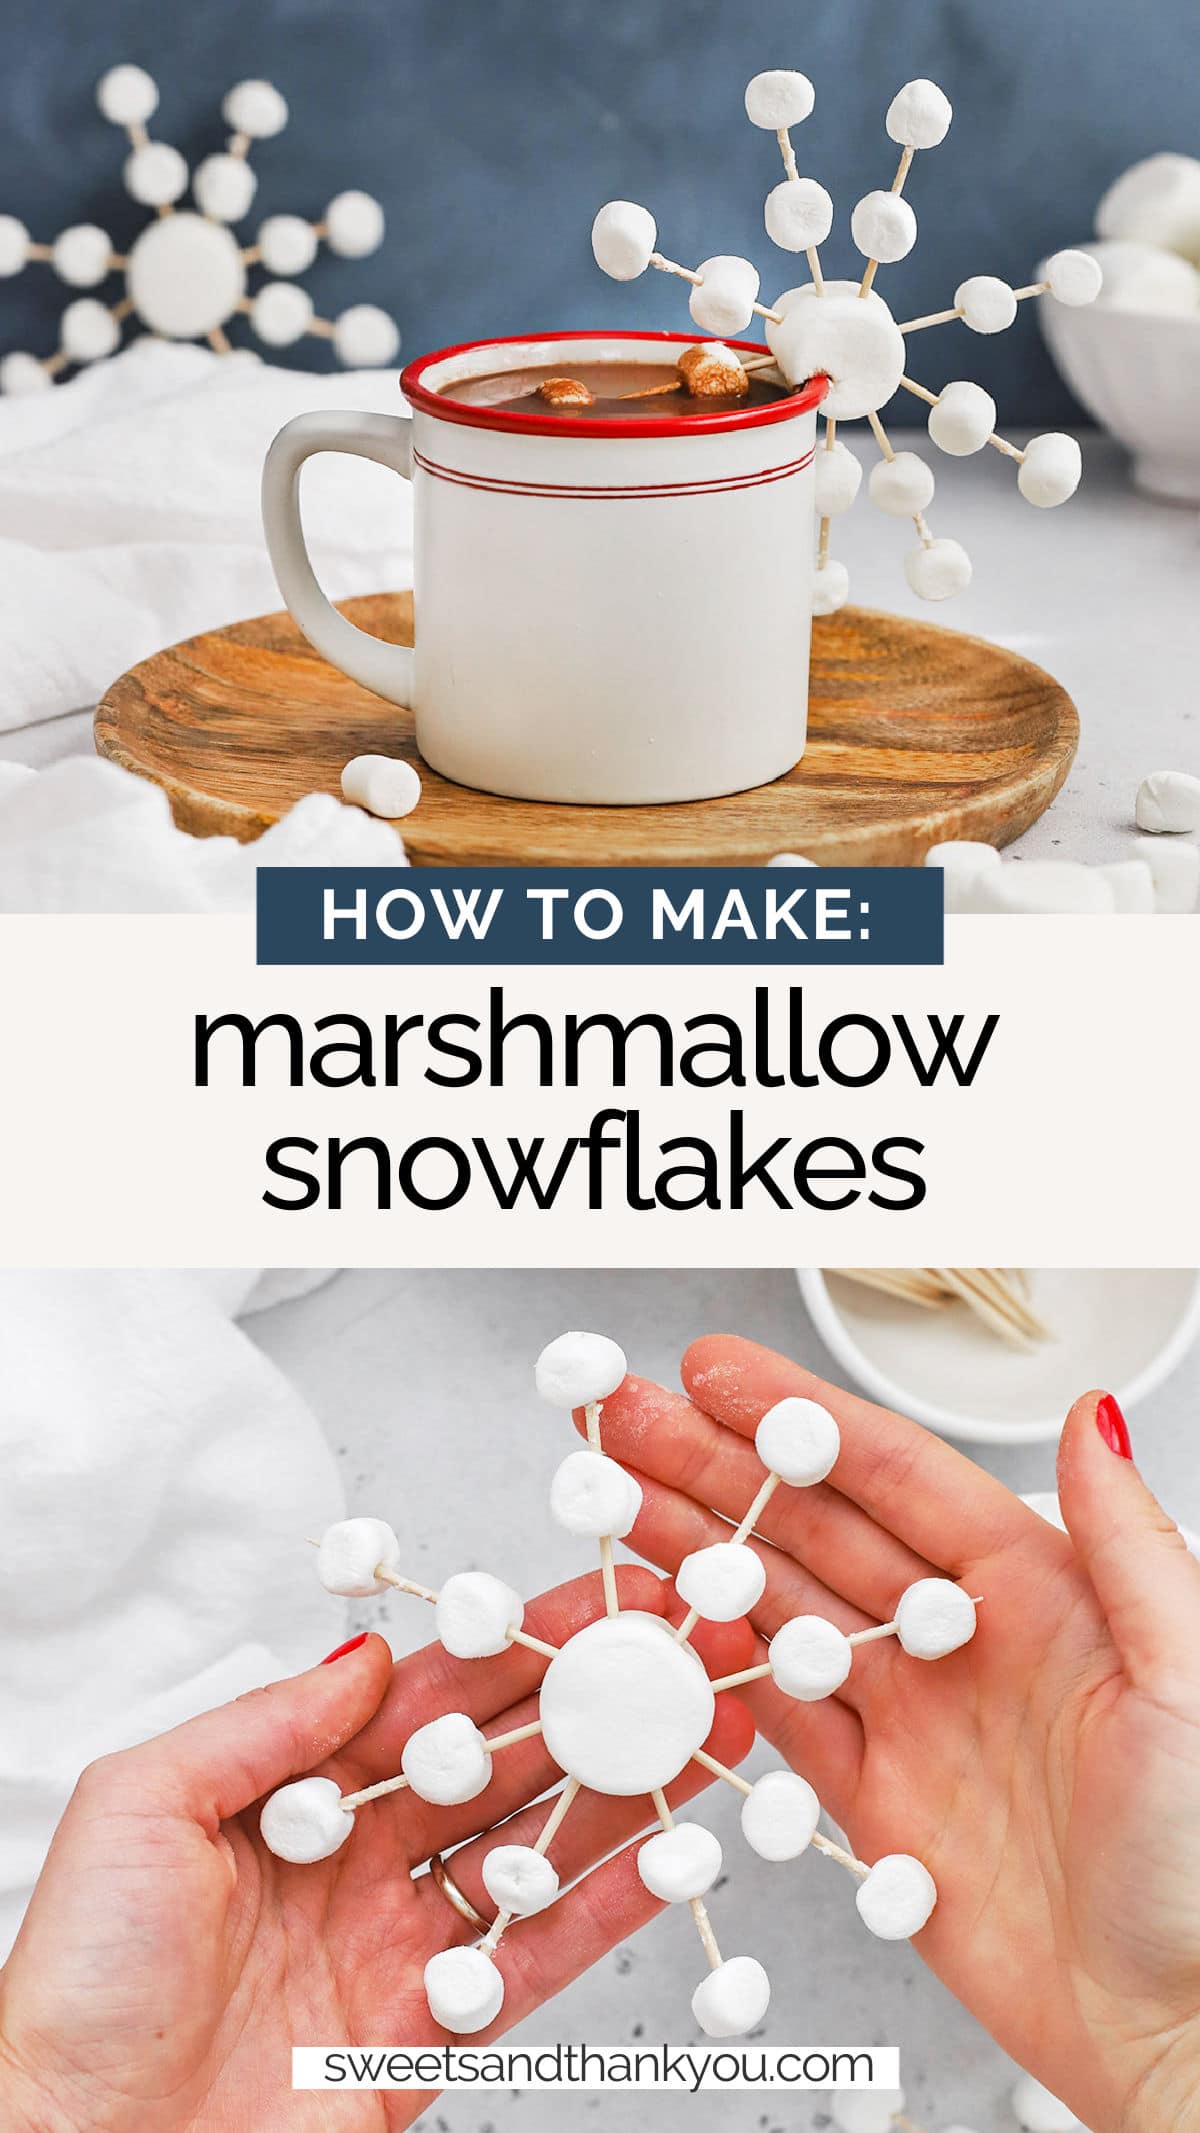
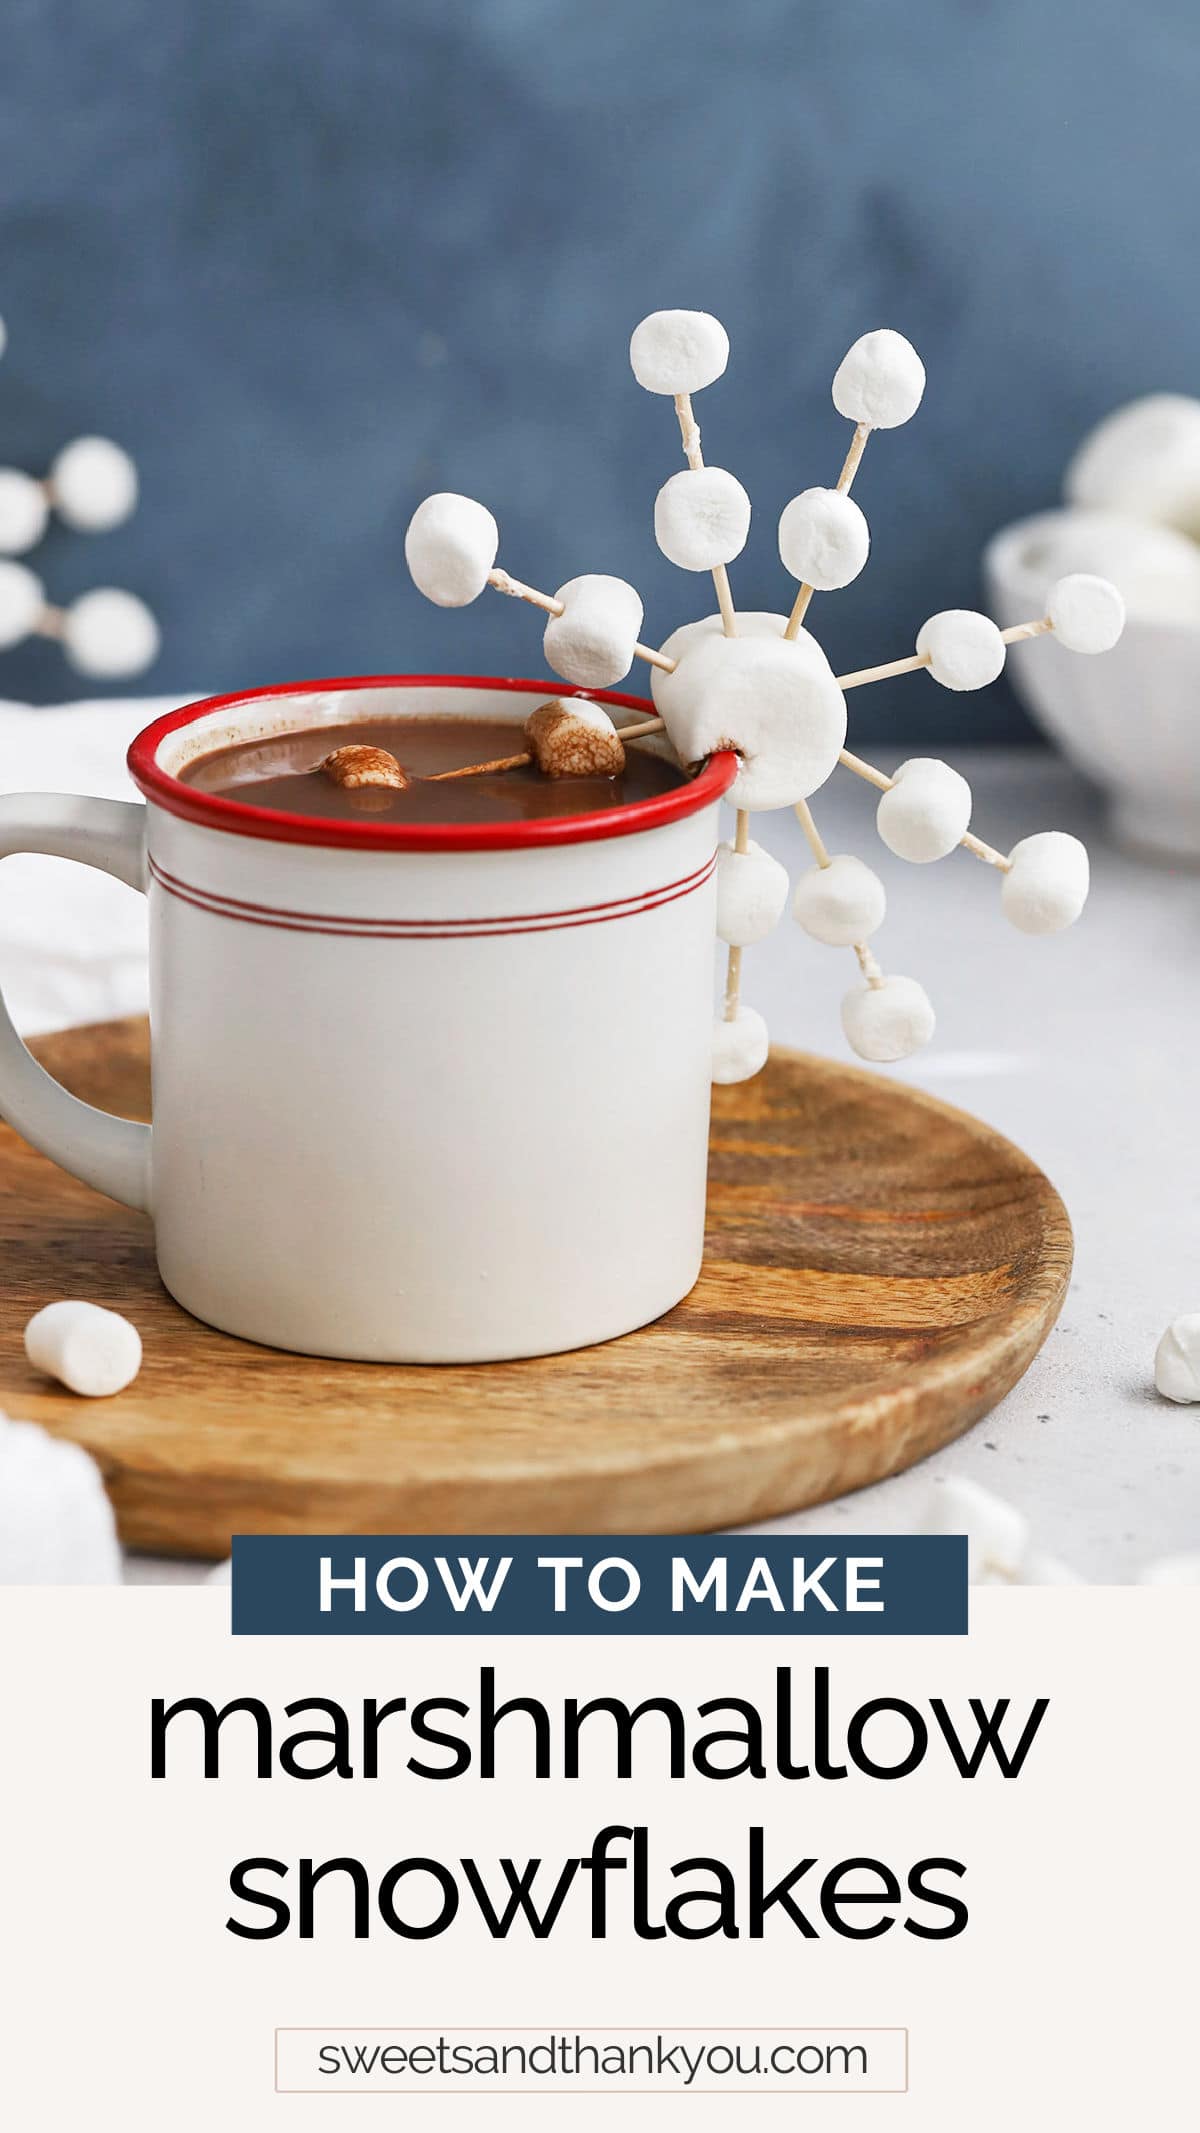
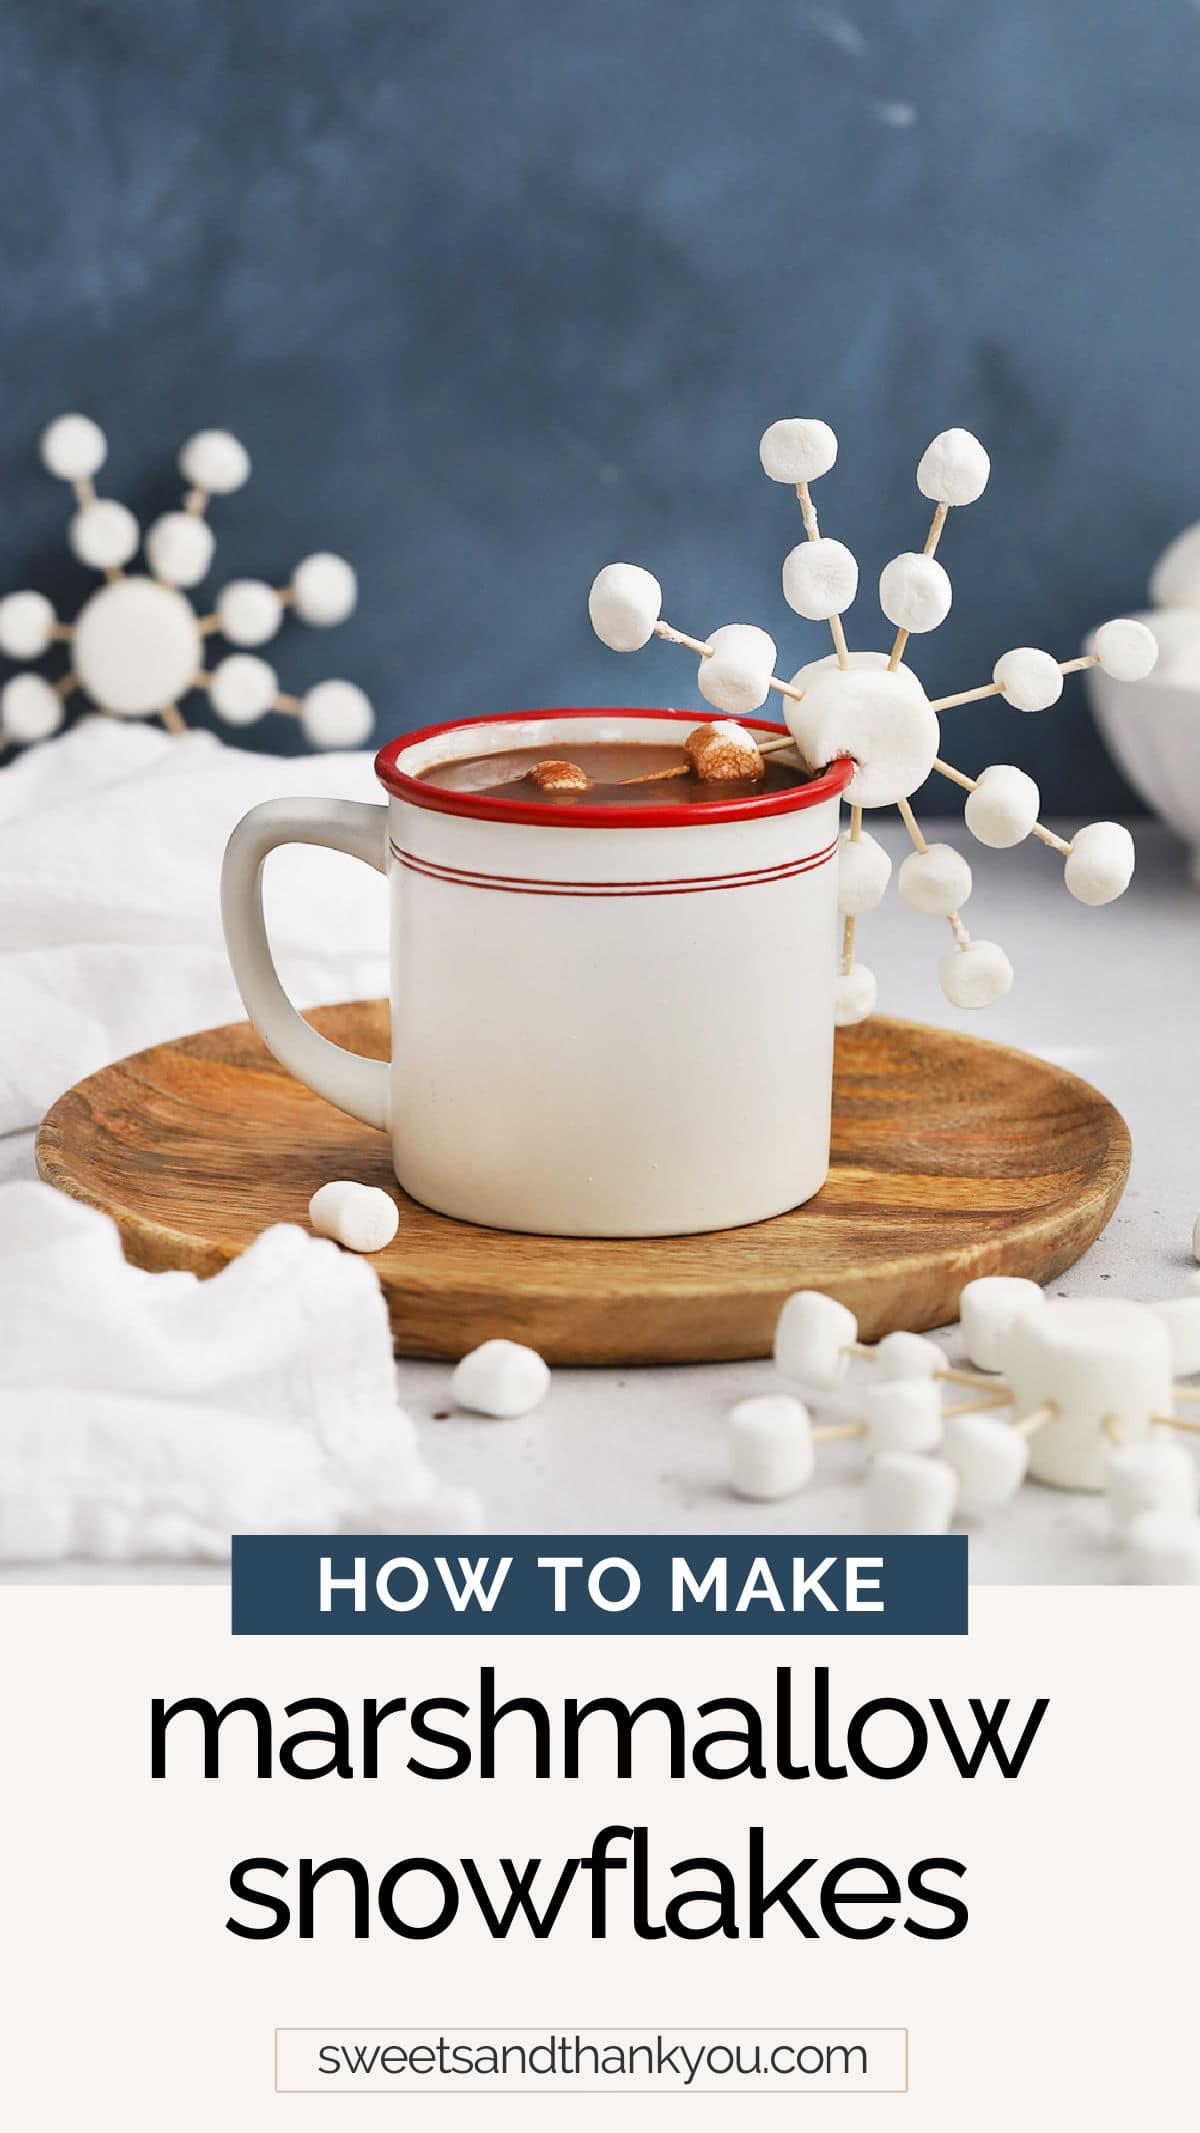
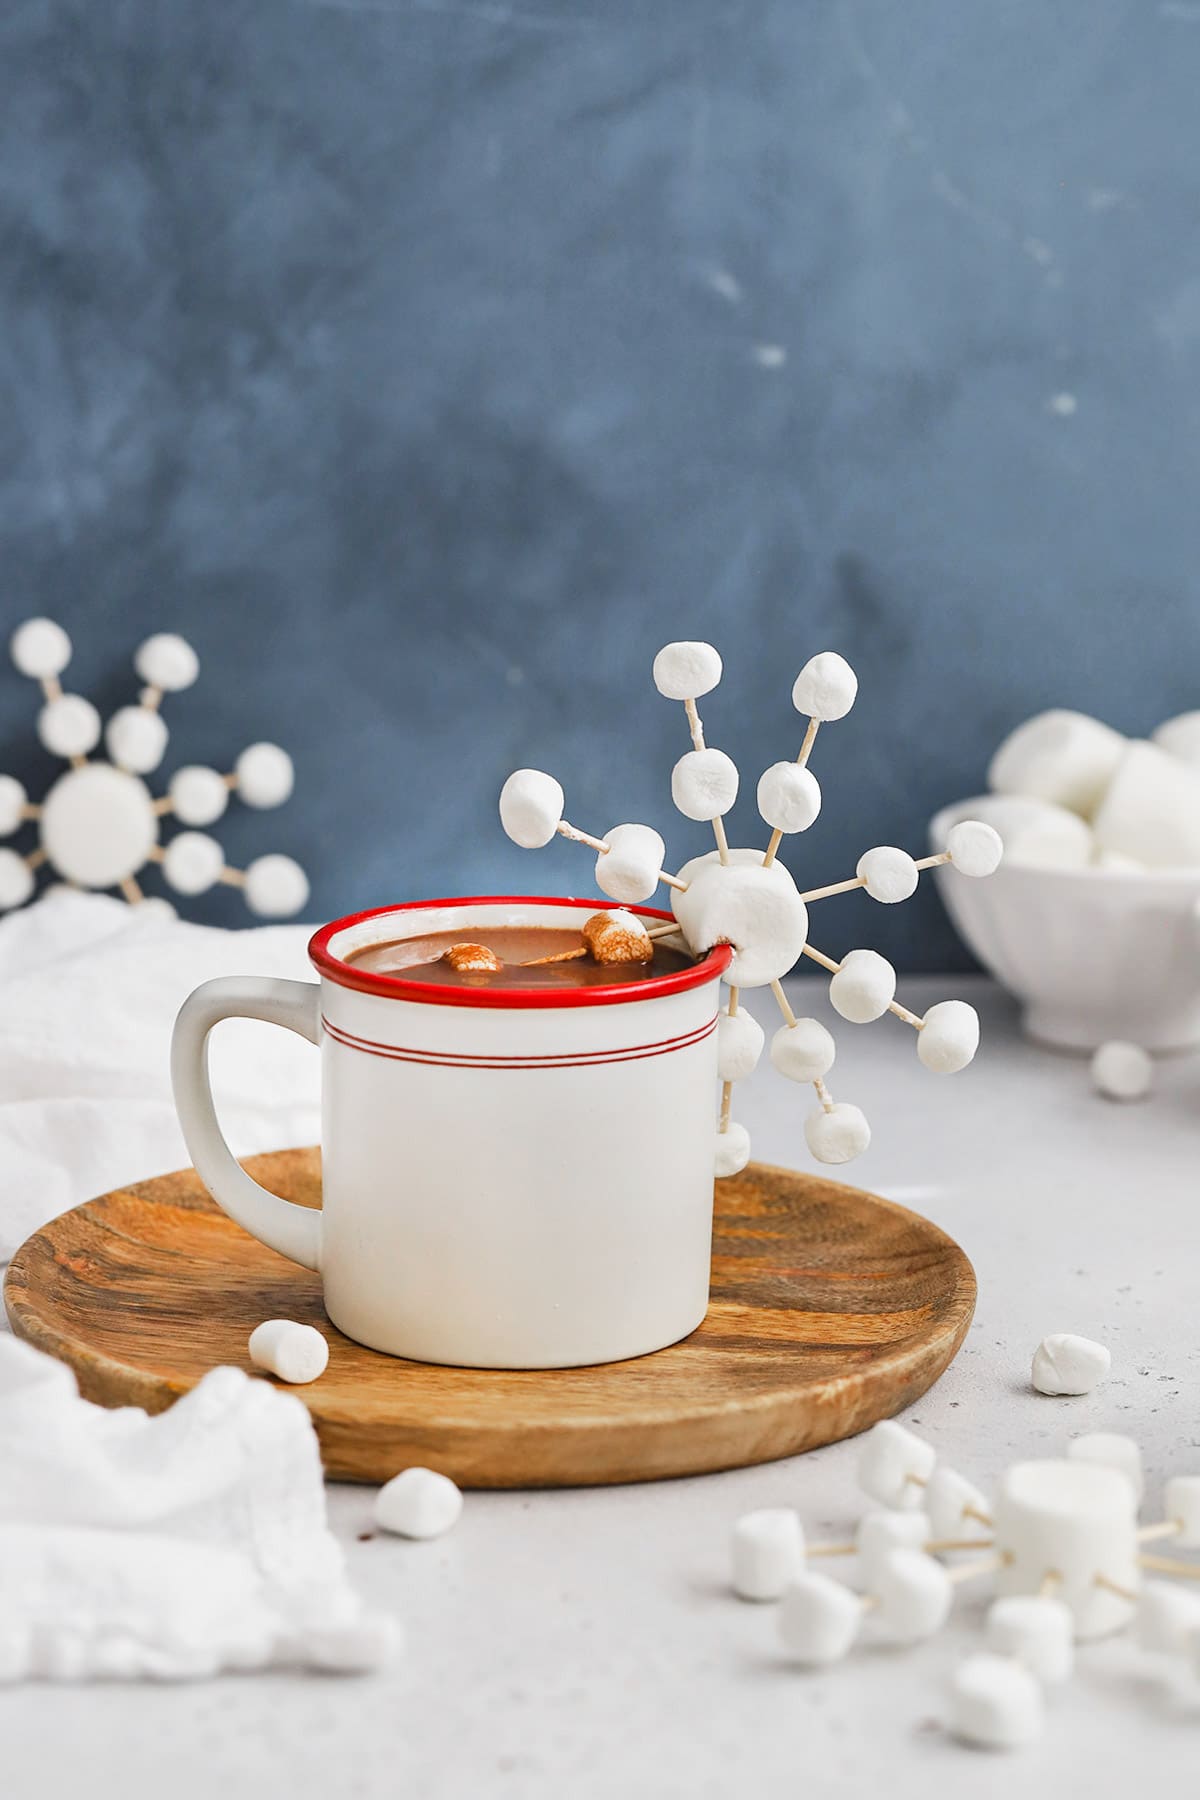
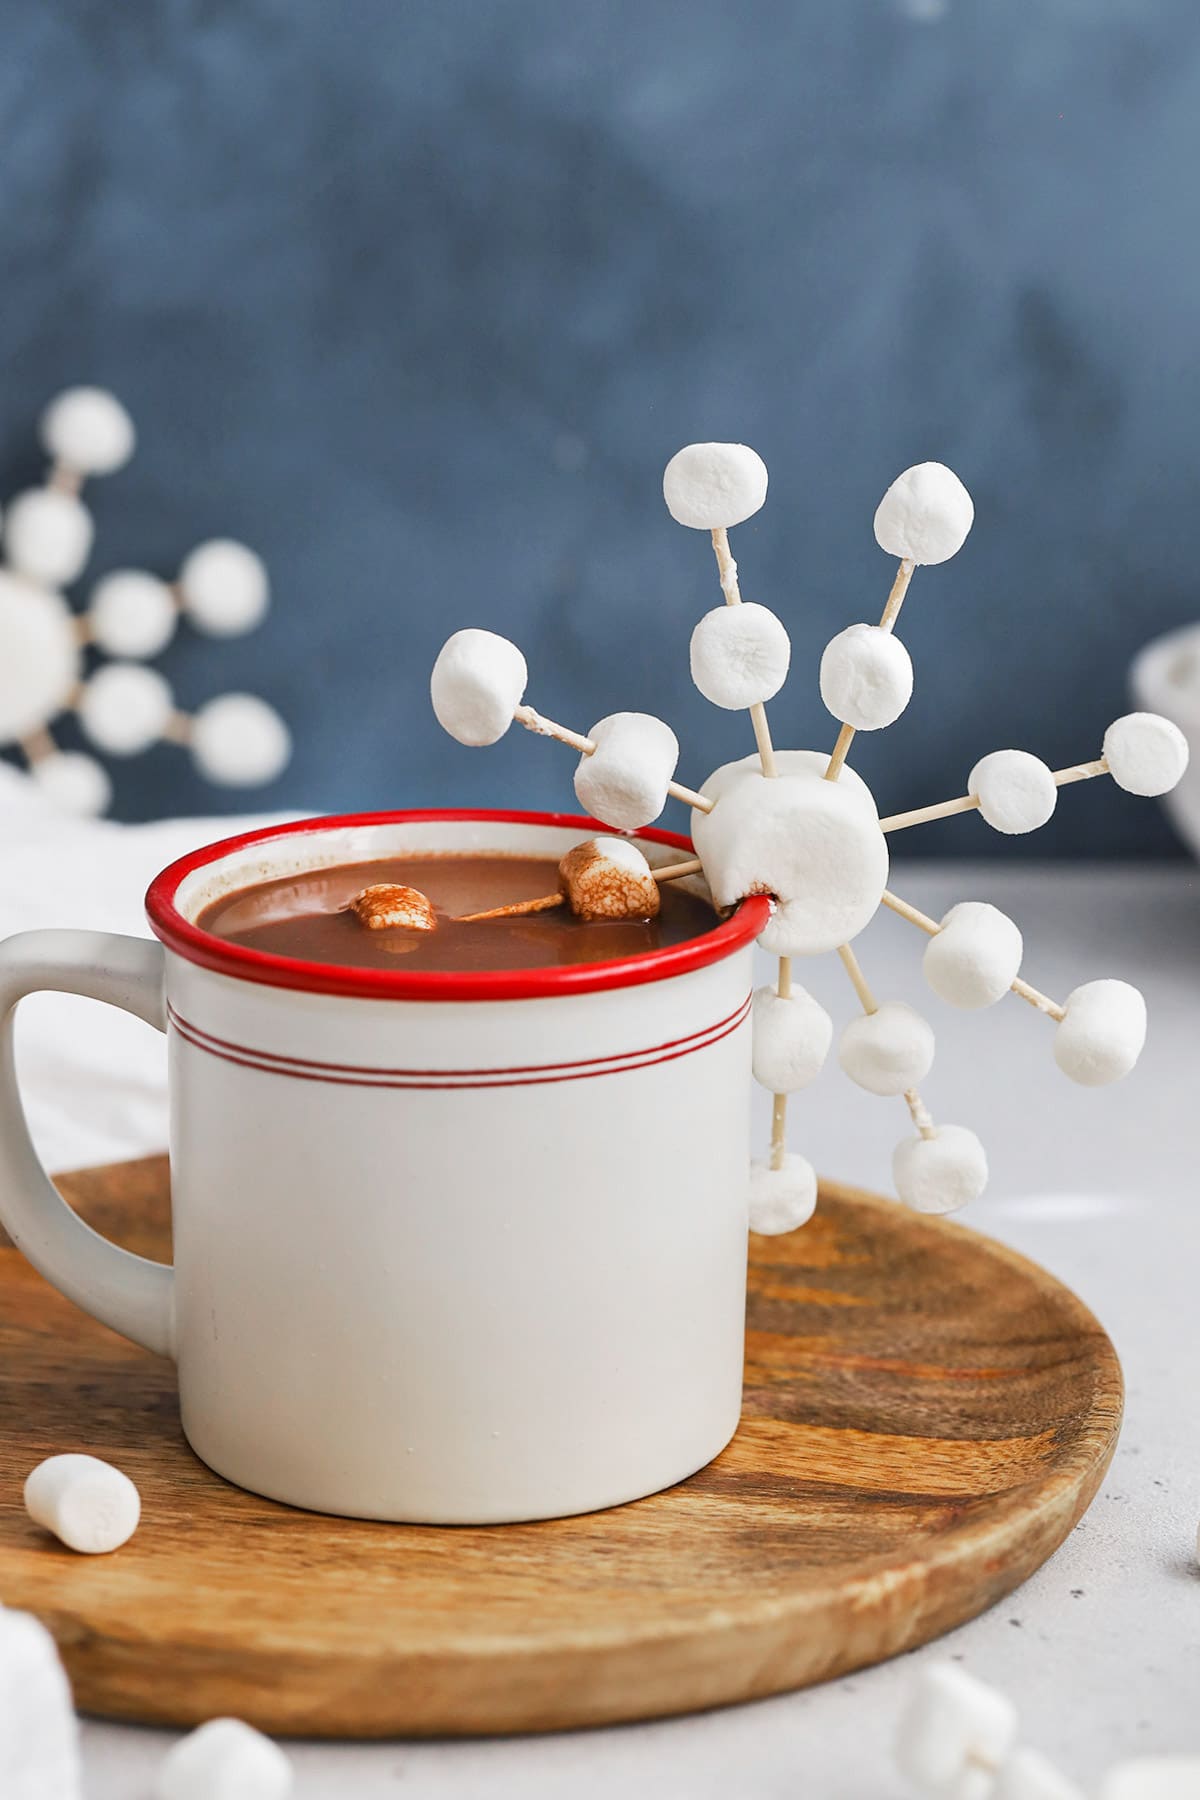
How To Make Marshmallow Snowflakes – Learn how to make marshmallow and toothpick snowflakes to decorate your next mug of hot cocoa! It only takes minutes & it’s so fun!
We’ve been living in the desert for more than a decade, and 70 degrees feels cold to us–ha! Since we’re in heat and sunshine basically all year round, my kids lean HARD into any chance to savor cloudy or chilly weather.
Every single time it’s cloudy outside, my kids ask if we can have hot cocoa, and my answer is always yes. It’s a fun, cozy tradition we love and I think they’ll carry with them as they grow up.
When Christmas rolls around, we double down on all things cozy around here, so we do a lot of hot chocolate, blankets, coloring, books, and twinkle lights. Which means dressing up our hot chocolate becomes an art form!
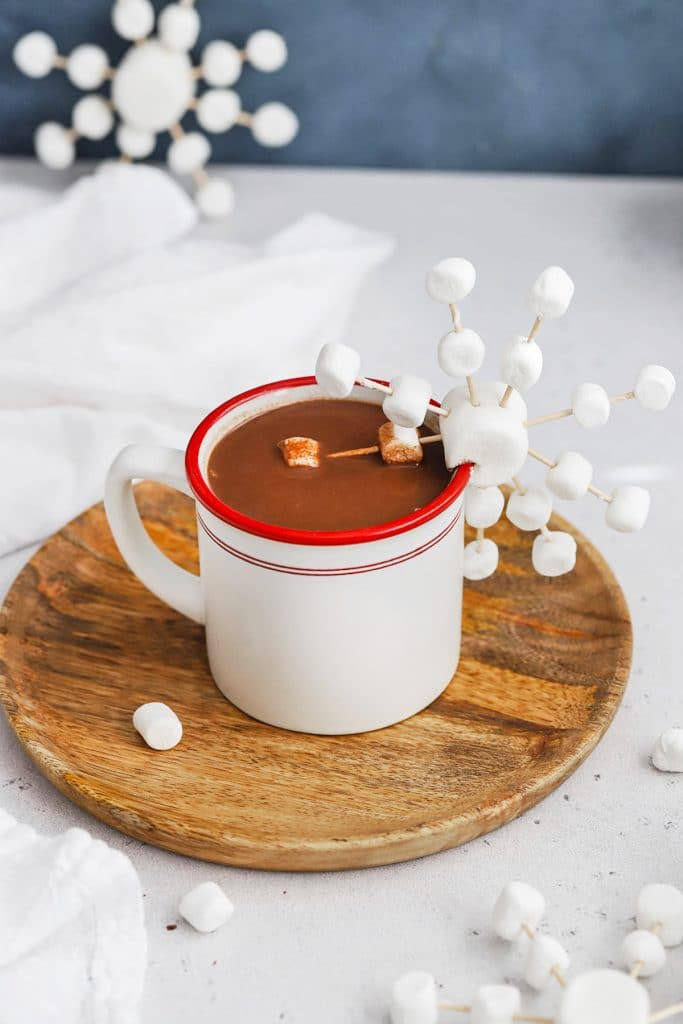
We love a good dollop of coconut whipped cream, a sprinkle of marshmallows, or a candy cane swirled in, to be sure, but today I thought I’d share one of our favorite hot chocolate toppings that doubles as a craft: Marshmallow Snowflakes!
This easy (like, EASY!!!) activity turns any cup of hot chocolate into something extra special and you only need 3 things to get started…
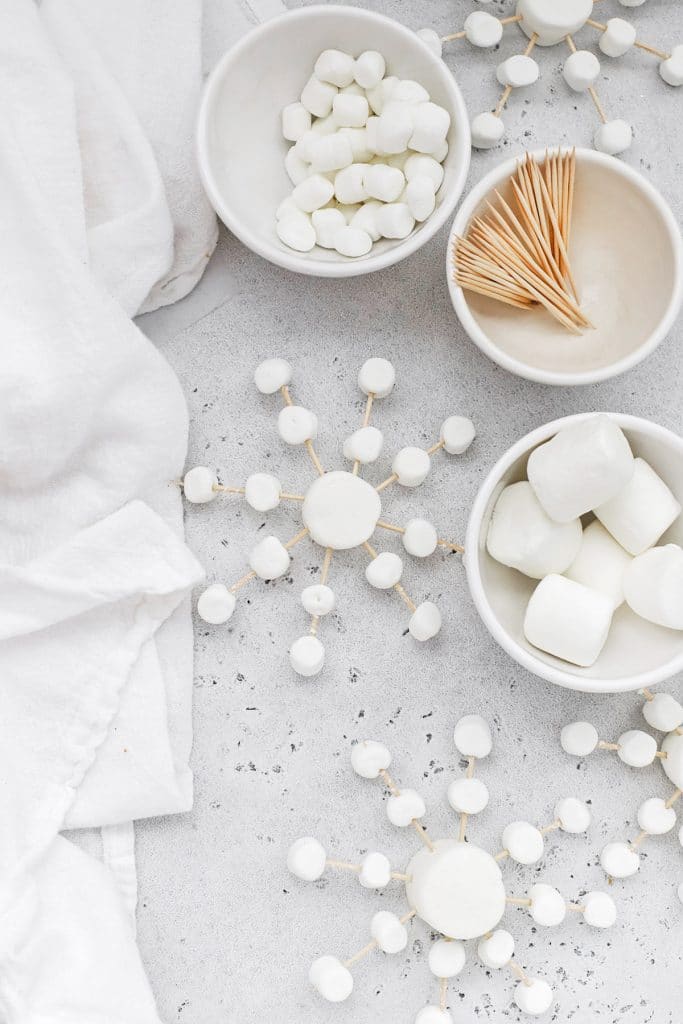
Here’s What You Need To Make Marshmallow Snowflakes:
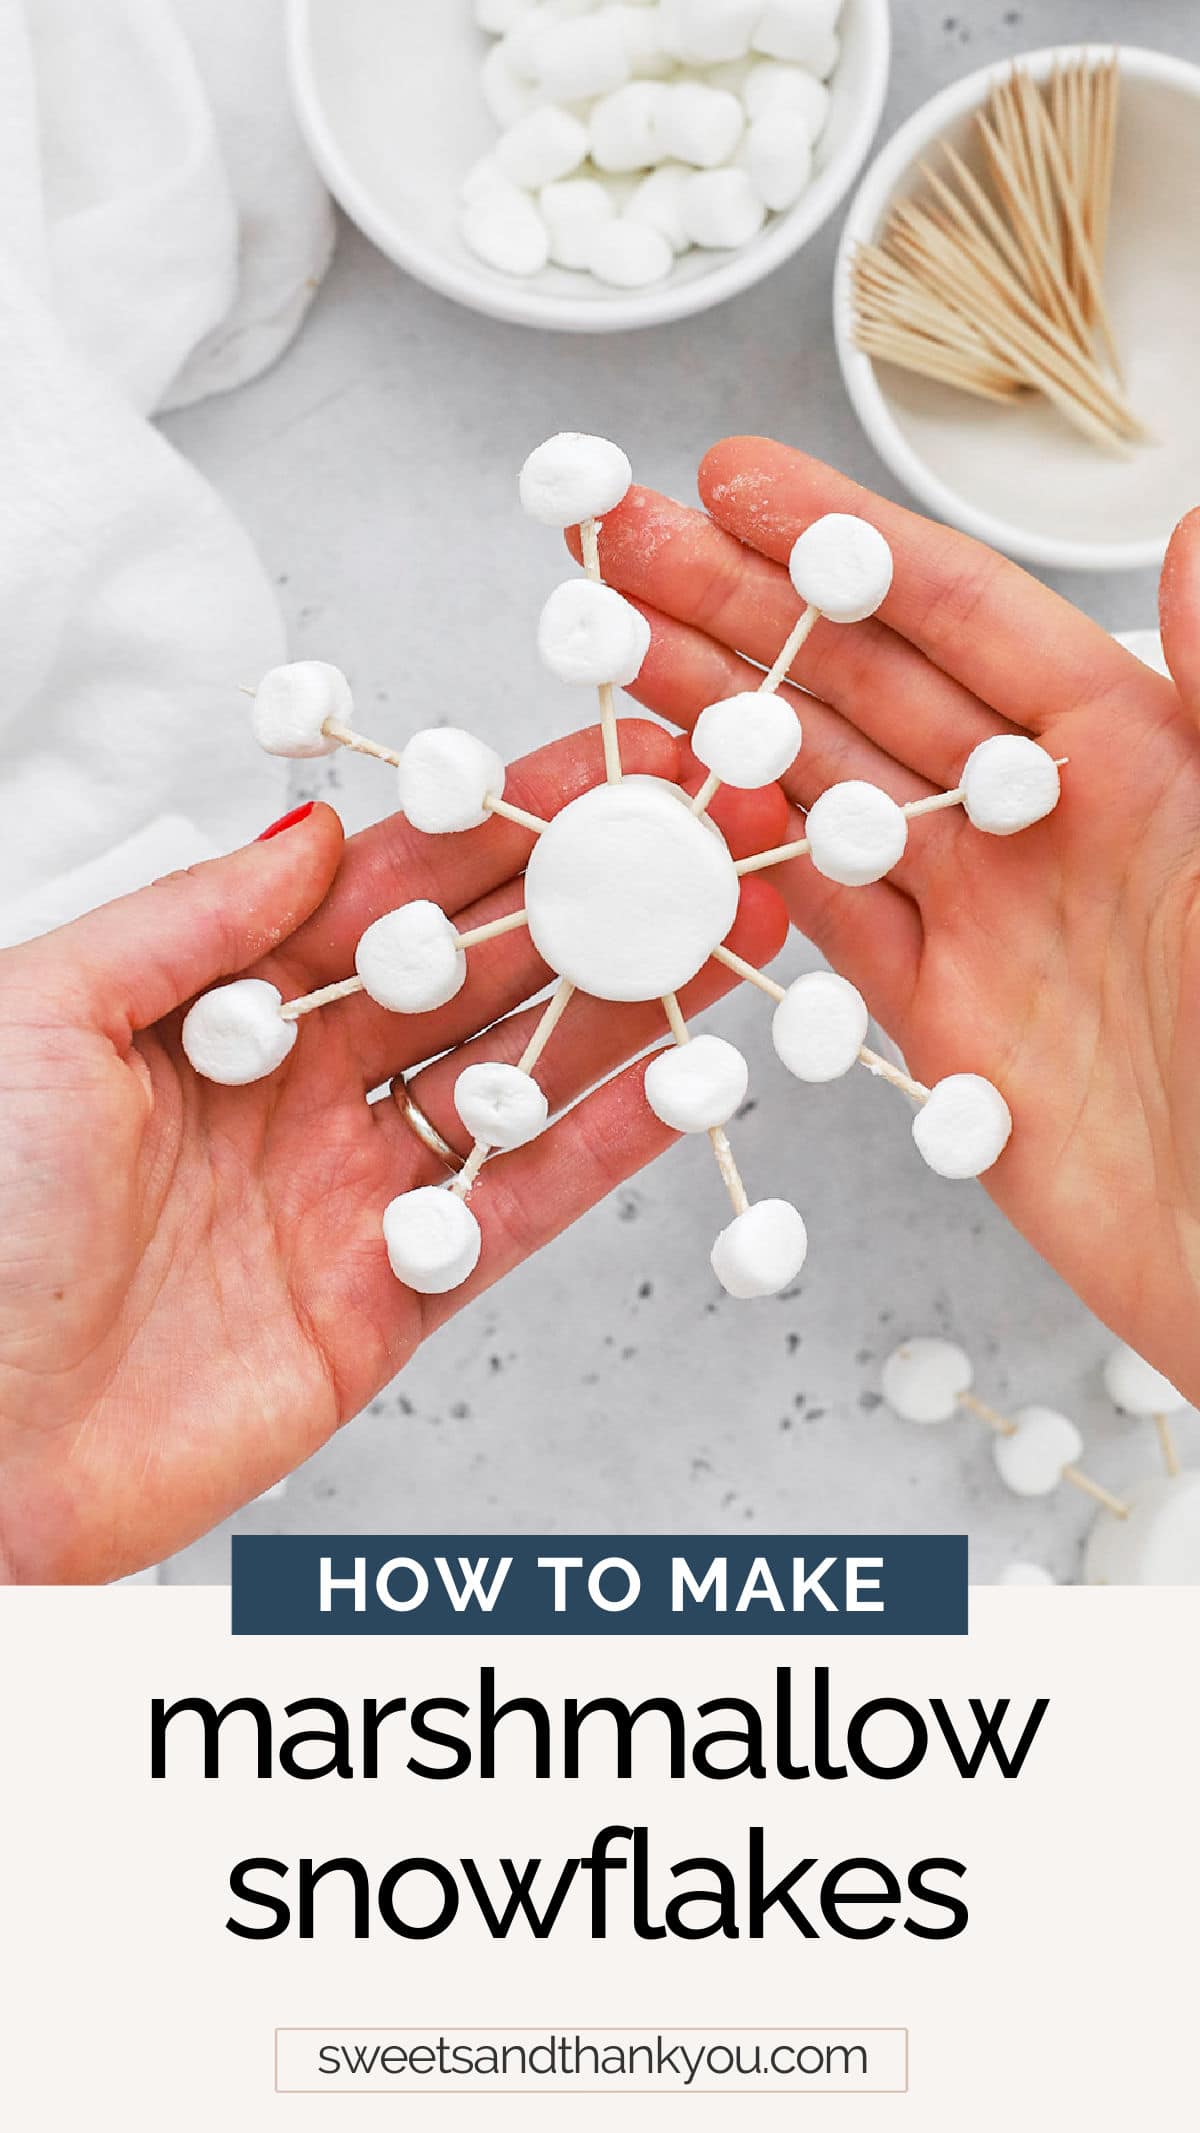
- Toothpicks. Simple and inexpensive! You’ll need 6-8 toothpicks per snowflake, which will act as the points of your snowflake.
- Large Marshmallows For The Center. Then, you’ll need 1 large marshmallow (the regular size) to act as the center of your snowflake. (It’s easier to attach the toothpicks & is more sturdy than the mini ones)
- Mini Marshmallows, To Decorate. Lastly, you’ll use mini marshmallows to decorate the toothpicks & create your snowflake design. For the ones in these photos, I used 2 mini marshmallows per toothpick (for a total of 16 per snowflake).
PSST! Need Vegan Marshmallows? We like these marshmallows & mini marshmallows from Dandies! Trader Joe’s mini marshmallows are also vegan.
How To Make Marshmallow Snowflakes Step By Step
Since my kids were preschoolers, one of our favorite boredom busters is to pull out a bag of marshmallows and a box of toothpicks and let them use marshmallows and their fine motor skills to build whatever sounds fun! So how do you make a snowflake out of marshmallows and toothpicks? We’ll be using the same principle, with the marshmallows as the “glue” the holds things together. Here’s how you’ll make easy marshmallow snowflakes, step by step:
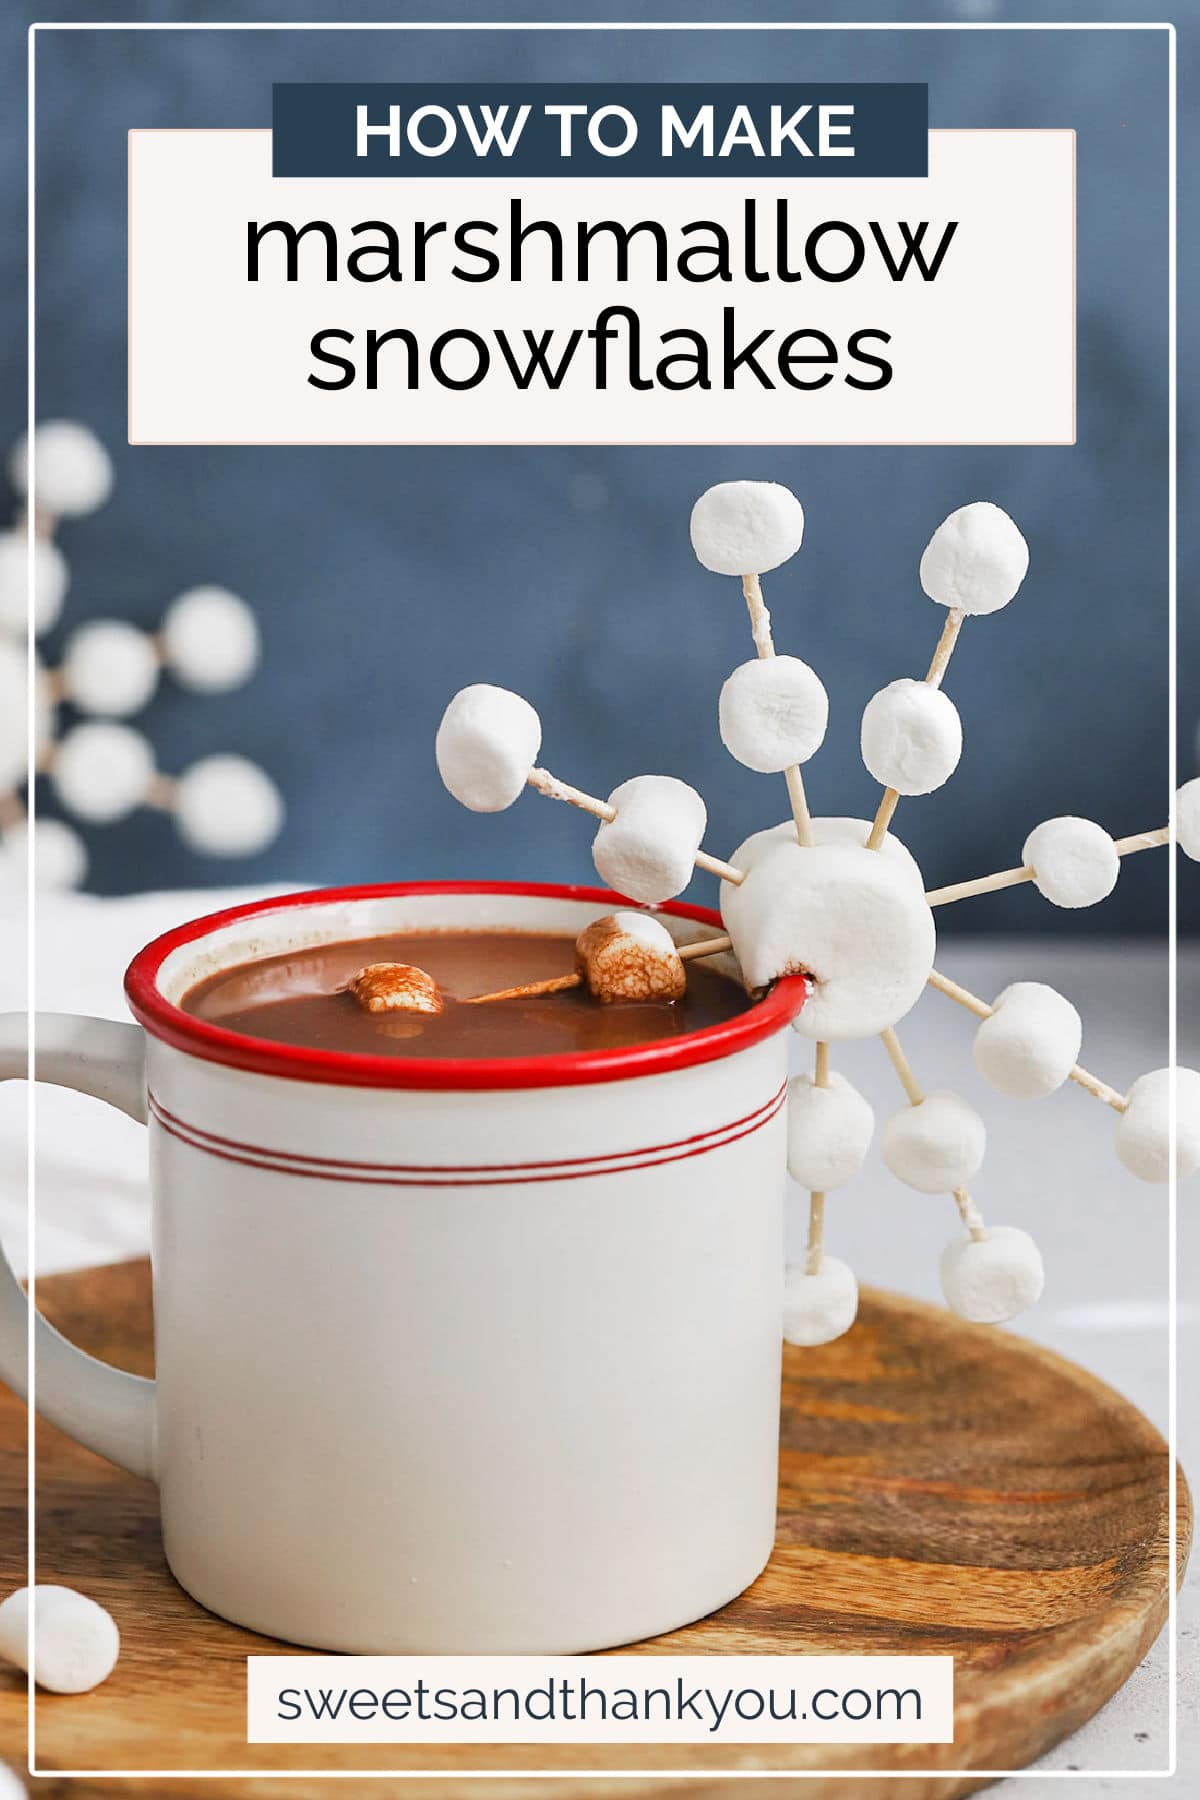
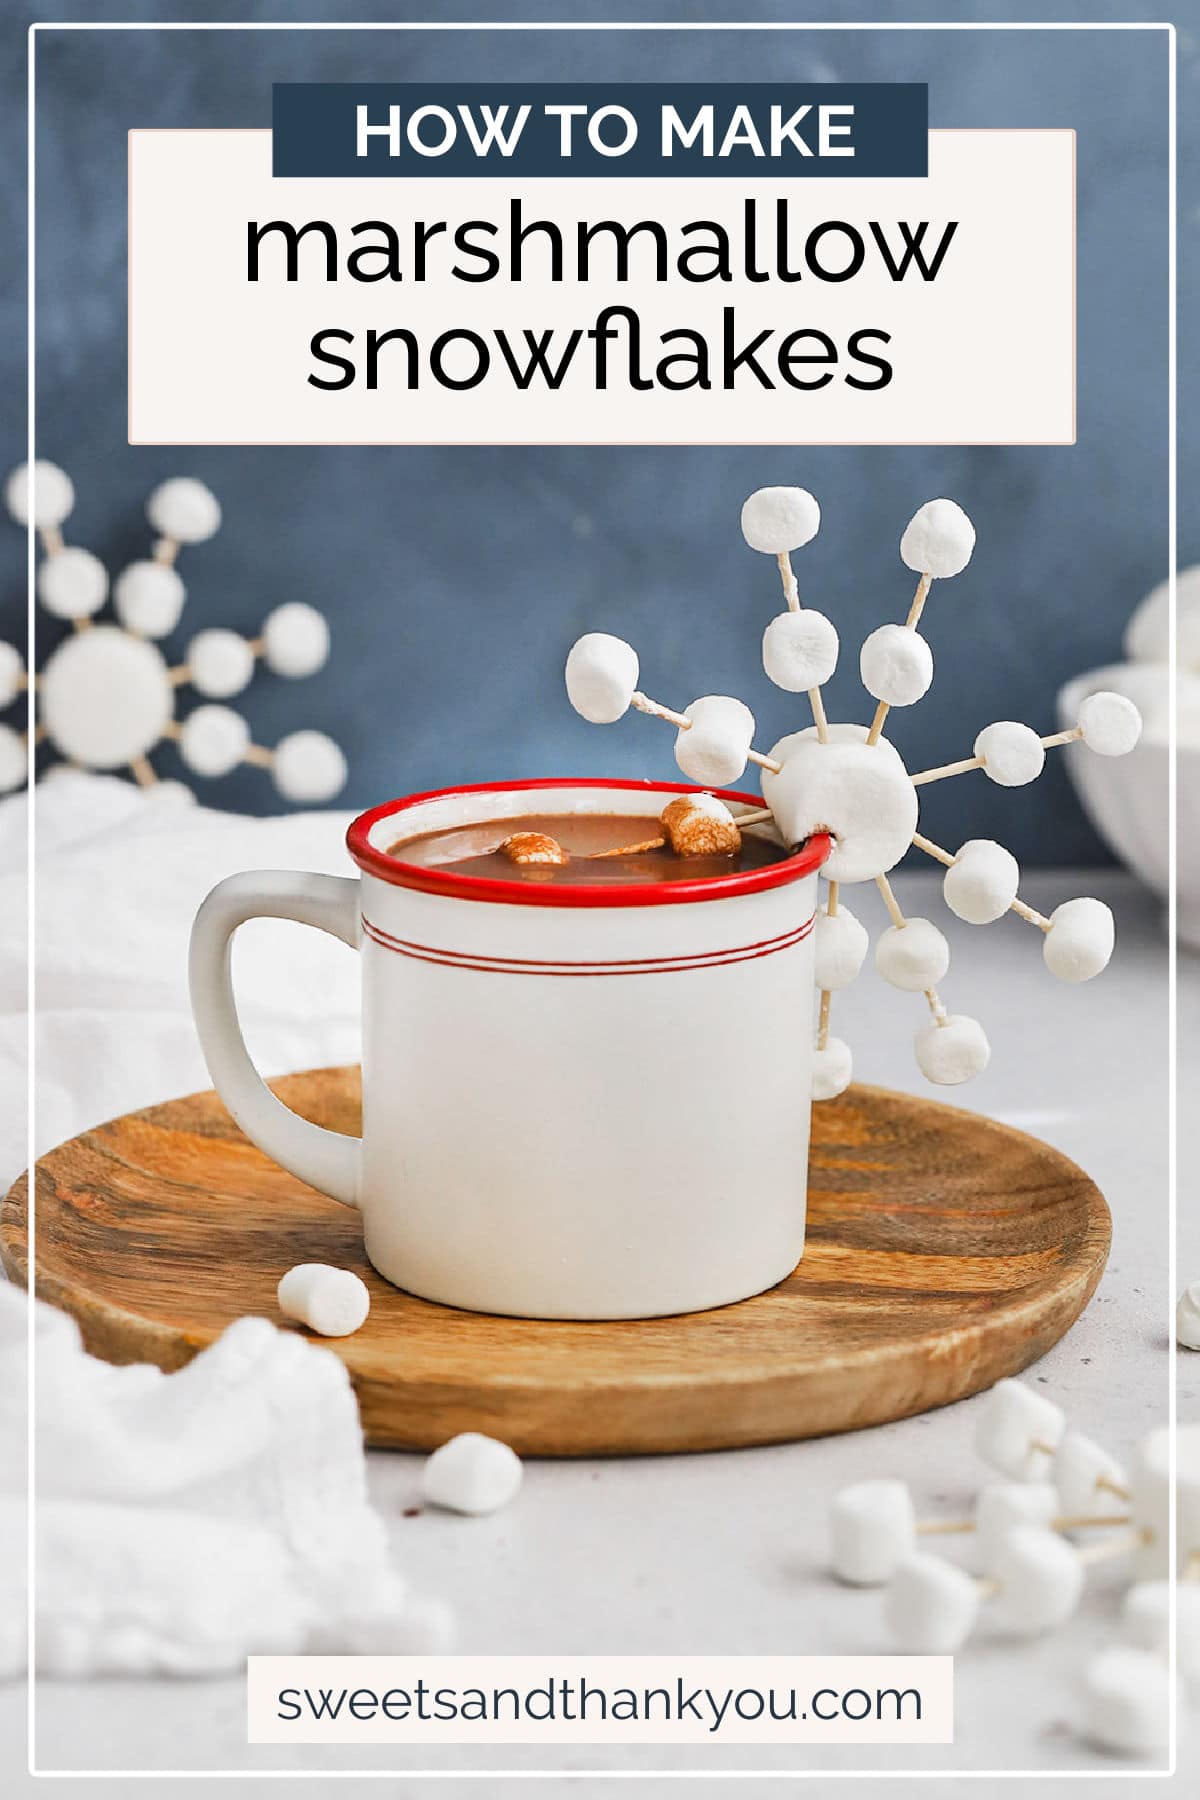
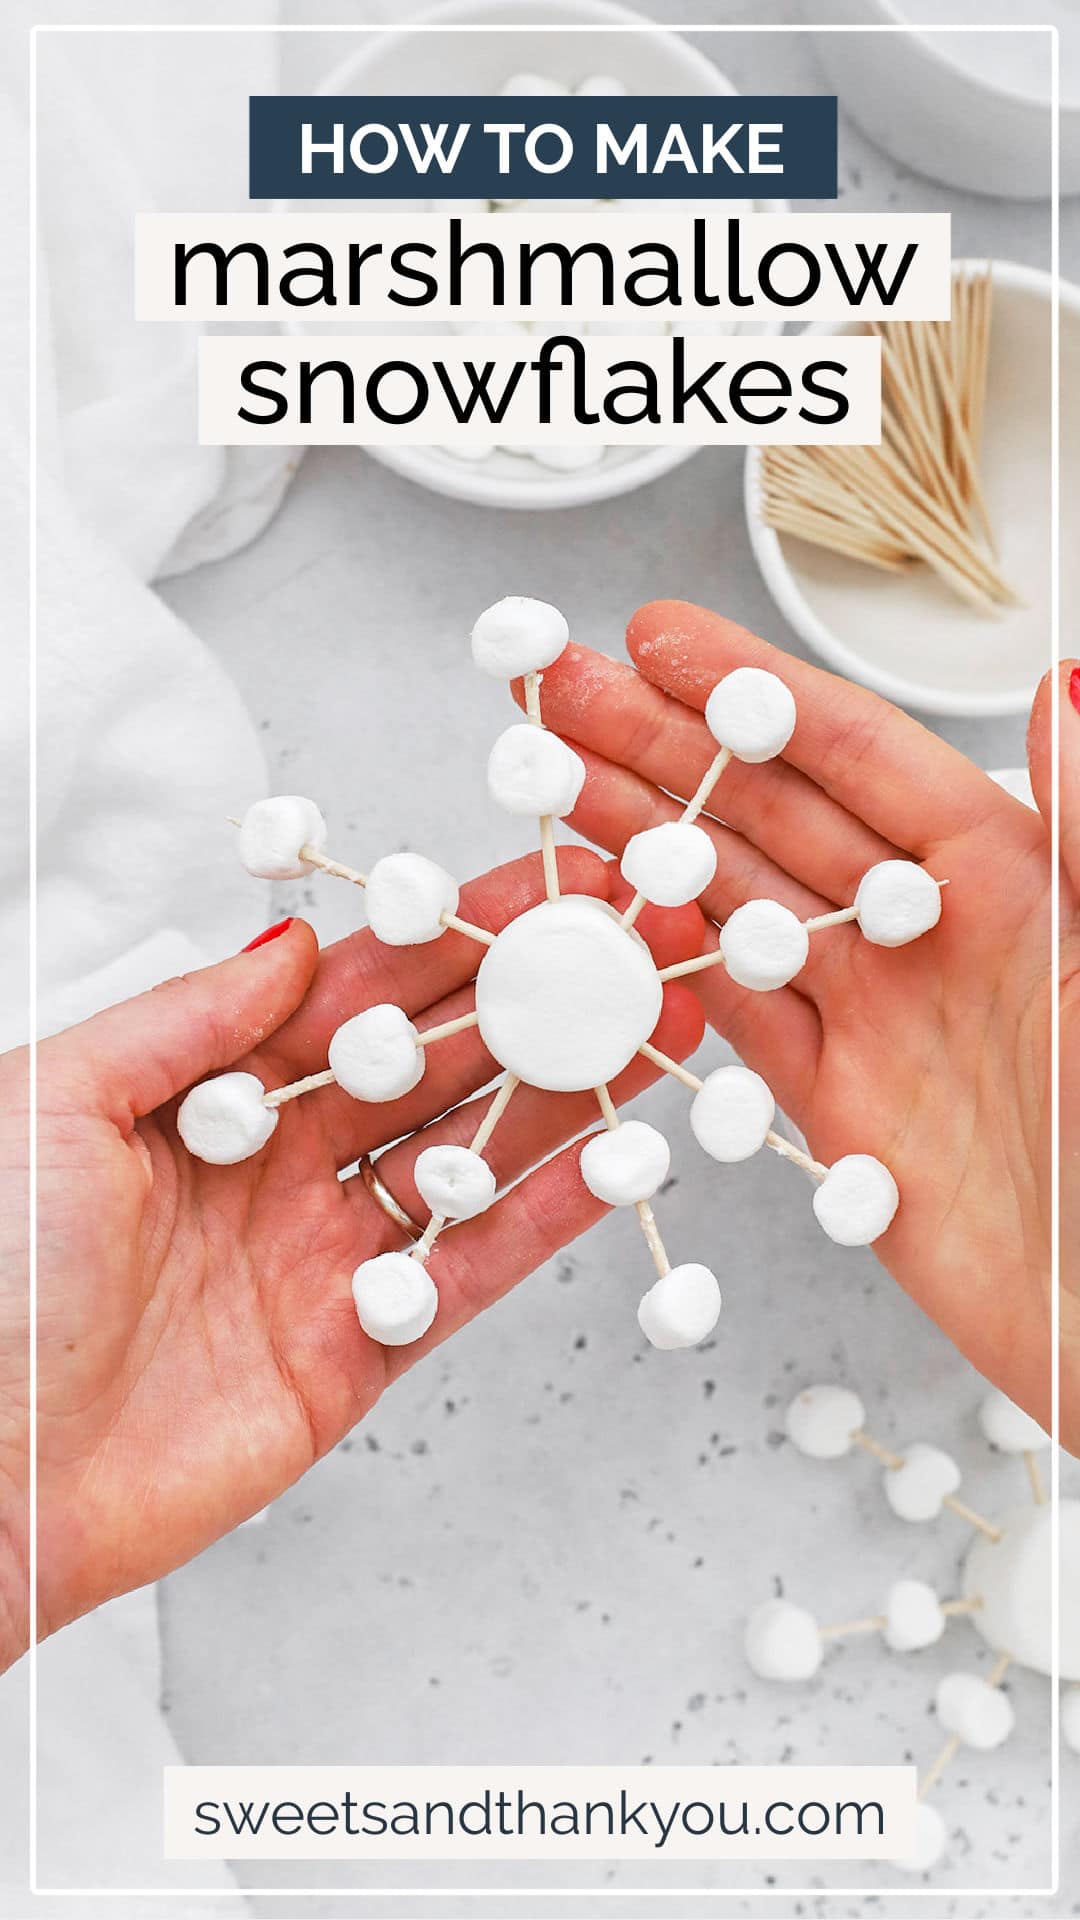
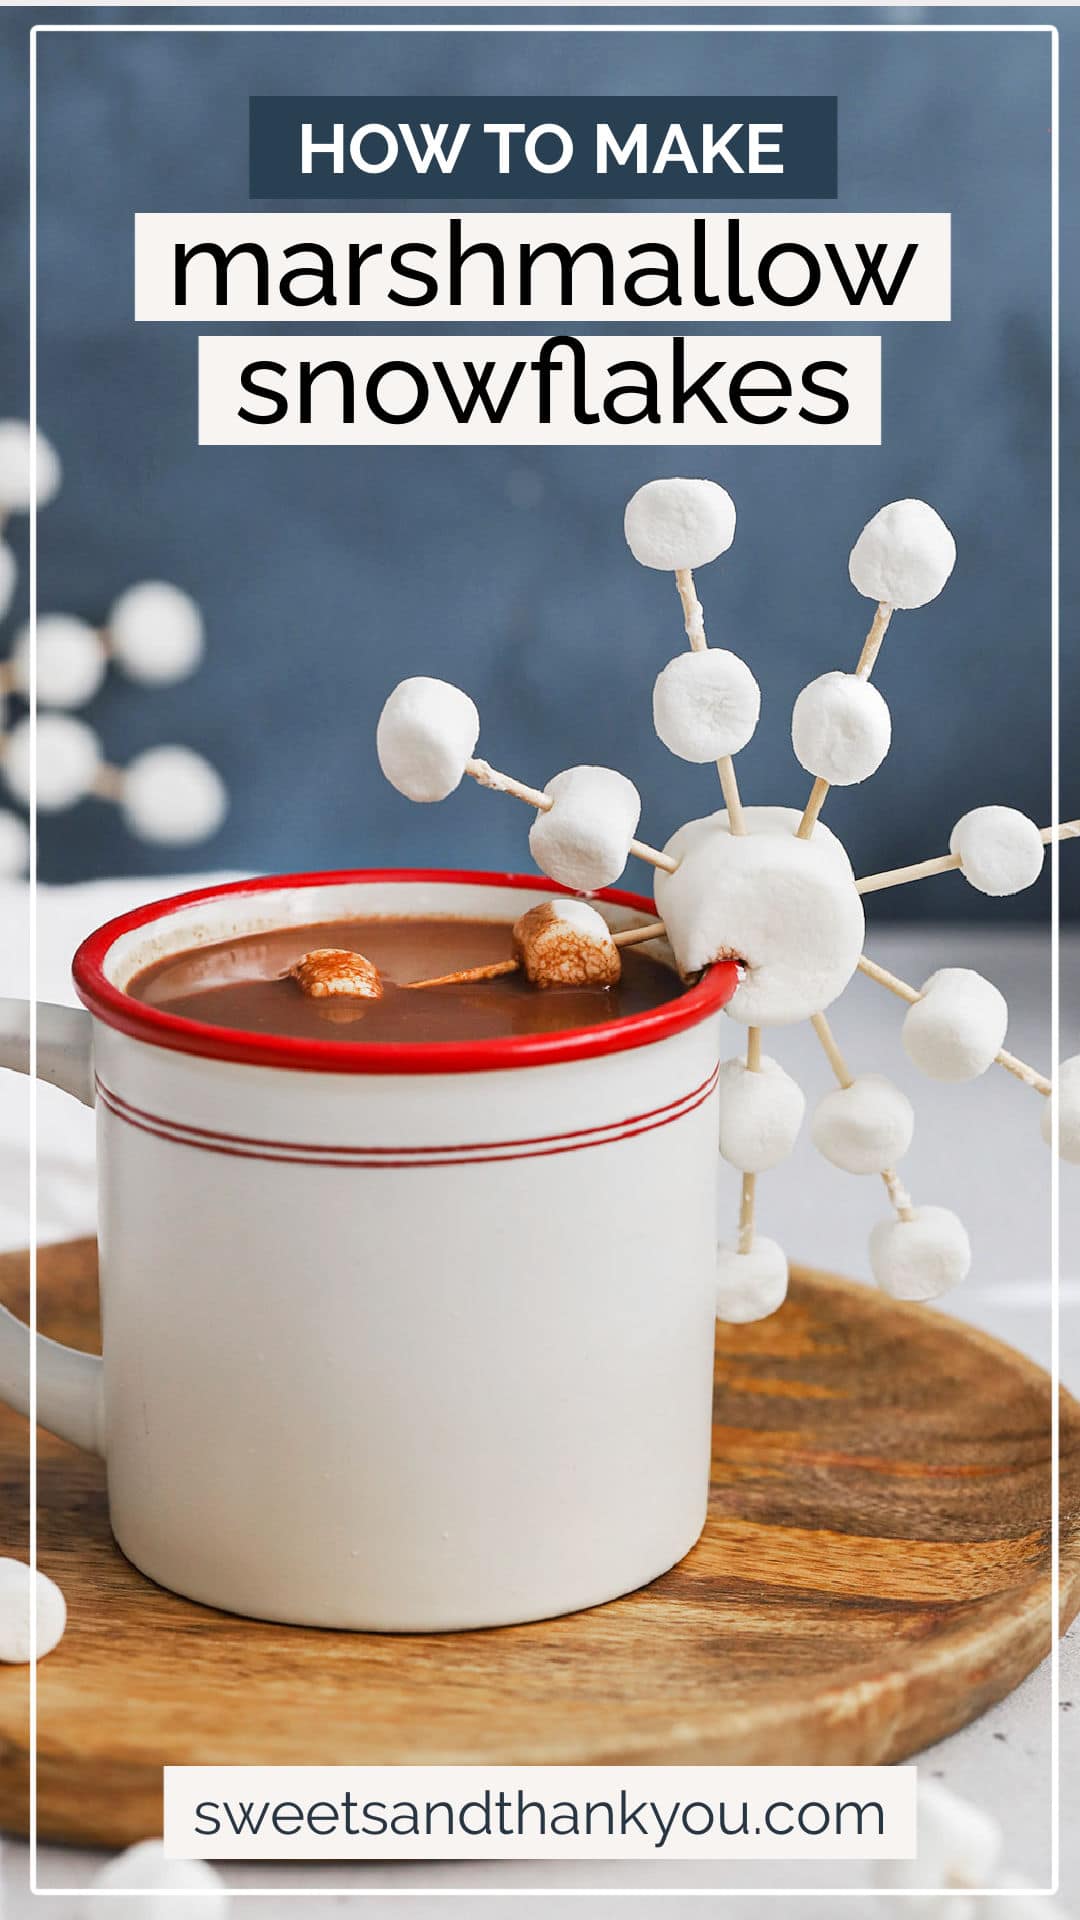
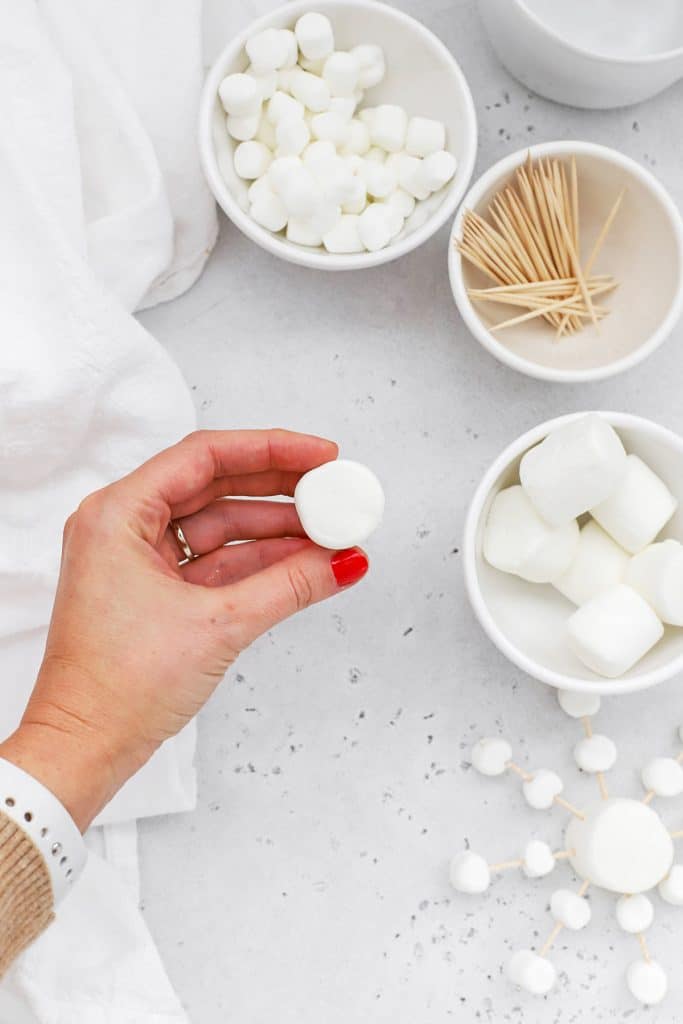
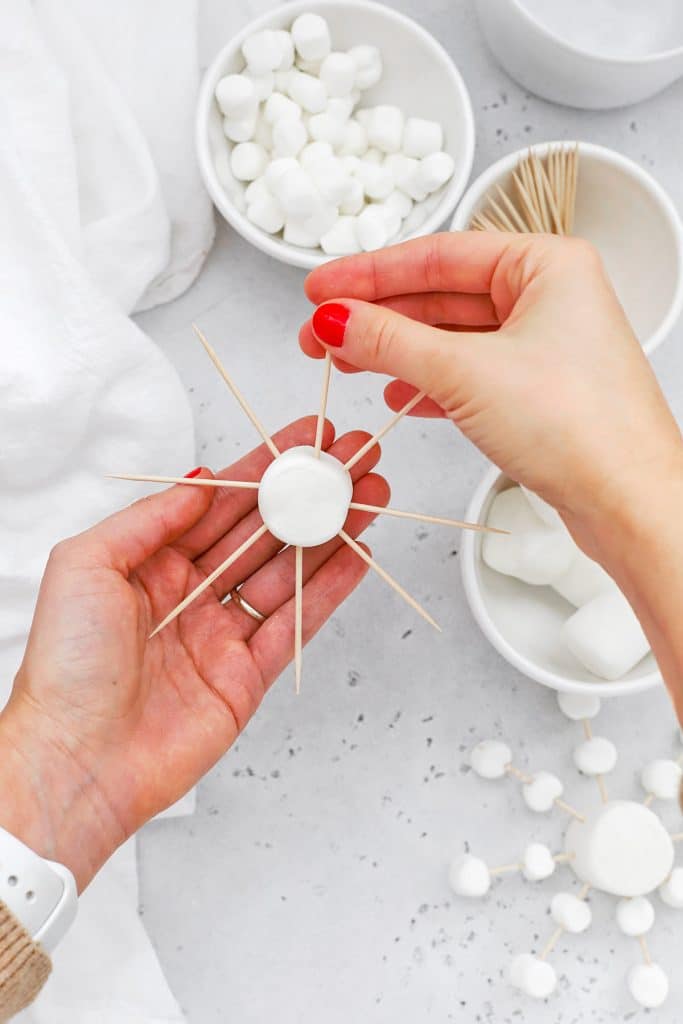
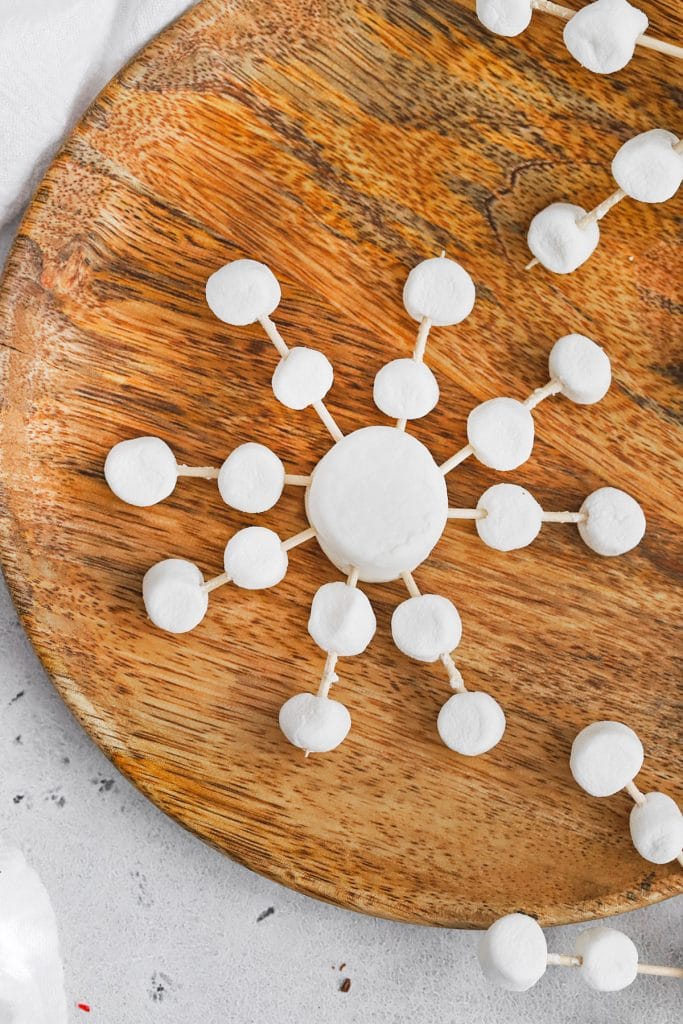
- Start With A Large Marshmallow For Your Snowflake Center. For each snowflake, choose a large marshmallow to act as the center of the snowflake. Hold the large marshmallow so that the circular side (the top or bottom of the cylinder) faces you. (This makes for a prettier snowflake.)
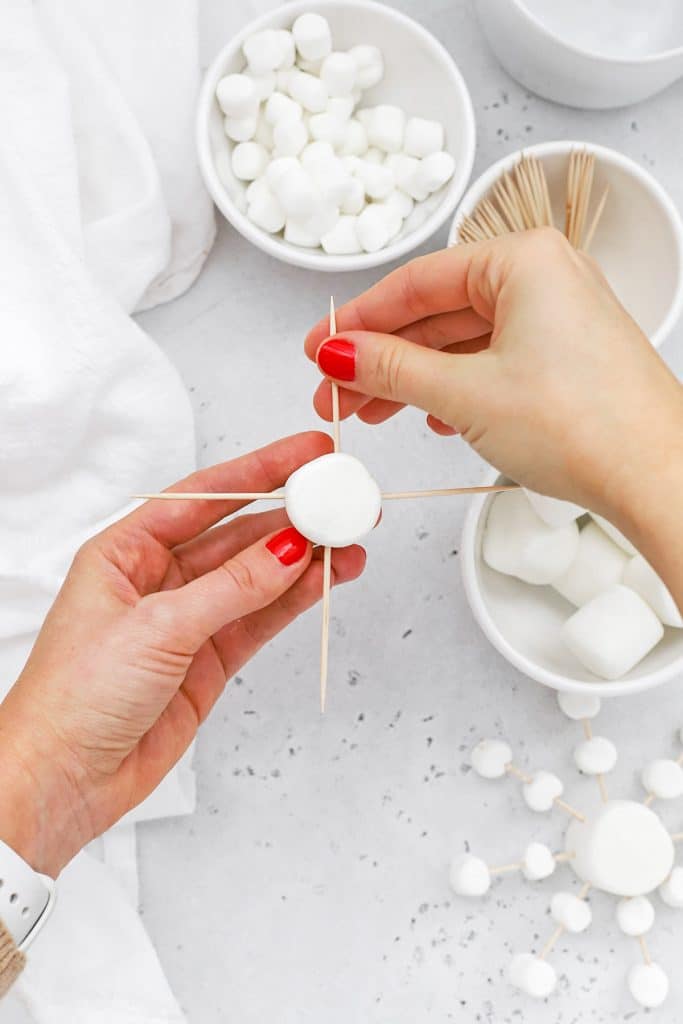
- Add Toothpicks To Make The Points Of Your Marshmallow Snowflakes. Insert 6-8 toothpicks around the circle (I like to do 8. I place 4 toothpicks into the center marshmallow like the points of a compass, then fill in the gaps with another toothpick in between each for a total of 8.)
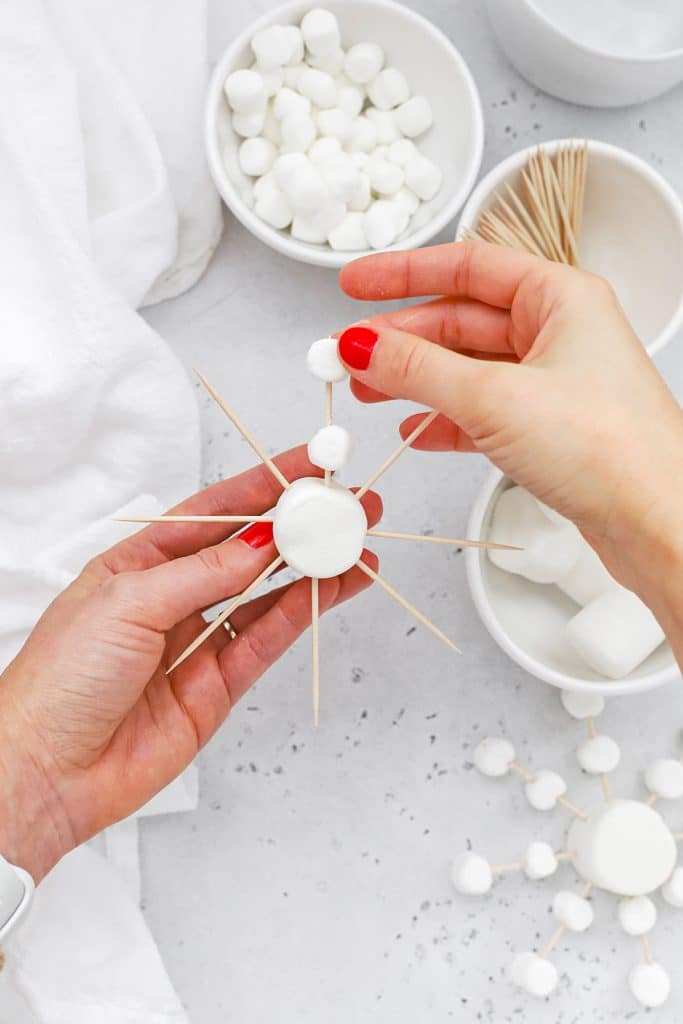
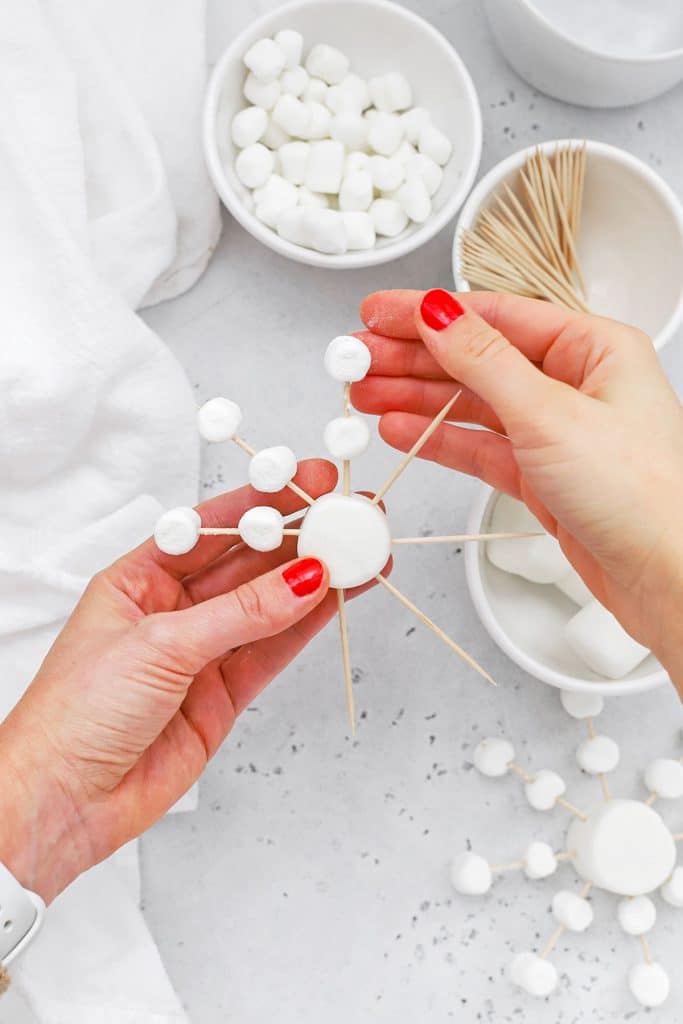
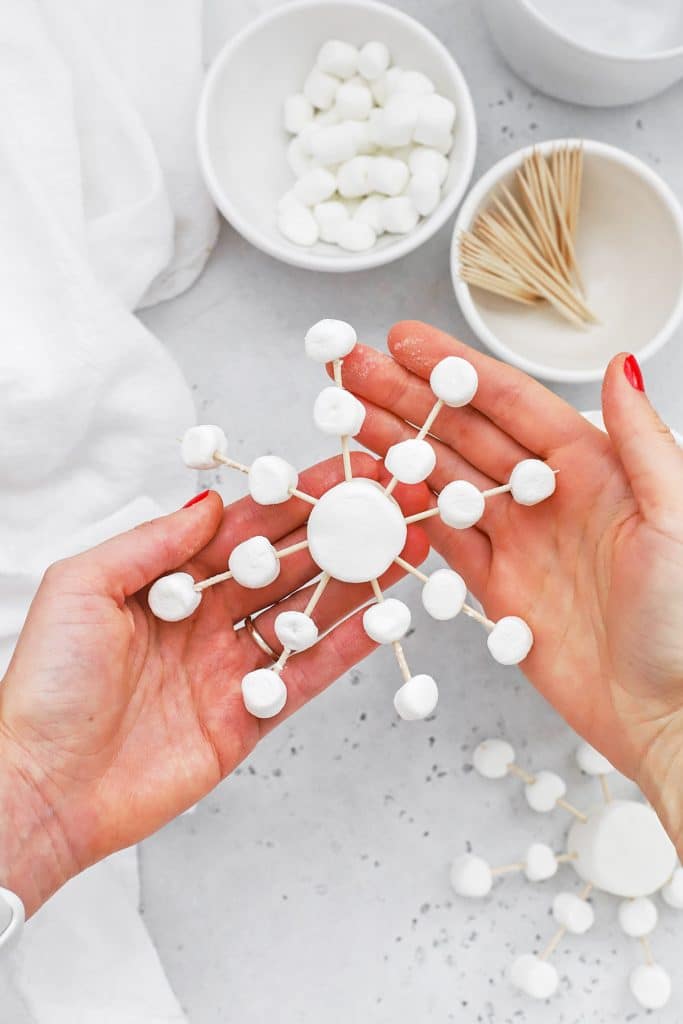
- Add Mini Marshmallows To Make Your Design! Then, decorate each toothpick with small marshmallows to make your snowflake design. Again, I recommend holding the marshmallows so the circular side faces you for the prettiest effect. For the sample snowflake, I put 2 mini marshmallows on each toothpick, but you can create any different designs or patterns you like!)
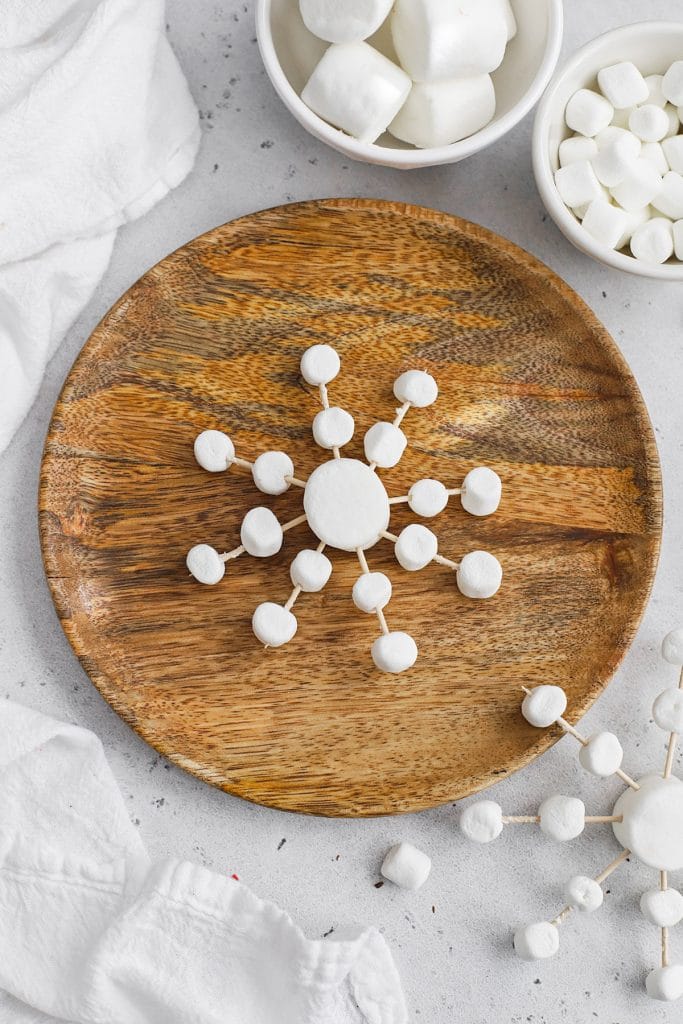
- Then, Serve, Store, Or Display! Serve with your favorite cup of hot chocolate, or store in a zip-top bag until you’re ready to use them. You can also hang them with string or ribbon for a fun decoration!
FAQ + Tips For Cute Marshmallow Snowflakes:

Use The Circular Side Of The Marshmallows! For the cutest snowflake marshmallow hot cocoa toppers, I recommend placing and holding each marshmallow with the circular side (the top or bottom of the cylinder shape) facing you. It’ll look the most round and neat, which gives a really crisp, pretty appearance to the snowflakes.
Try Using Flavored Marshmallows! It won’t have the same classic white appearance, but you can add another layer of fun and pattern play to your marshmallow snowflakes by mixing in some flavored marshmallows. Try peppermint marshmallows at the holidays or the multicolor mini marshmallows you can sometimes find in the grocery store.
How Long Do Snowflake Marshmallows Last? Like most marshmallows, your mini marshmallow snowflakes will start to dry and harden the longer they’re exposed to the air, so to keep them fresh, you can store them in an airtight bag or airtight container. Kept this way, they’ll last 3-4 days. Out in the air, they’ll start to harden within a day or so.
Do Fresh Or Stale Marshmallows Work Better For Marshmallow Snowflakes? If you’re strictly using them for building (and not eating), stale or dry/hard marshmallows can be easier to work with. That said, if you plan to eat and enjoy your toothpick and marshmallow snowflakes, I highly recommend using fresh ones. They’re still quite easy to work with, and will taste better.
WE ♥


Marshmallow Snowflakes
- Total Time: 5 minutes
- Yield: 1 snowflake
- Diet: Gluten Free
Description
Learn how to make marshmallow and toothpick snowflakes to decorate your next mug of hot cocoa! It only takes minutes & it’s so fun!
Ingredients
- Toothpicks (6-8 per snowflake)
- Large Marshmallows (1 per snowflake)
- Mini Marshmallows (12-16 per snowflake)
Instructions
- For each snowflake, choose a large marshmallow to act as the center of the snowflake. Hold the large marshmallow so that the circular side (the top or bottom) faces you. (This makes for a prettier snowflake.)
- Insert 6-8 toothpicks around the circle (I like to do 8. I place 4 toothpicks in the center marshmallow like the points of a compass, then fill in the gaps with another toothpick in between each for a total of 8.)
- Then, decorate each toothpick with mini marshmallows to make your snowflake design! Again, I recommend holding the marshmallows so the circular side faces you for the prettiest effect. For the sample snowflake, I put 2 mini marshmallows on each toothpick, but you can create any design you like!)
- Serve with your favorite cup of hot chocolate, or store in a zip-top bag until you’re ready to use them. You can also hang them with string for a fun decoration!
- Prep Time: 5 minutes
- Cook Time: 0 minutes
- Category: Dessert
- Method: No-Bake
- Cuisine: American
