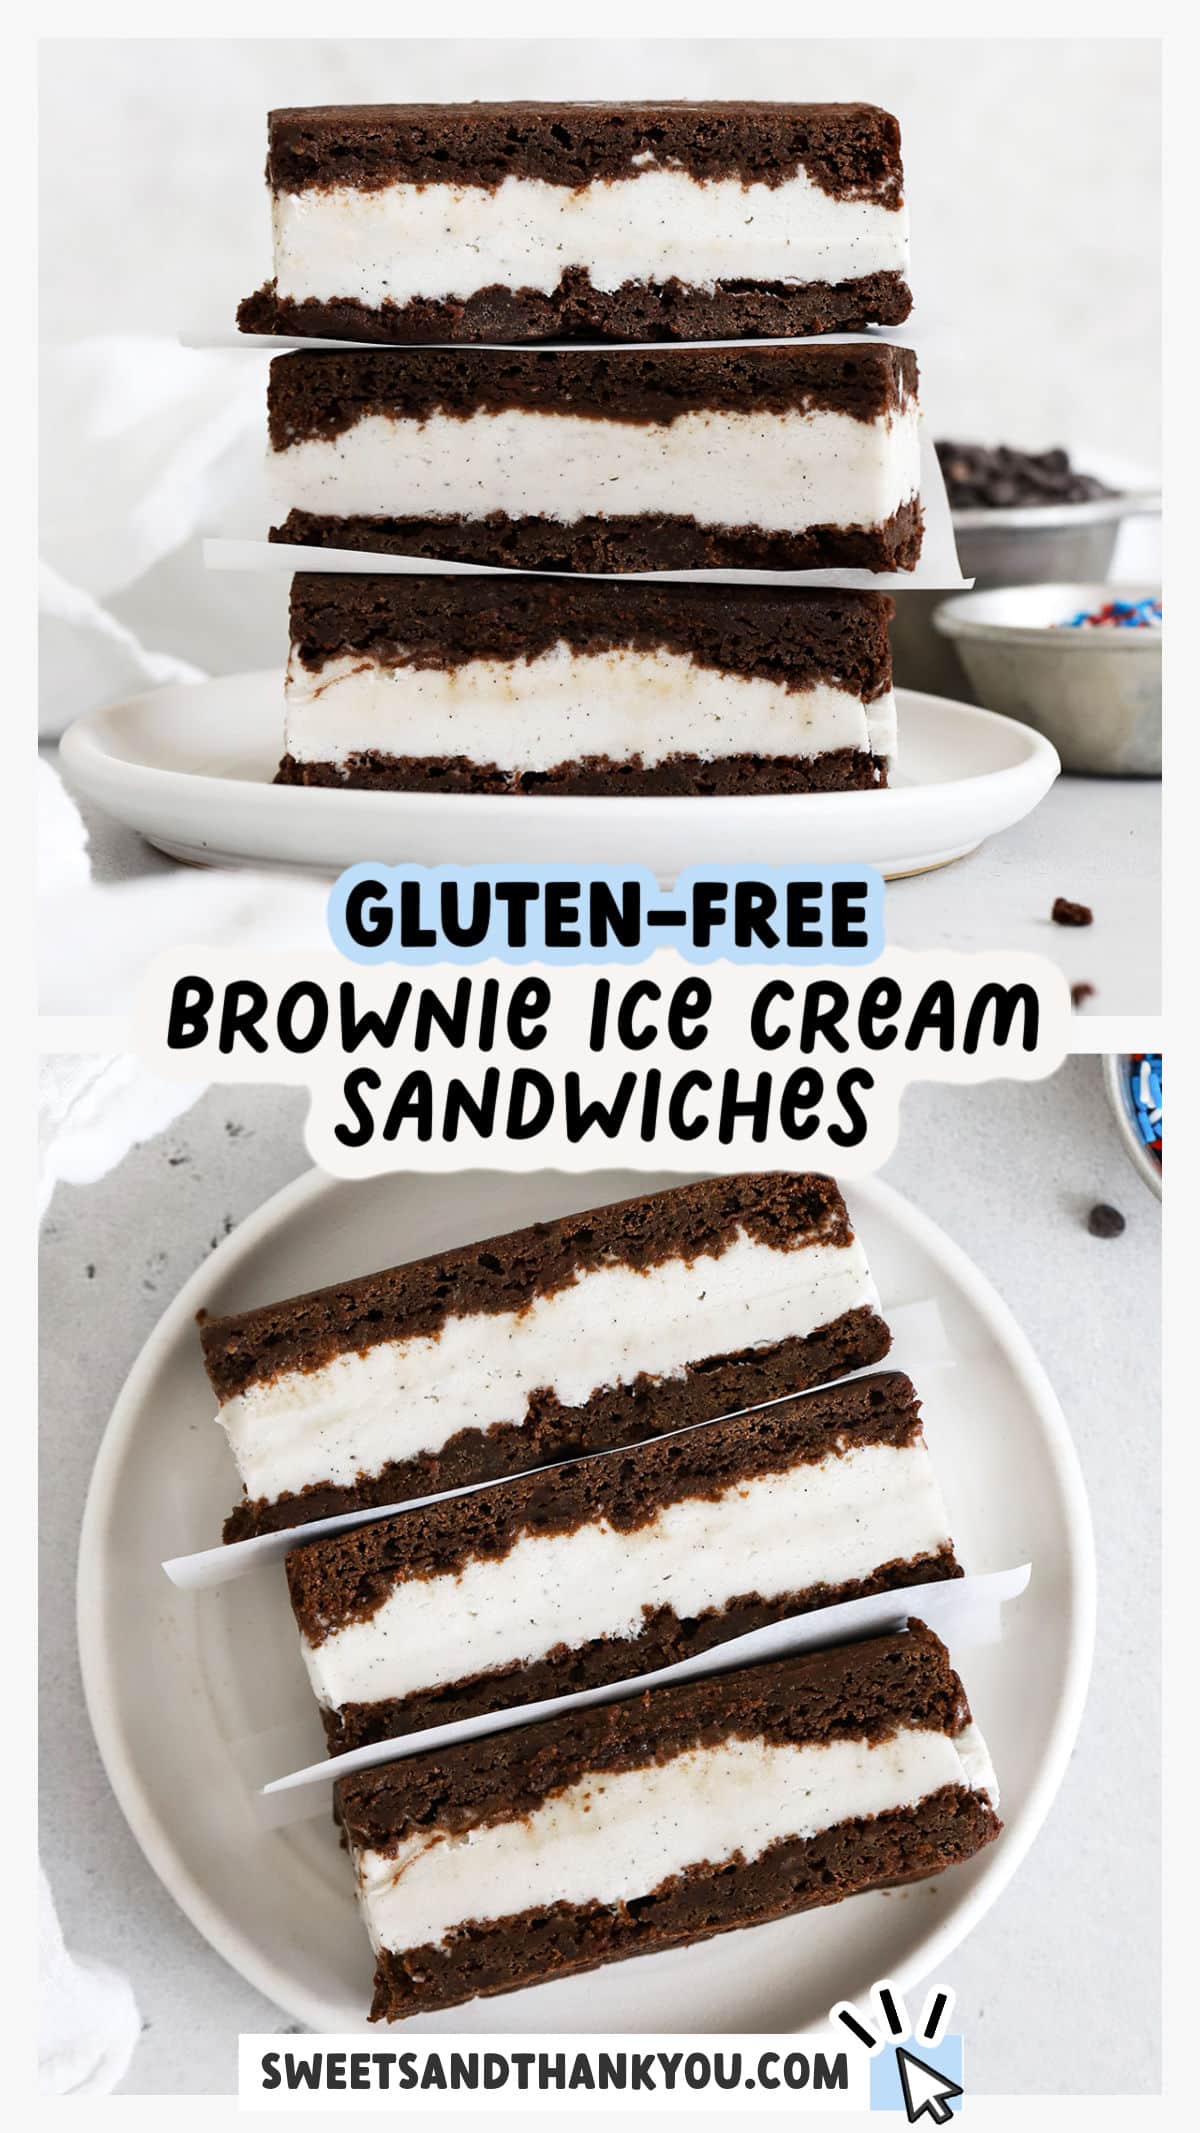
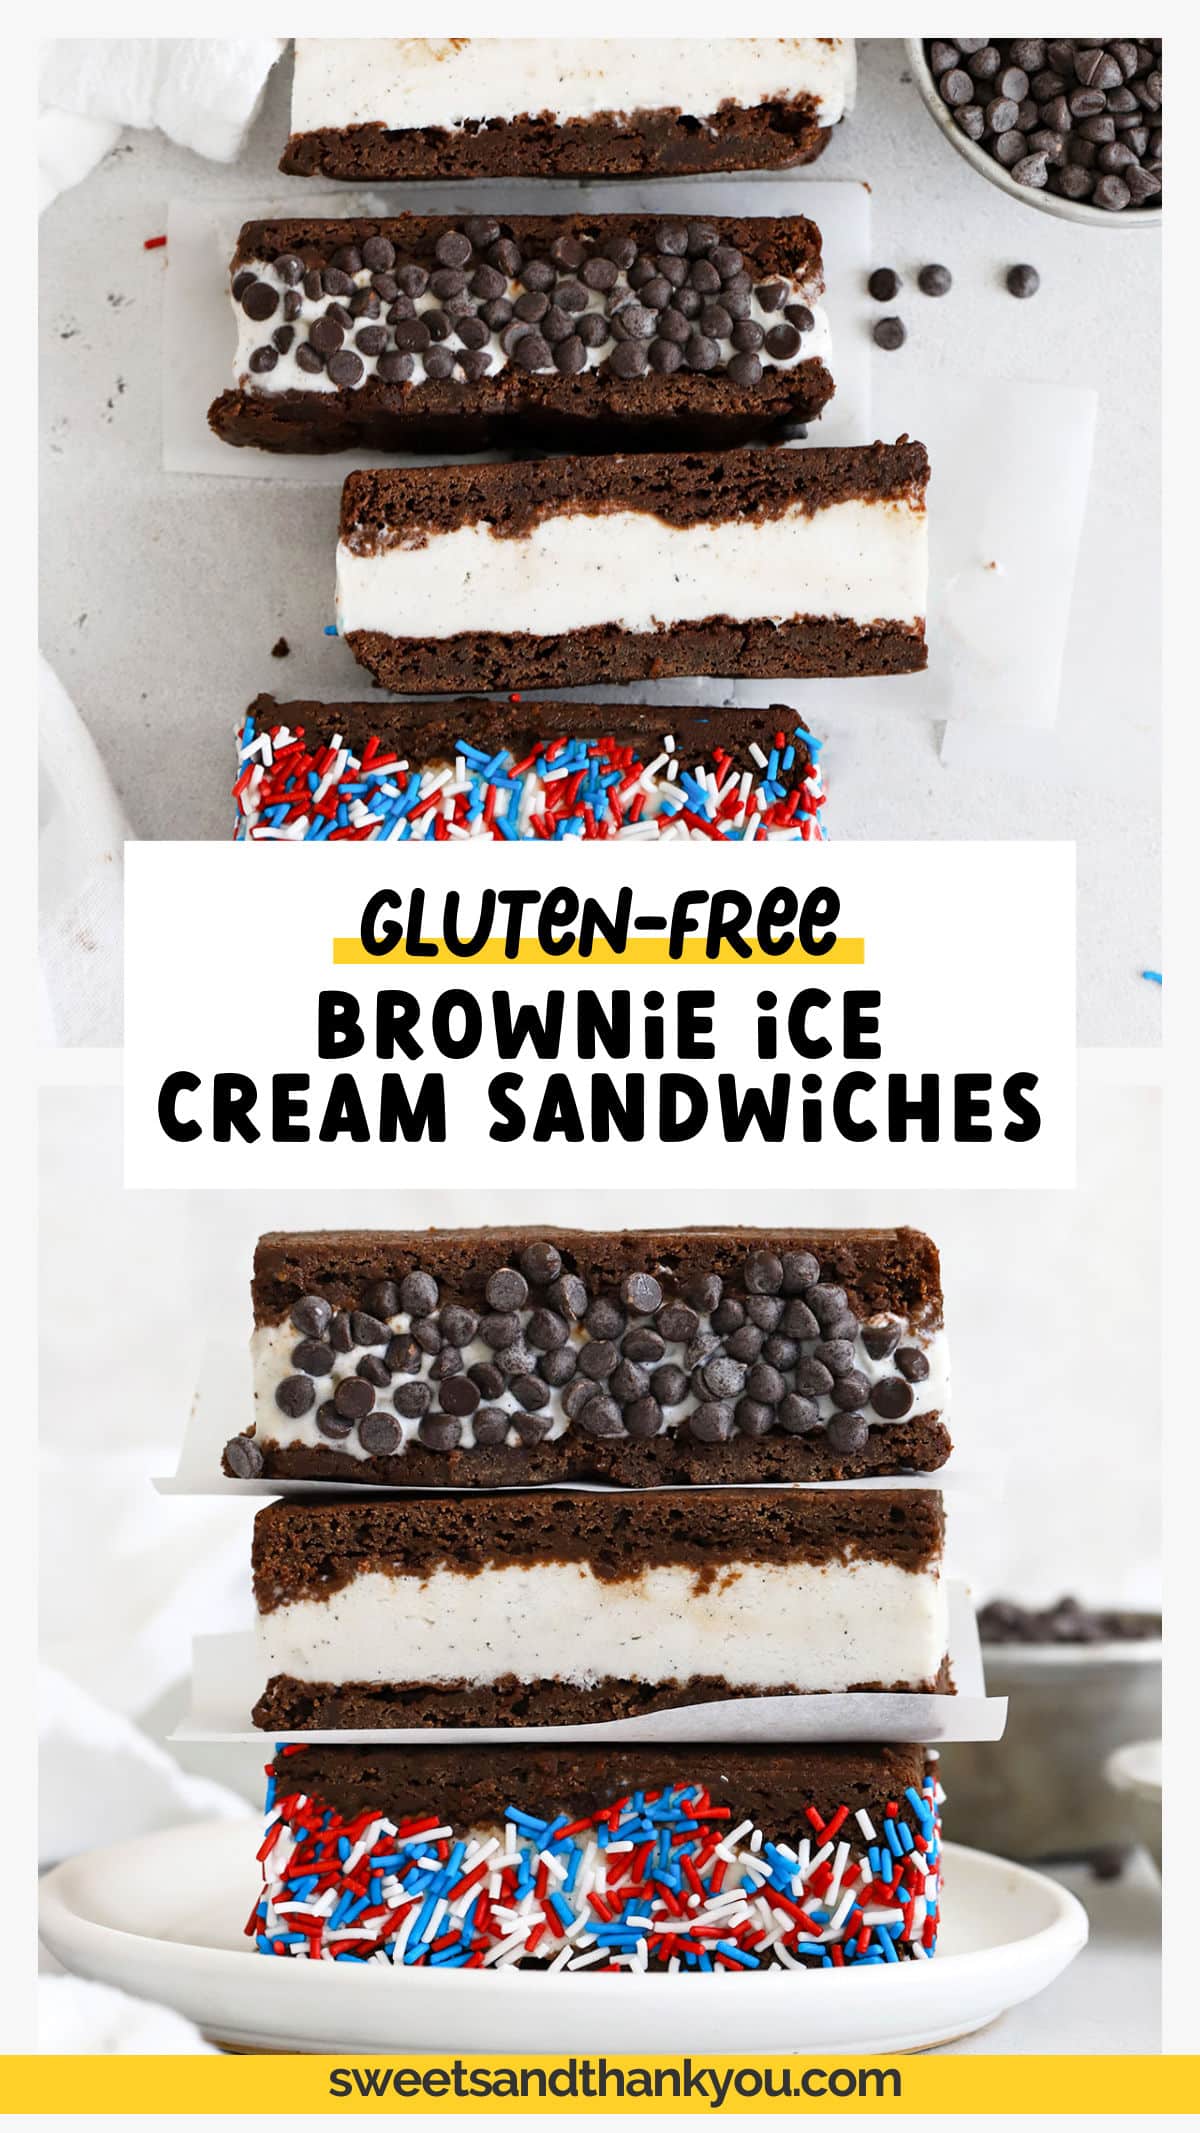
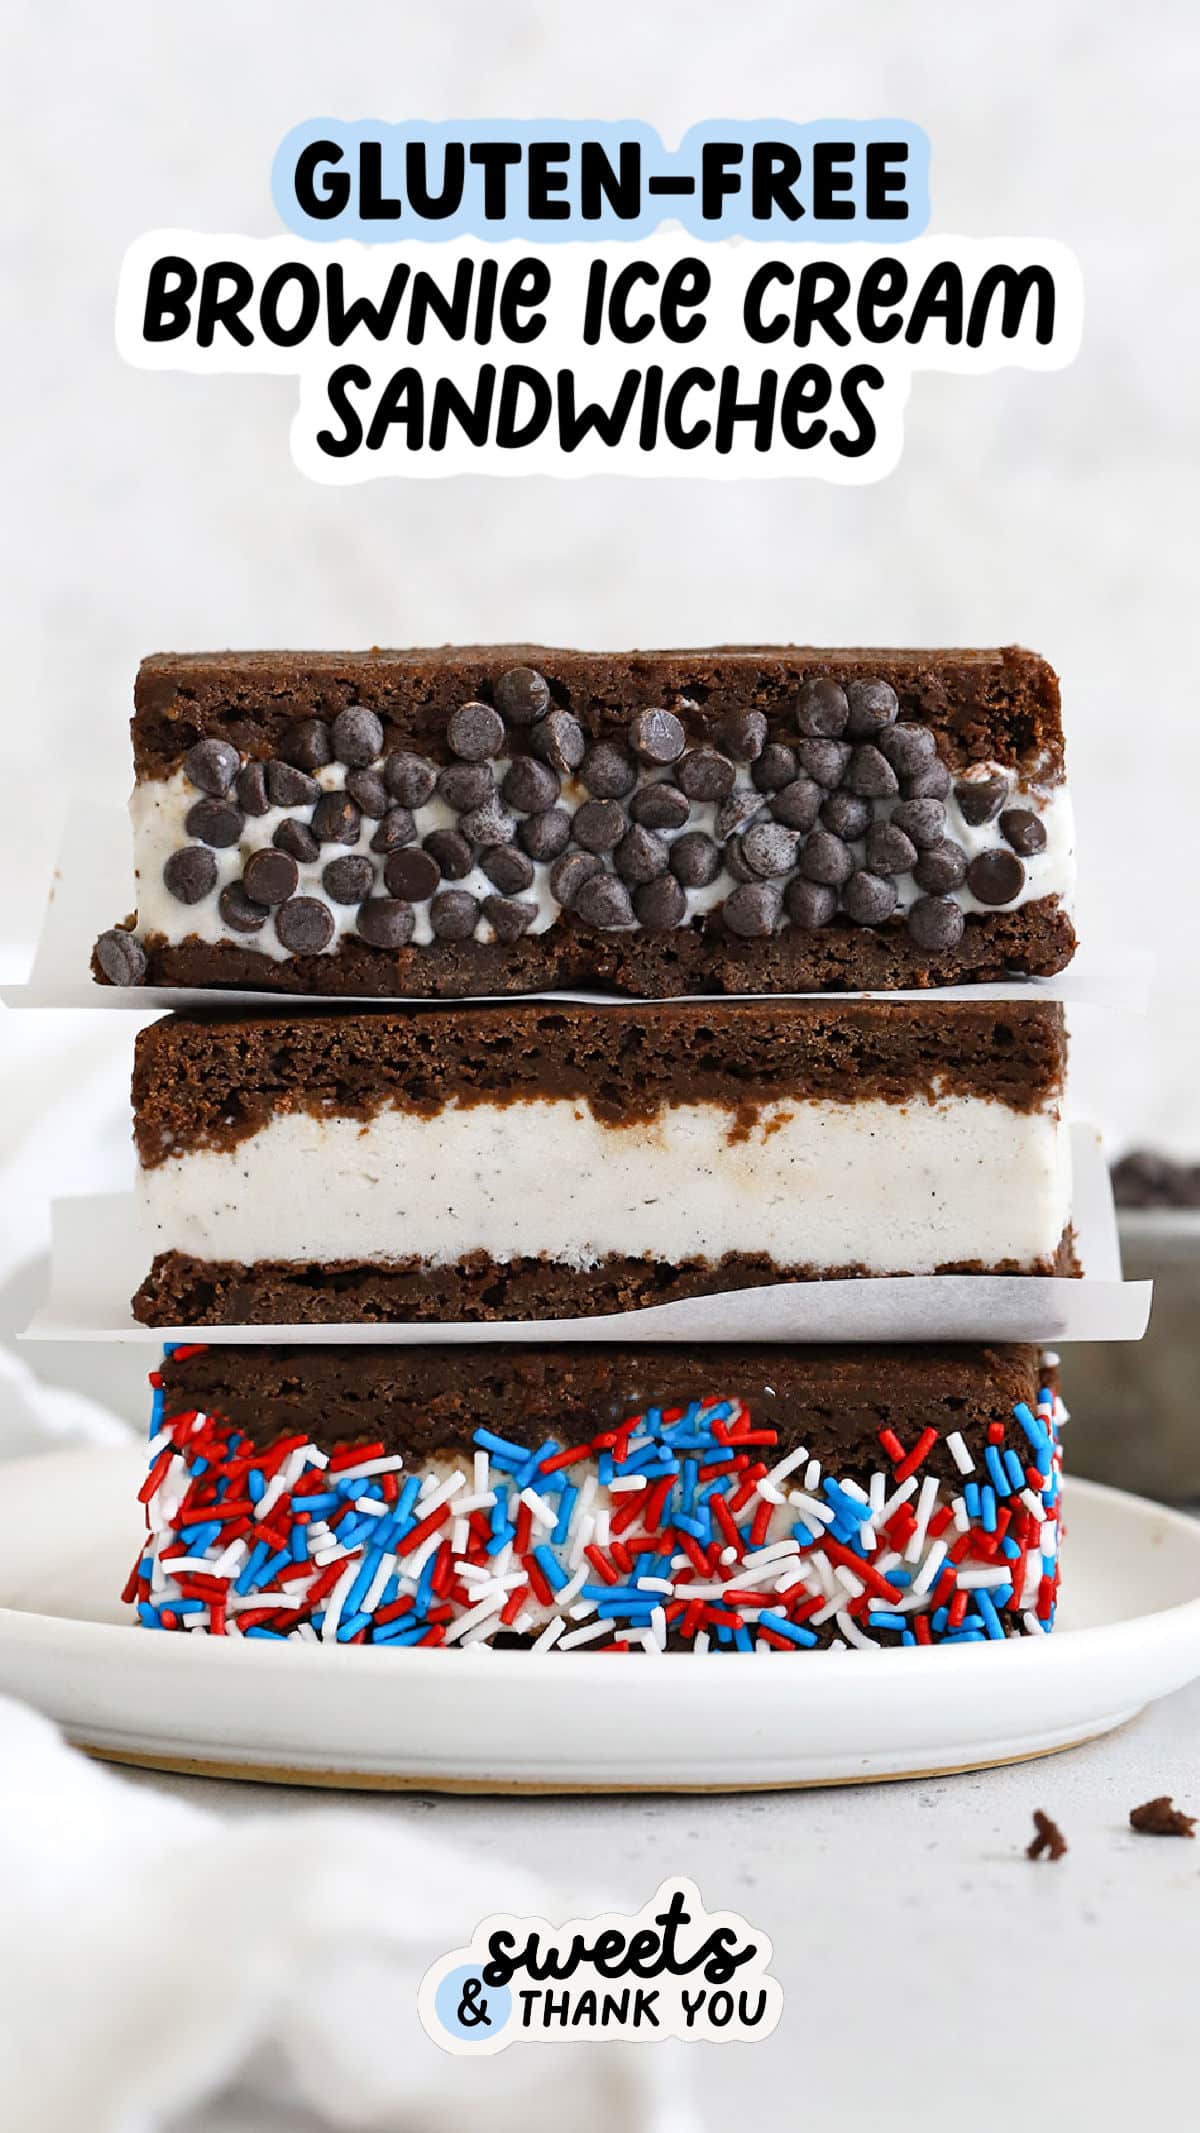
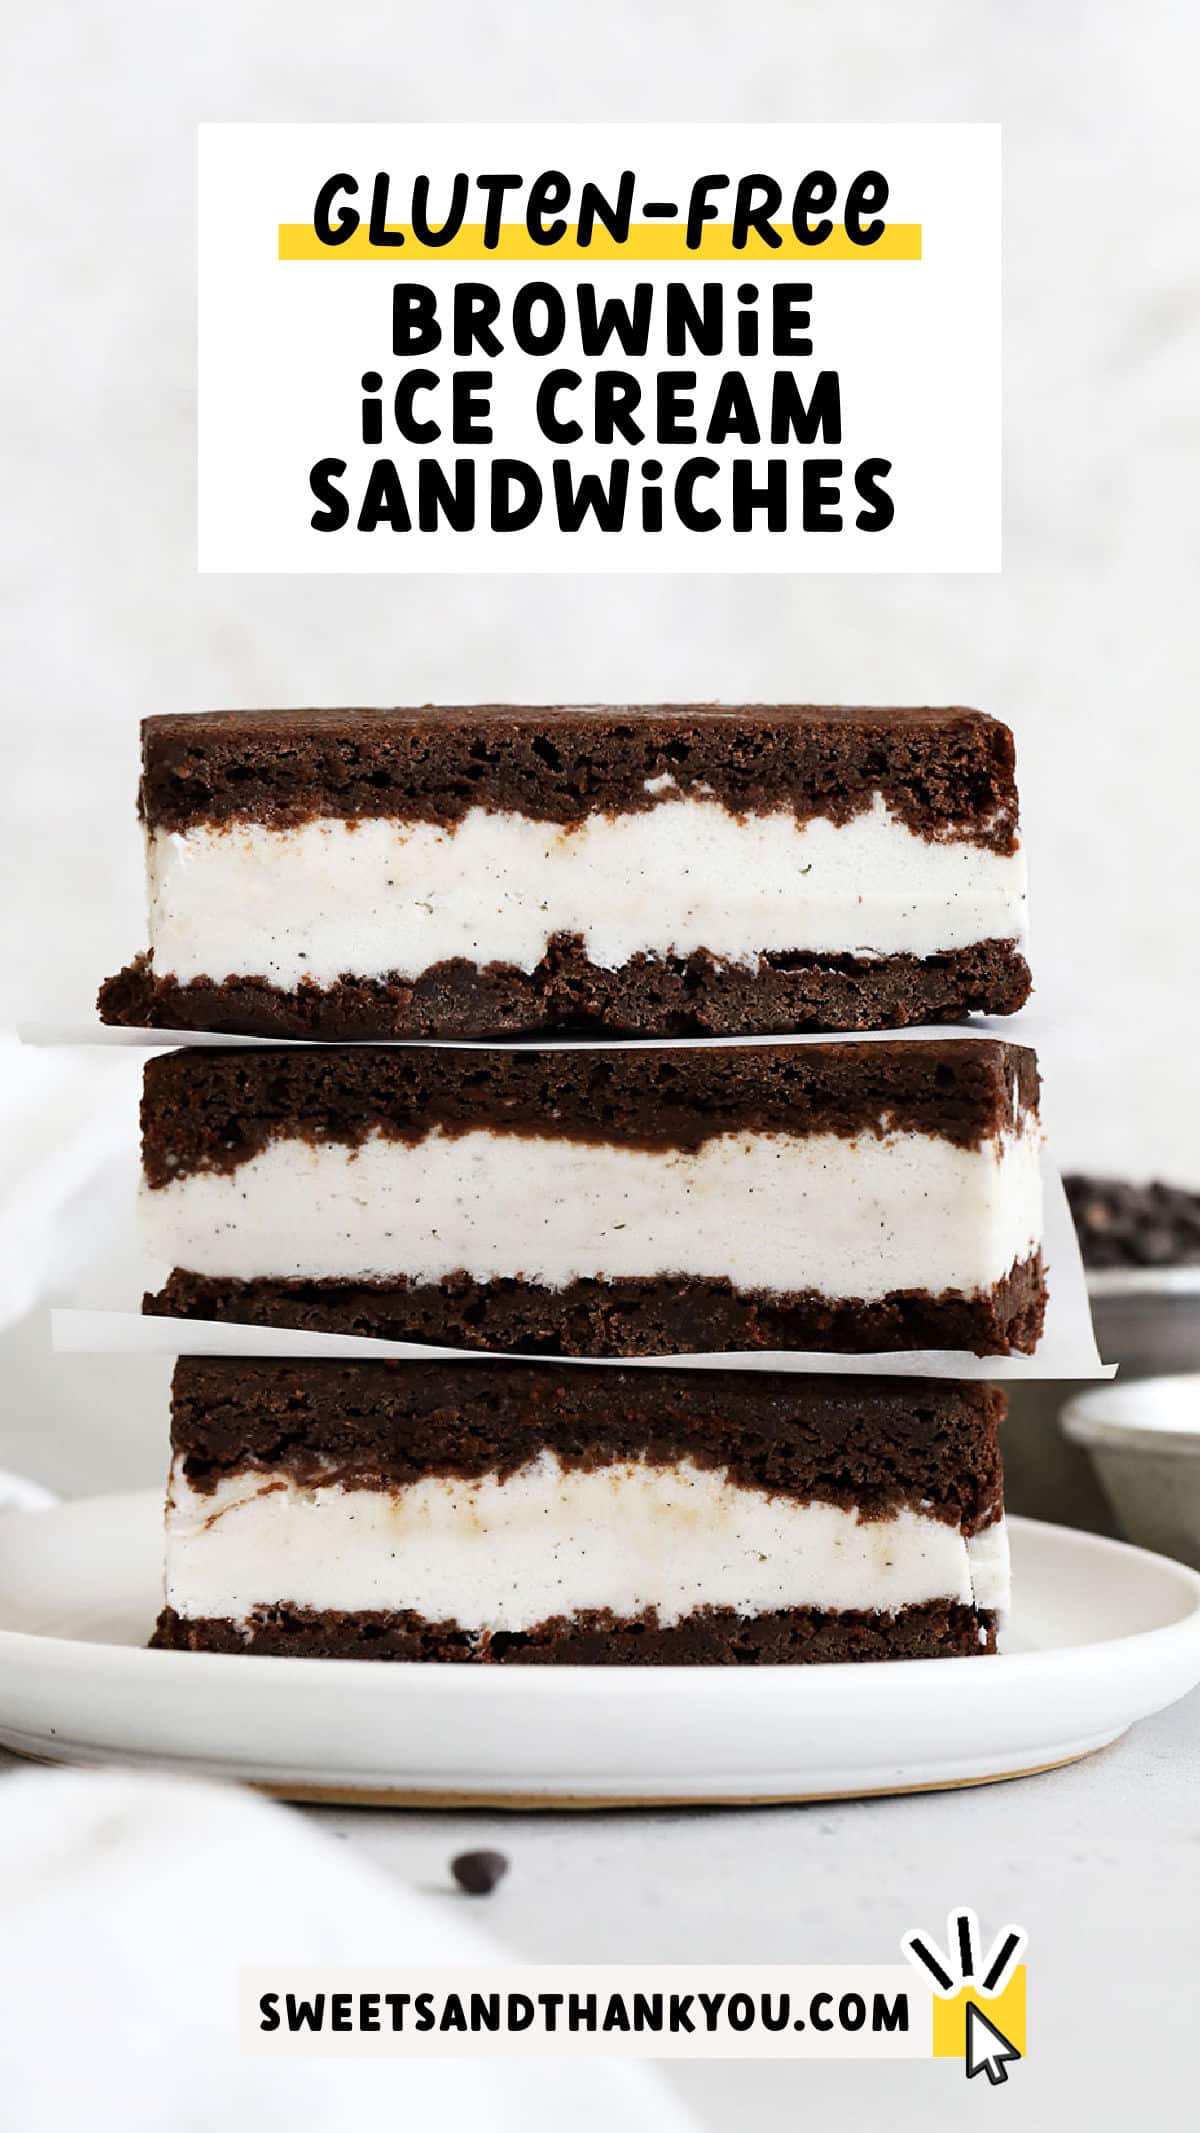
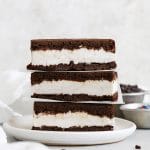
Gluten-Free Brownie Ice Cream Sandwiches
This post may contain affiliate links. See our disclosure policy for more.
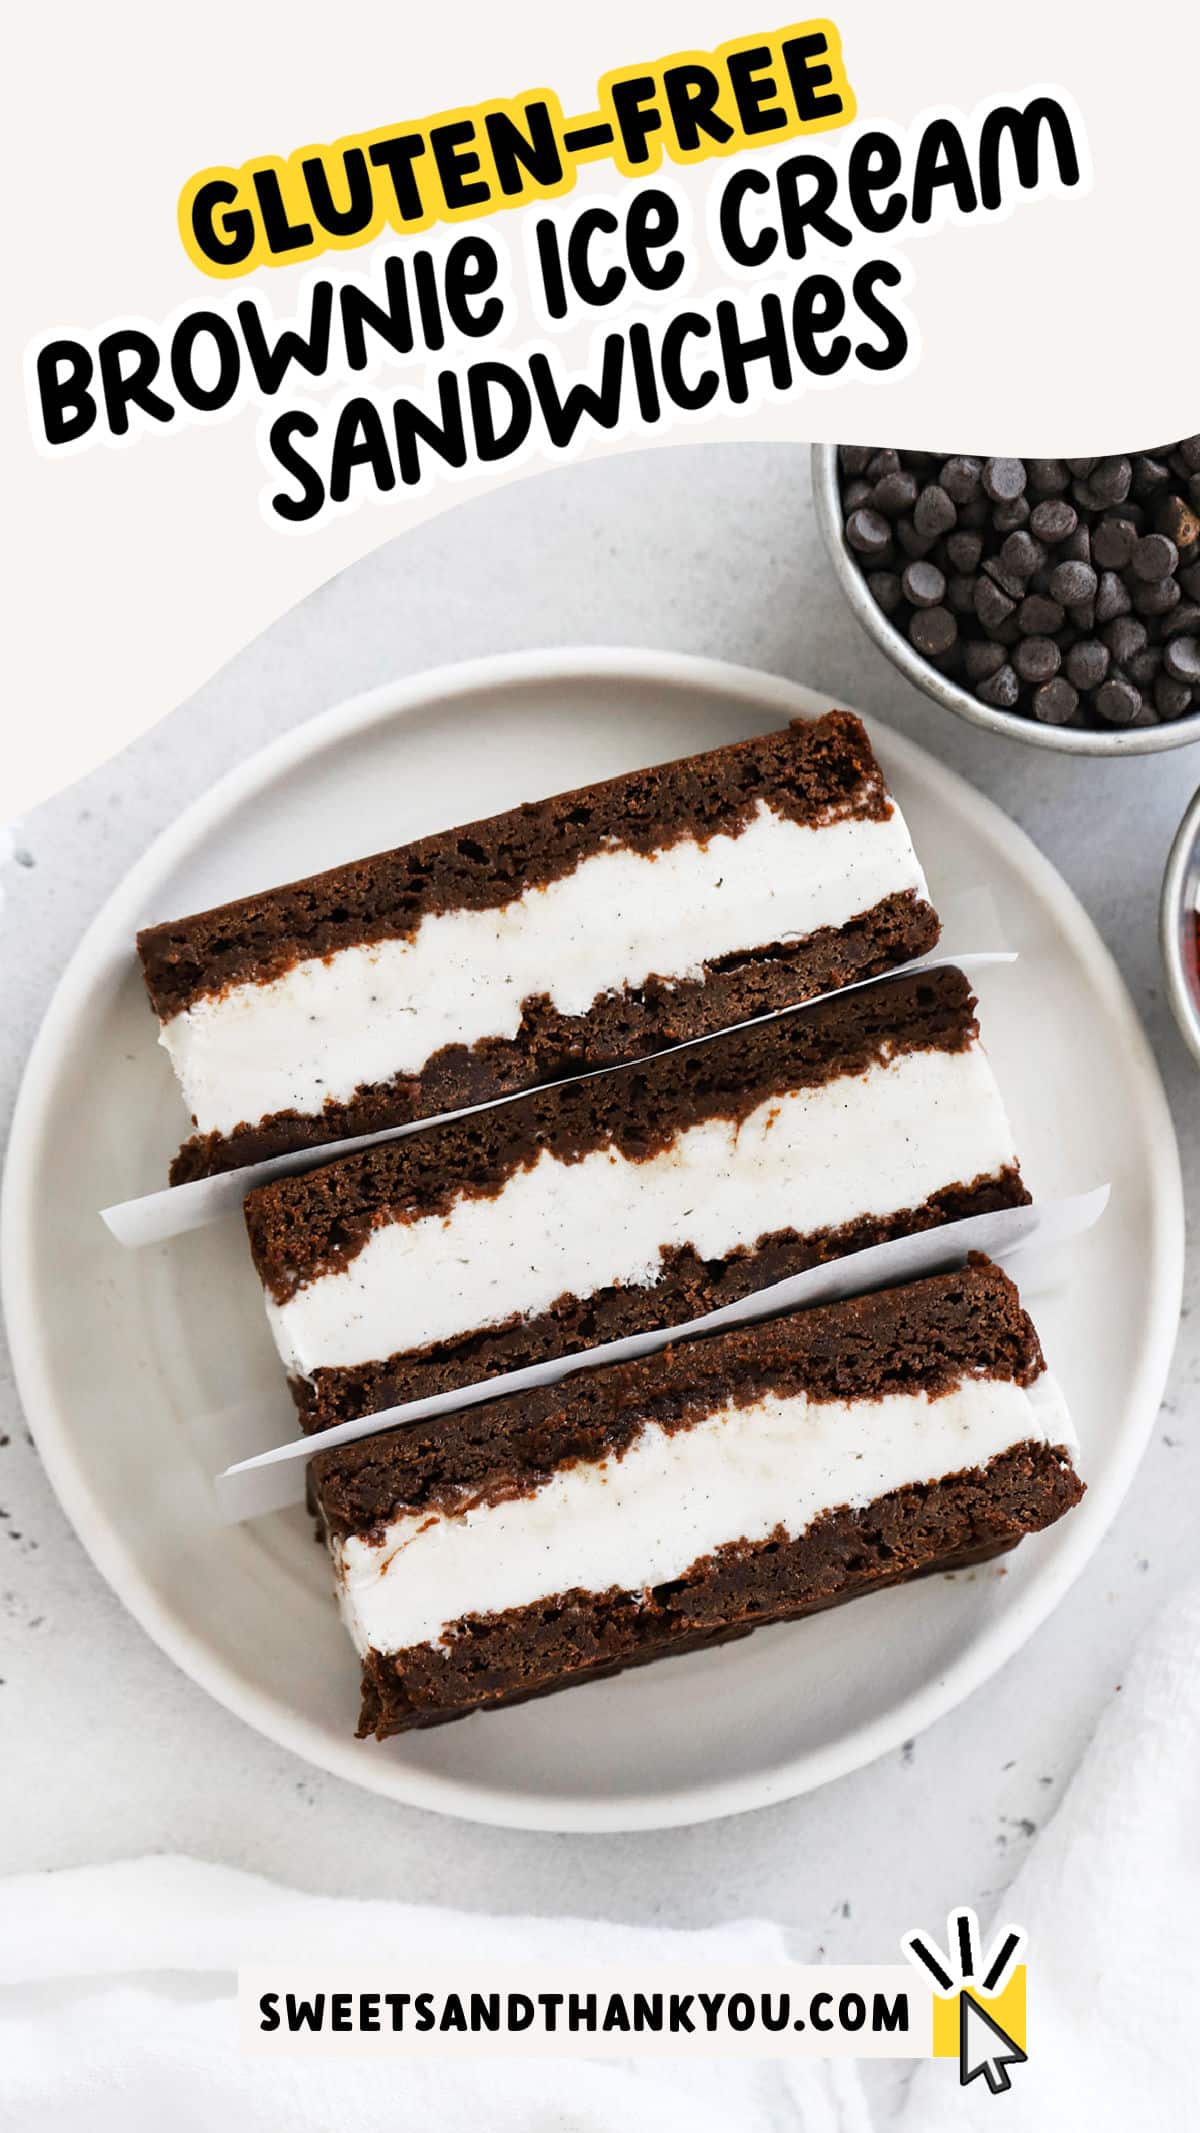
Learn how to make Gluten-Free Brownie Ice Cream Sandwiches–easy gluten-free ice cream sandwiches with all the classic flavor you love!
July is National Ice Cream Month and we are HERE for it! With temperatures soaring, no-bake treats and frozen treats are the name of the game this time of year. I wanted to kick off ice cream season with a classic, and it doesn’t get much more nostalgic than homemade ice cream sandwiches!
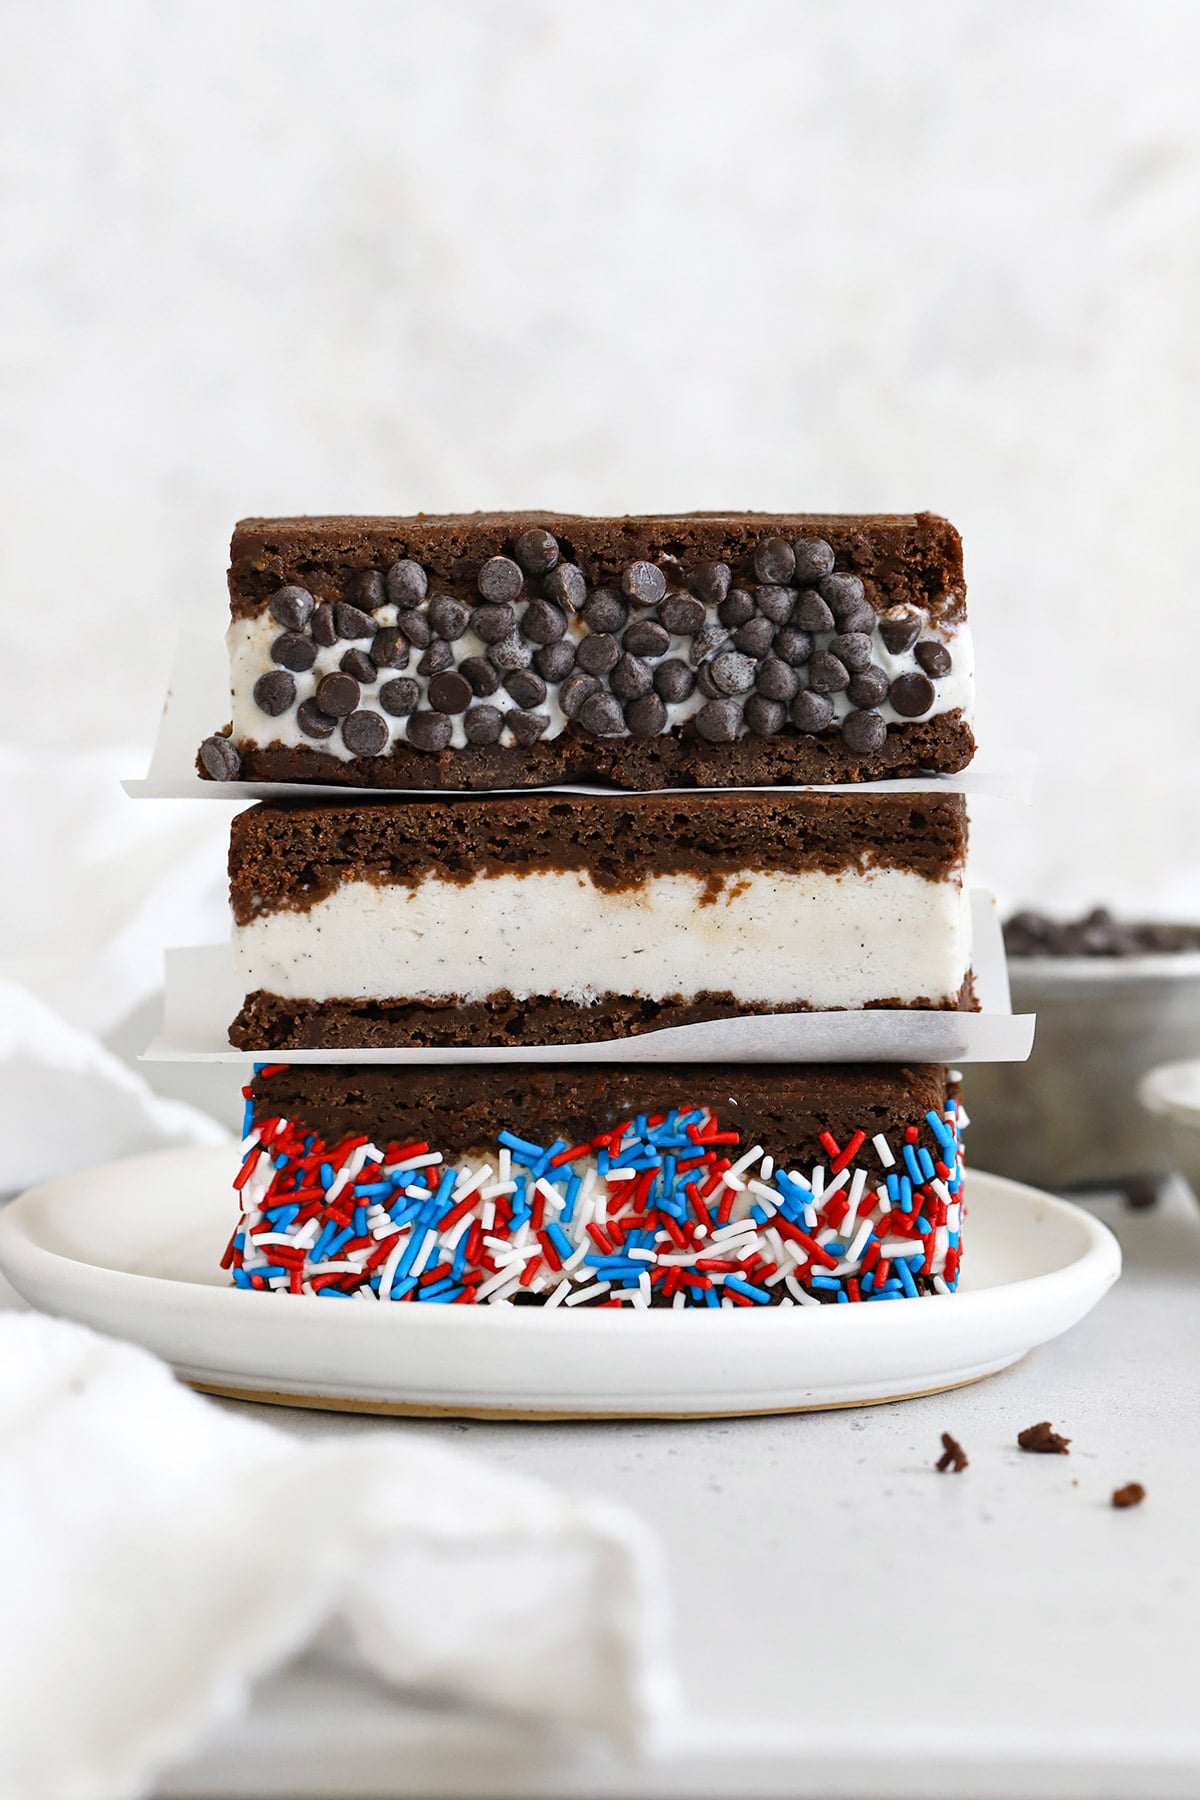
Our gluten-free ice cream sandwiches replace the typical wheat-based chocolate cookies with a soft, thin gluten-free brownie that’s incredible layered with ice cream. The end result tastes amazing–full of deep chocolate flavor from the brownie paired with the refreshing, creamy chill of the ice cream. It’s a summer match made in heaven!
And–my favorite feature–it’s easier than you think!
Here’s what you need to make delicious gluten-free brownie ice cream sandwiches…

Simple Ingredients To Start
- Butter Or Vegan Butter. Our soft brownie layers start with melted butter. I haven’t tried these with oil or other alternatives yet, but vegan butter/dairy-free butter should work!
- Sugar. Next up is sugar. The sugar helps keep these brownies soft and moist, which makes them easier to bite through when frozen. (No one wants to crack a tooth on their ice cream sandwich!)
- Eggs. Then, you’ll add two room temperature eggs. Here’s a trick to get eggs to room temperature fast!
- Vanilla. I love plenty of vanilla extract with my chocolate. It adds such great flavor!
- Gluten-Free Flour. To keep things simple, we’re making our gluten-free ice cream sandwiches with a simple measure-for-measure gluten-free flour blend. We recommend this one from King Arthur, but if you use another blend, be sure it has xanthan gum in it!
- Unsweetened Cocoa Powder. Using cocoa powder instead of melted chocolate (like I do with my gluten-free brown butter brownies) helps keep this brownie layer extra soft. You can use regular cocoa powder or use half Dutch-processed cocoa powder & regular unsweetened cocoa powder.
- Baking Powder. To help the brownies lift & puff, we’re using some baking powder. Easy!
- Salt. A little salt balances all the flavors. Don’t skip it!
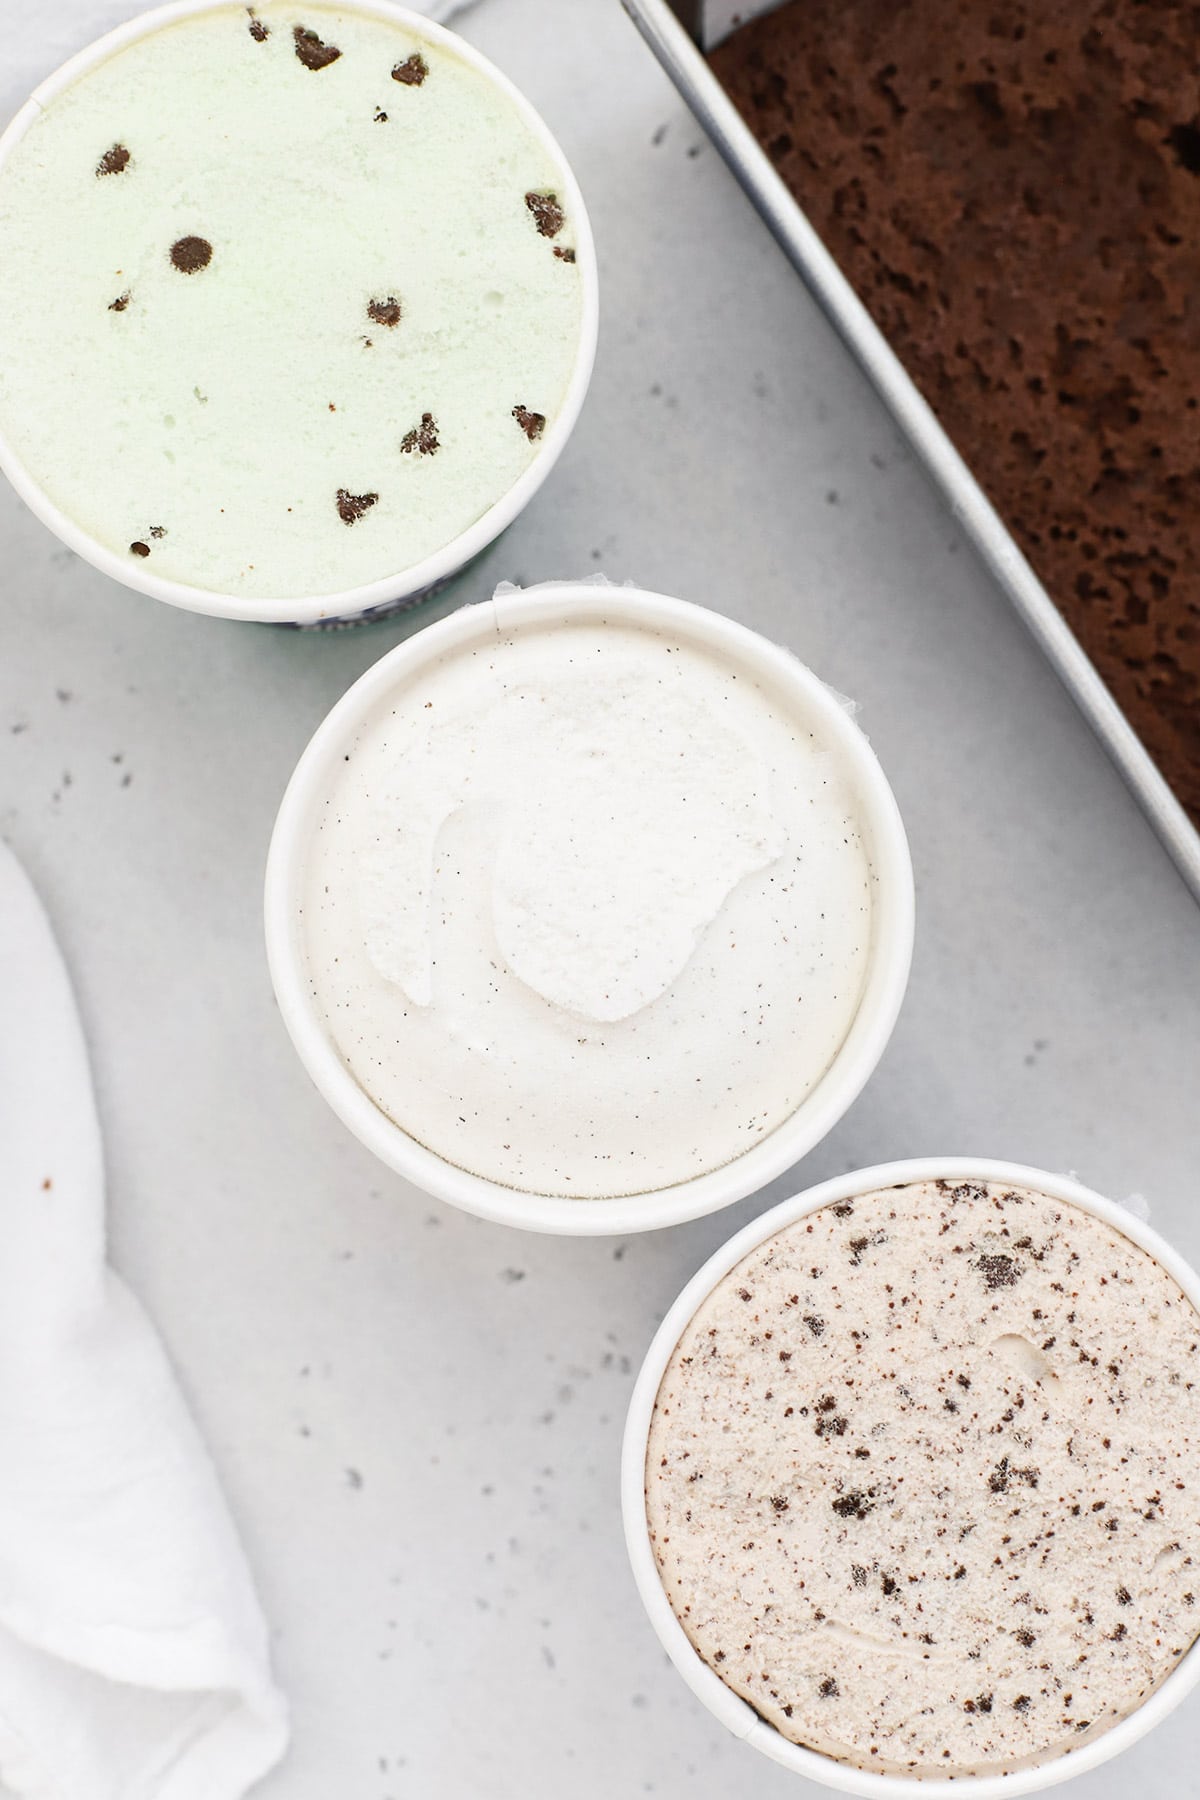
- Your Favorite Ice Cream. I used classic vanilla ice cream for the video, but lots of flavors of ice cream will work for these ice cream sandwiches. Check out our list of flavors to try below!
How To Make Gluten-Free Ice Cream Sandwiches Step-By-Step
As always, you can find the full recipe with ingredient amounts, detailed instructions, and tips in the recipe card below!
Preheat The Oven & Prep Your Pans Properly
- Preheat The Oven. Start by preheating the oven to 350 degrees F.
- Line two 8×8″ metal pans with parchment, leaving an overhang of parchment over the sides of the pan that you can use to lift the brownies out later. (See the photos or video as needed for a visual!).
- Cut two 8×8″ squares of parchment paper and set these aside. (You’ll use these for the tops of the brownies)
DON’T SKIP THE PARCHMENT! Using parchment on the bottom of the brownies & a square pressed onto the surface of the brownies as they bake is CRUCIAL to being able to easily lift these soft brownies out of the pan & helps them bake in an even layer.
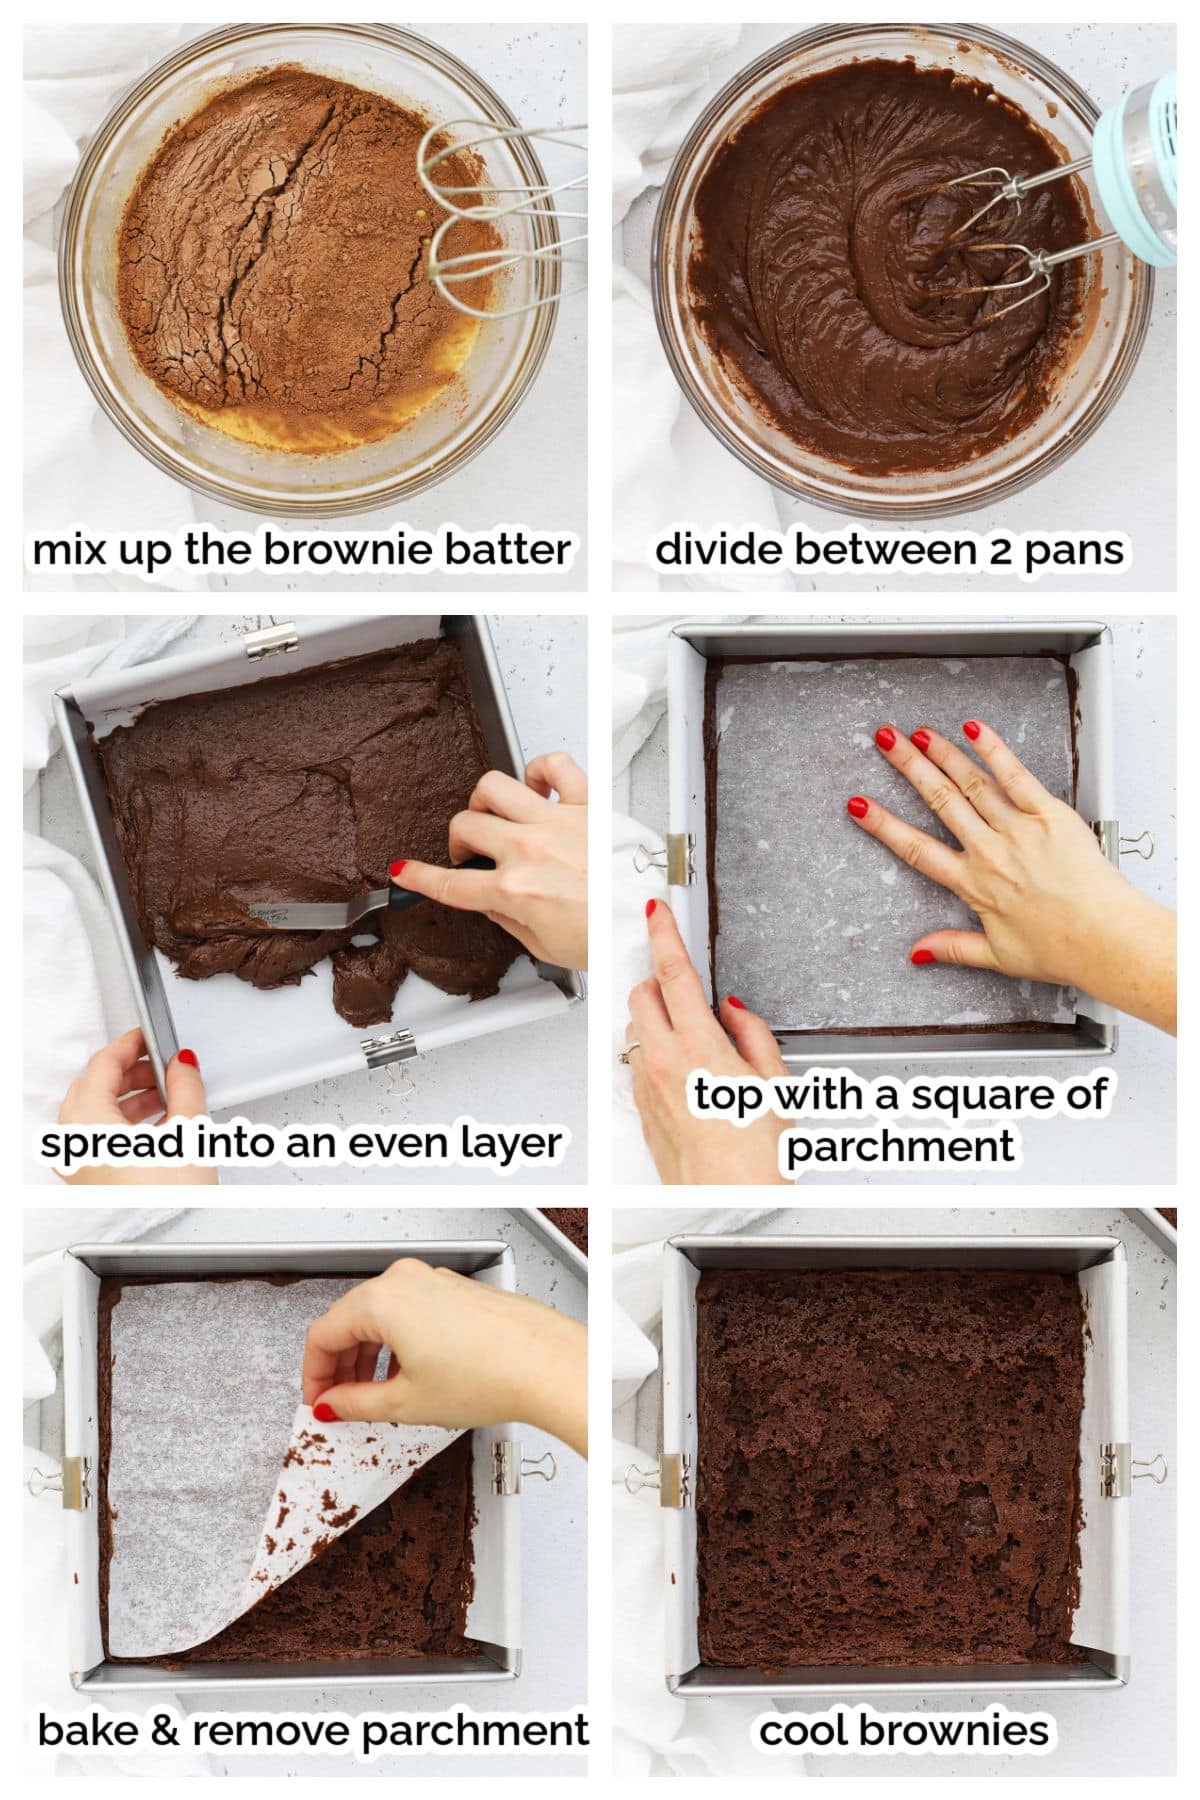
Make The Brownie Layers
- Measure The Dry Ingredients. In a medium bowl, combine the flour, cocoa powder, baking powder, and salt. Whisk to combine and set aside. (Weigh your flour and cocoa powder for the most accurate results, or at least use the scoop and level method to measure as accurately as you can.)
- Melt The Butter & Combine With Sugar. Start the brownies by melting the butter in a large microwave safe bowl (or in a saucepan on the stovetop). Add the sugar to the melted butter and mix until the mixture looks like wet sand.
- Add Eggs One At A Time, Then Add The Vanilla. Add the eggs to the sugar/butter mixture one at a time, beating 20-30 seconds after each addition. Then, add the vanilla and stir until well combined.
- Add The Dry Ingredients A Little At A Time, mixing until the batter is fully combined. It’ll be on the thick and sticky side at this point.
- Divide The Batter Between The Two Pans. Weigh it to get as accurate as possible, or use a measuring cup to divide and scoop the batter as evenly as you can between the two pans.
- Gently Smooth The Batter. Use an offset spatula or the back of a spoon to gently spread the batter into an even layer. (Again, it’ll be sticky, so just do your best! Securing the parchment paper to the sides of the pan with chip clips or binder clips while you’re spreading the batter can help. Remember to remove them before baking!)
- Gently Press A Parchment Square Onto The Surface of each pan of brownies. This helps the brownies bake into an even layer and makes it easier to gently spread the batter into an even layer.
- Bake & Cool. Pop the brownies into the oven and bake 15-16 minutes, or until still soft but no longer gooey. (You don’t want to over-bake the brownies or they’ll be too hard to bite through when frozen.) While the brownies are hot, carefully remove the top square of parchment from each pan of brownies. Cool the brownies for 5 minutes in the pans, then use the parchment overhang to remove ONE of the batches of brownies from the pan. (This will be the top of your ice cream sandwiches.) Transfer the brownies (leaving them on the base layer of parchment so it’s easier to assemble later) to a wire cooling rack and allow the brownies to cool an additional 10-15 minutes, while your ice cream softens.
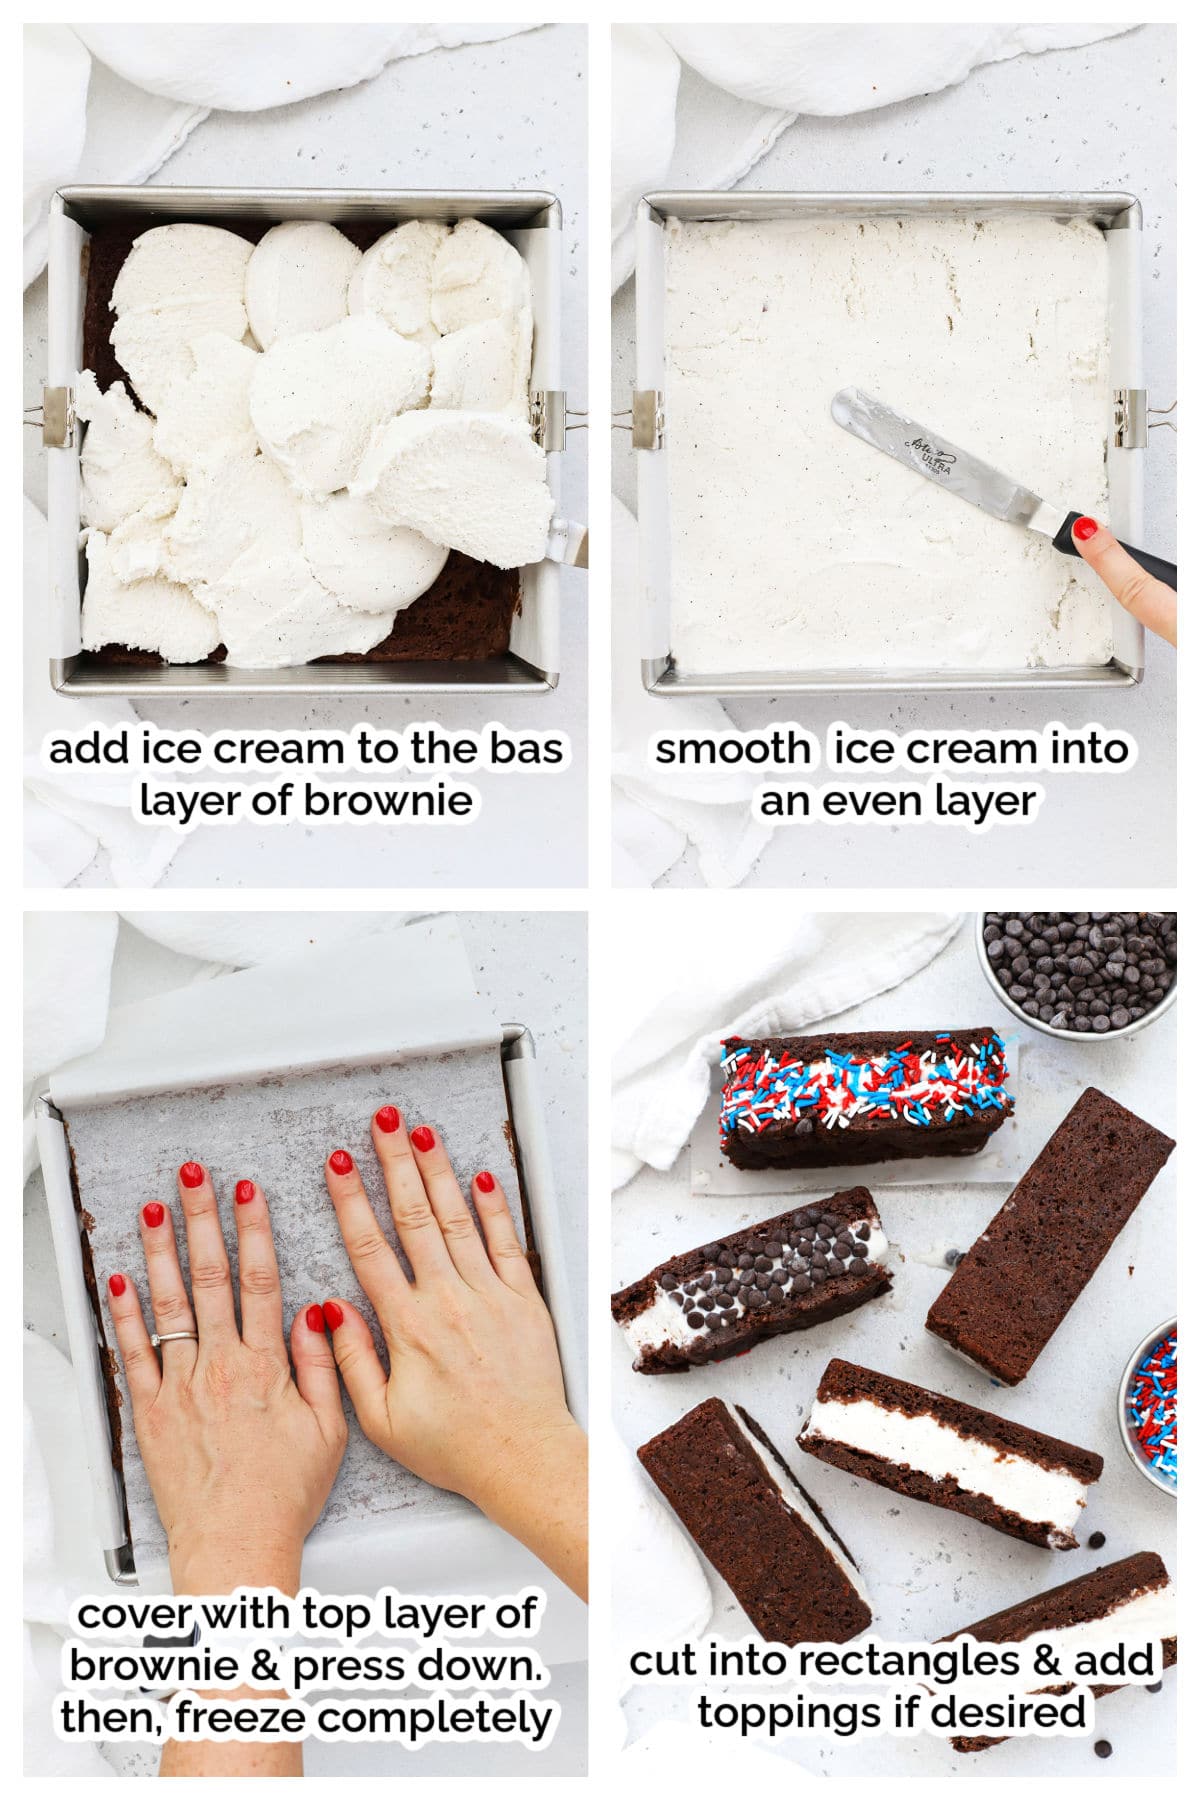
Assemble The Ice Cream Sandwiches
- Add The Ice Cream To The Base Layer. While the brownies are cooling, remove the ice cream from the freezer to soften slightly. Use a butter knife to remove thin sections of ice cream, and place the ice cream on top of the brownie layer that’s still in the pan (the base layer of the ice cream sandwiches). Use gentle pressure with the back of a flexible spatula or an offset spatula to spread the ice cream into an even layer. Be gentle so you don’t smash the base brownie layer!
- Cover With The Top Layer Of Brownies. Use the parchment lining of the top layer of brownies to help you lift and transfer the top brownie layer. Work quickly to turn the top brownie layer out on top of the ice cream. (Work quickly and carefully, as the brownies are soft!) Use gentle pressure to press the top layer of brownies into the ice cream.
- Freeze Completely. Remove the parchment from the top layer of brownies, and cover the pan with food wrap (plastic wrap, Press ‘n’ Seal, or foil). Then transfer the pan to the freezer. Freeze at LEAST 6 hours, up to 12-18 hours in advance. (Otherwise the ice cream will be too soft when you slice them!)
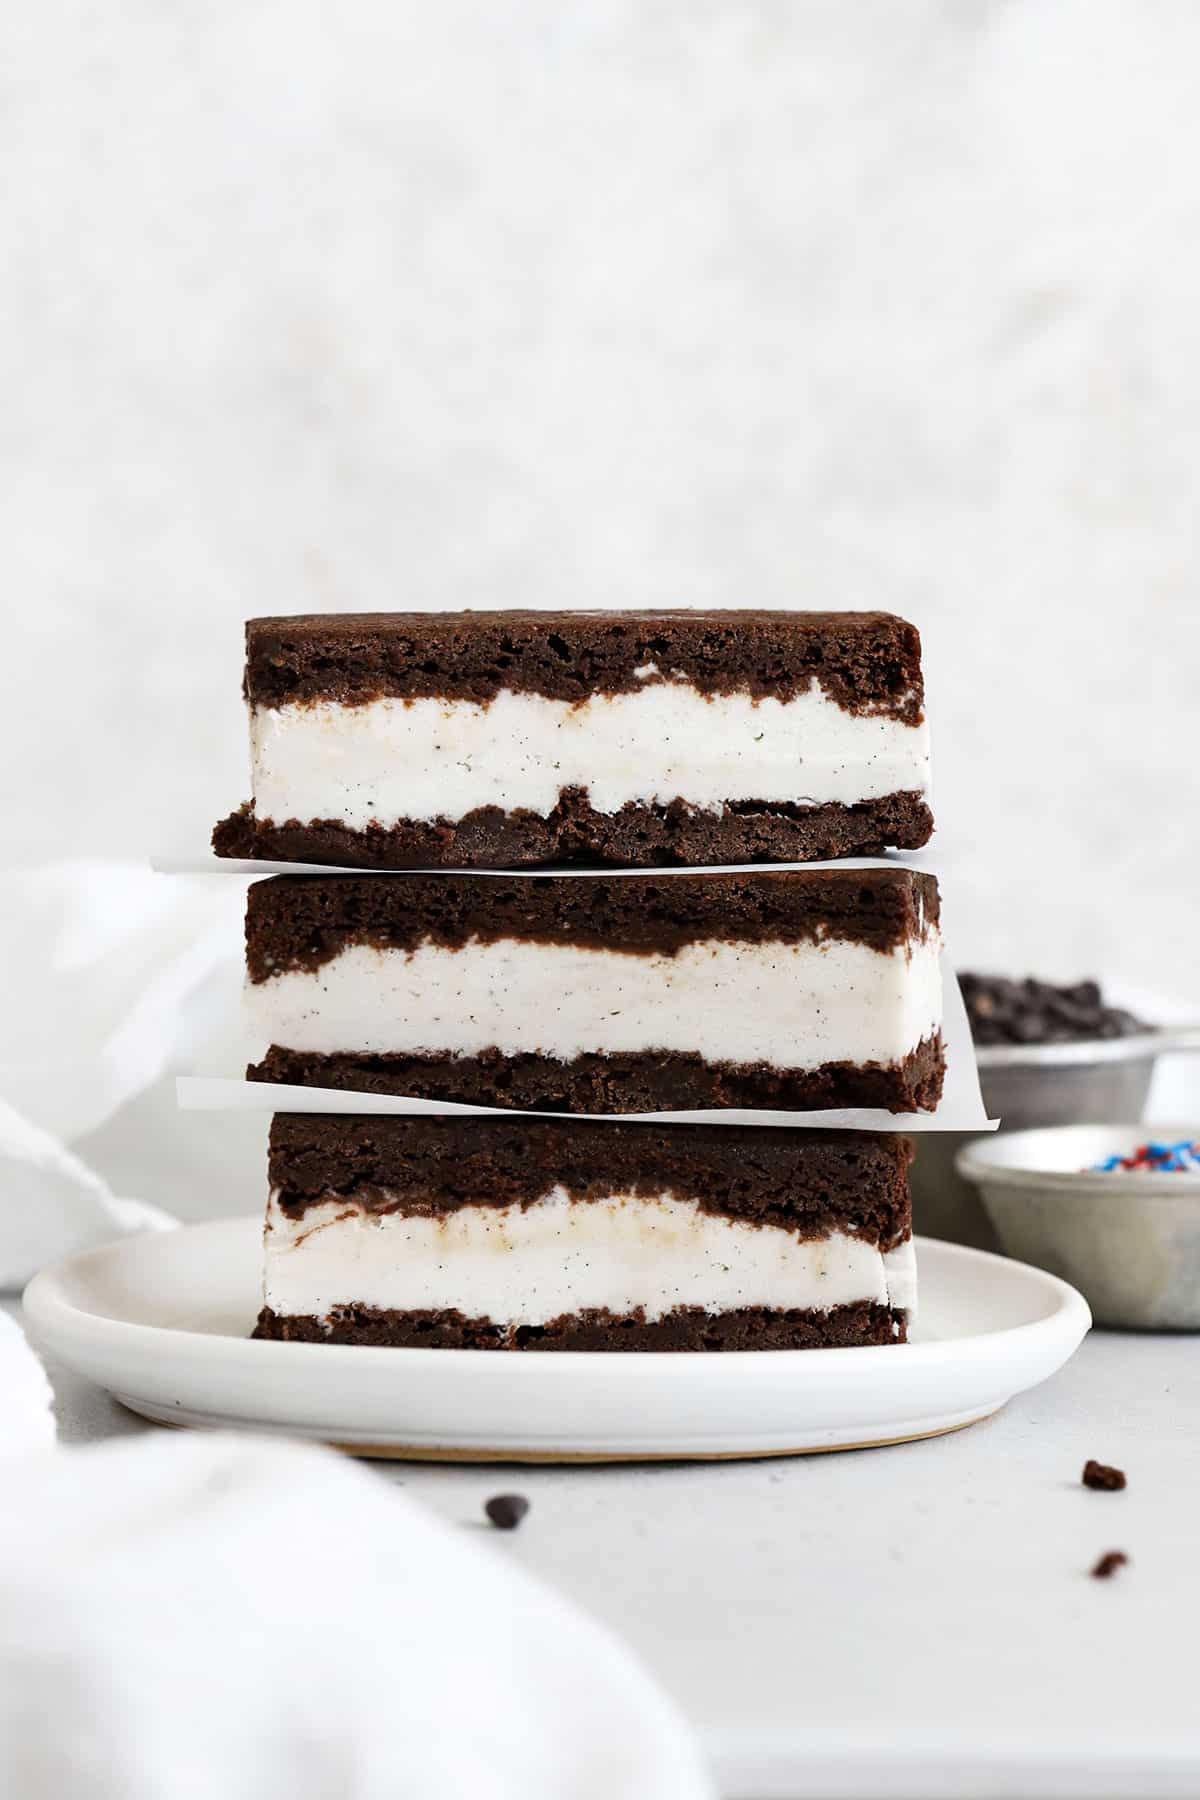
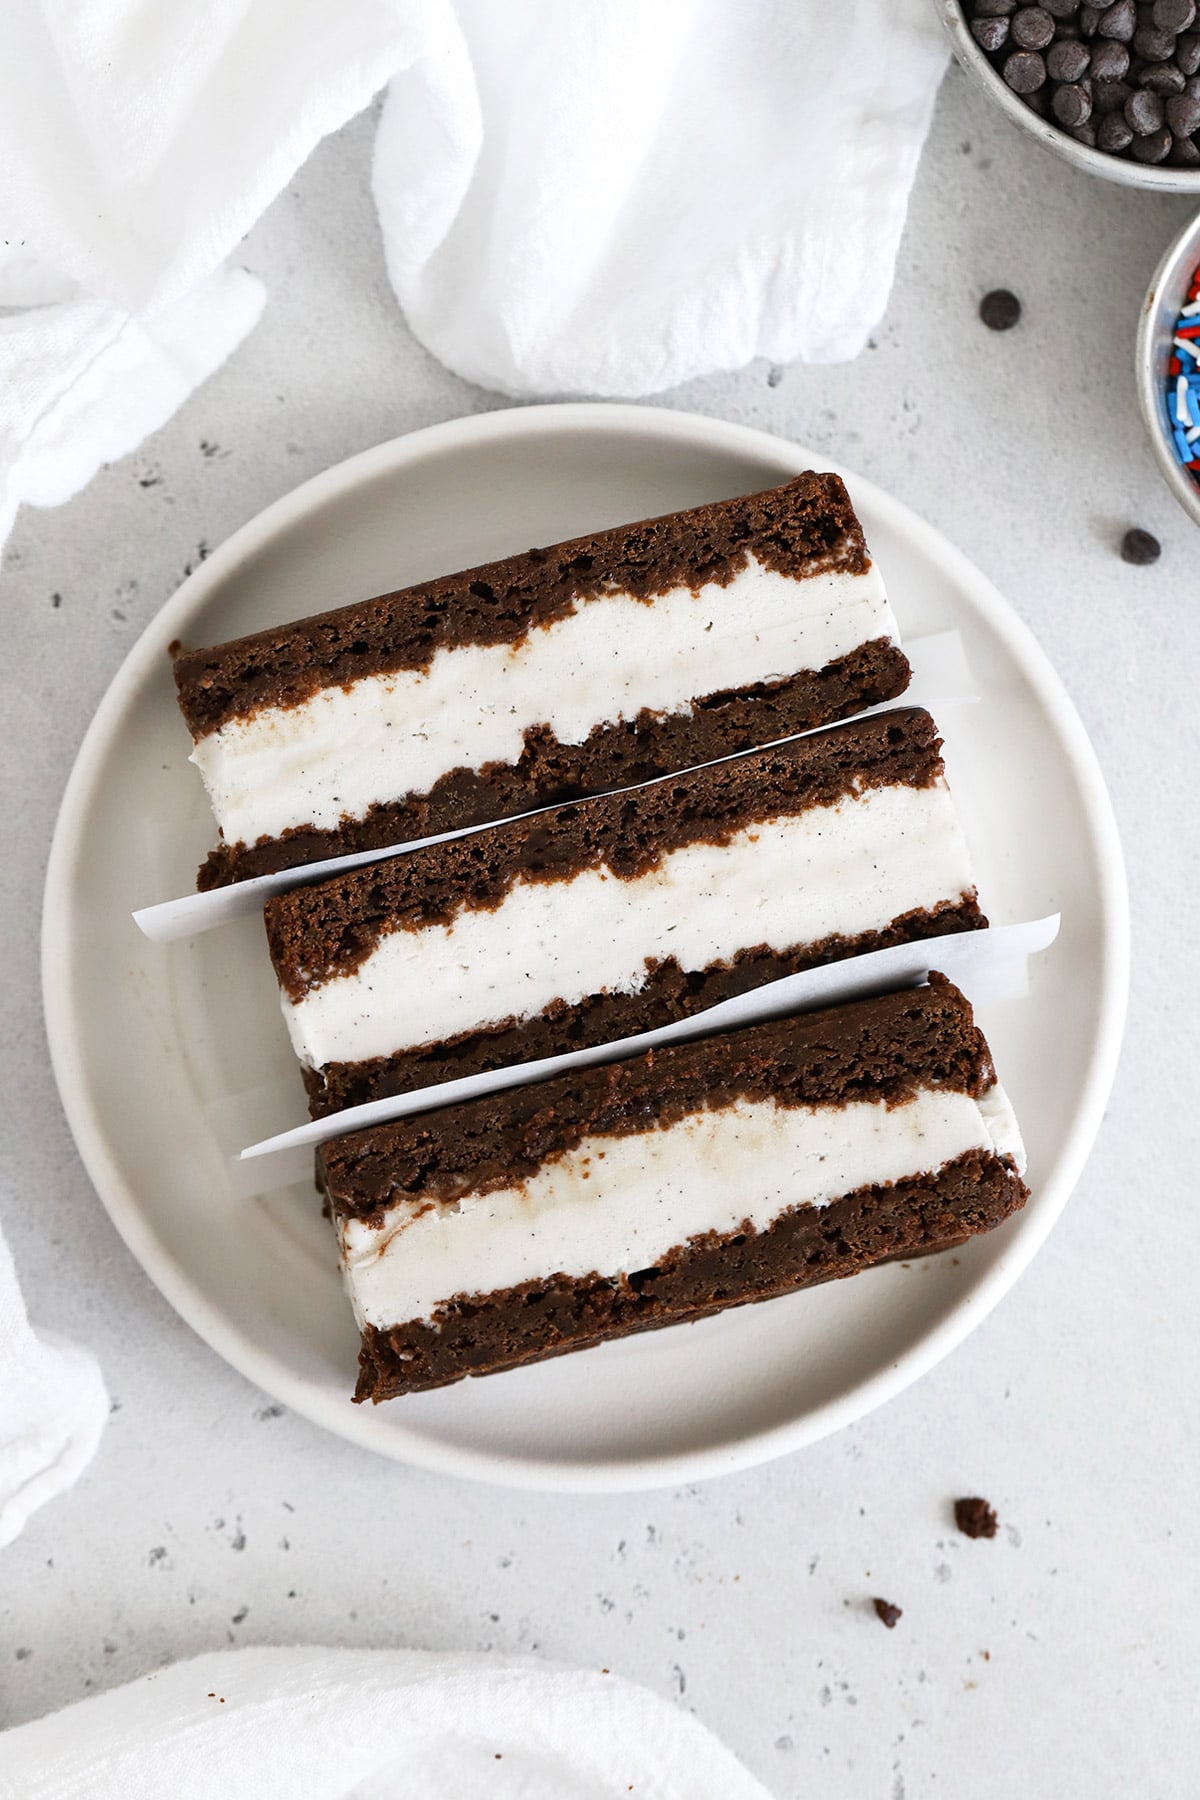
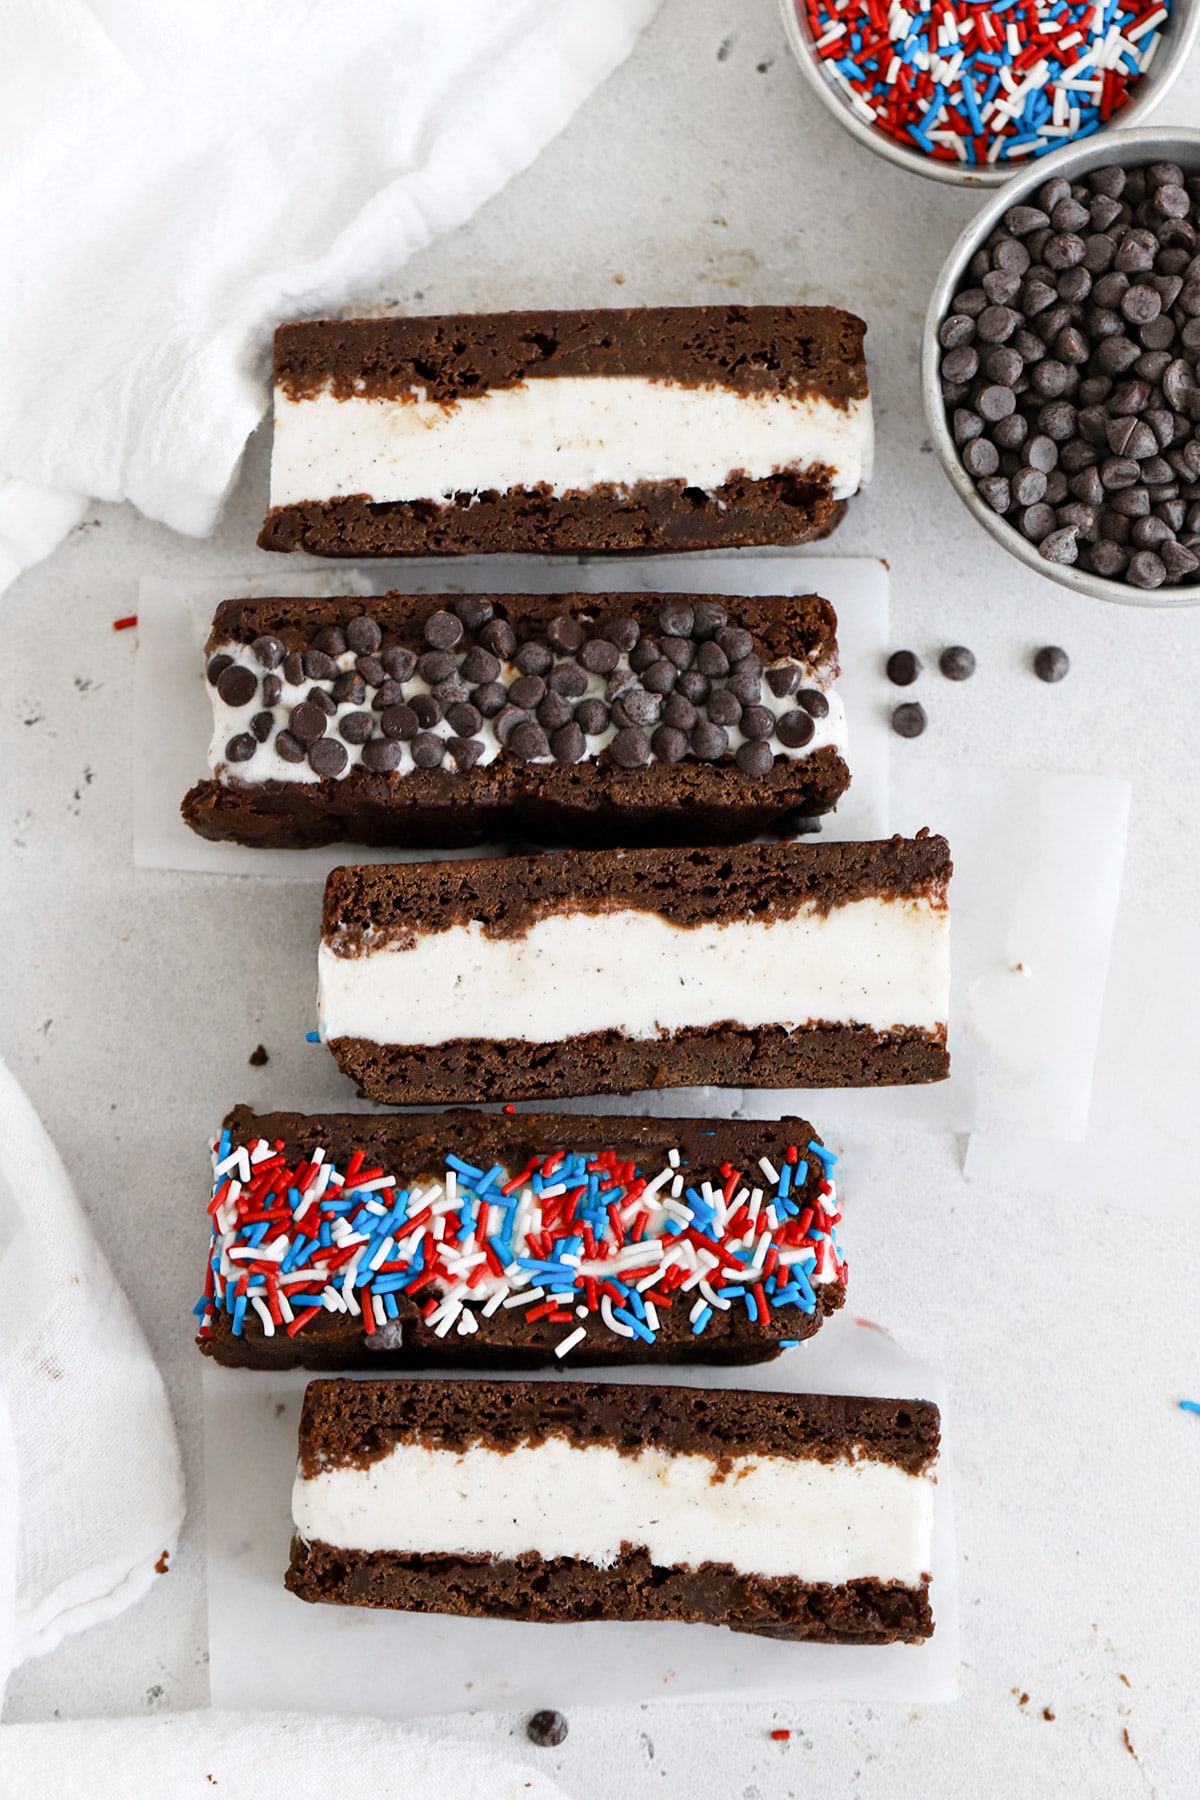
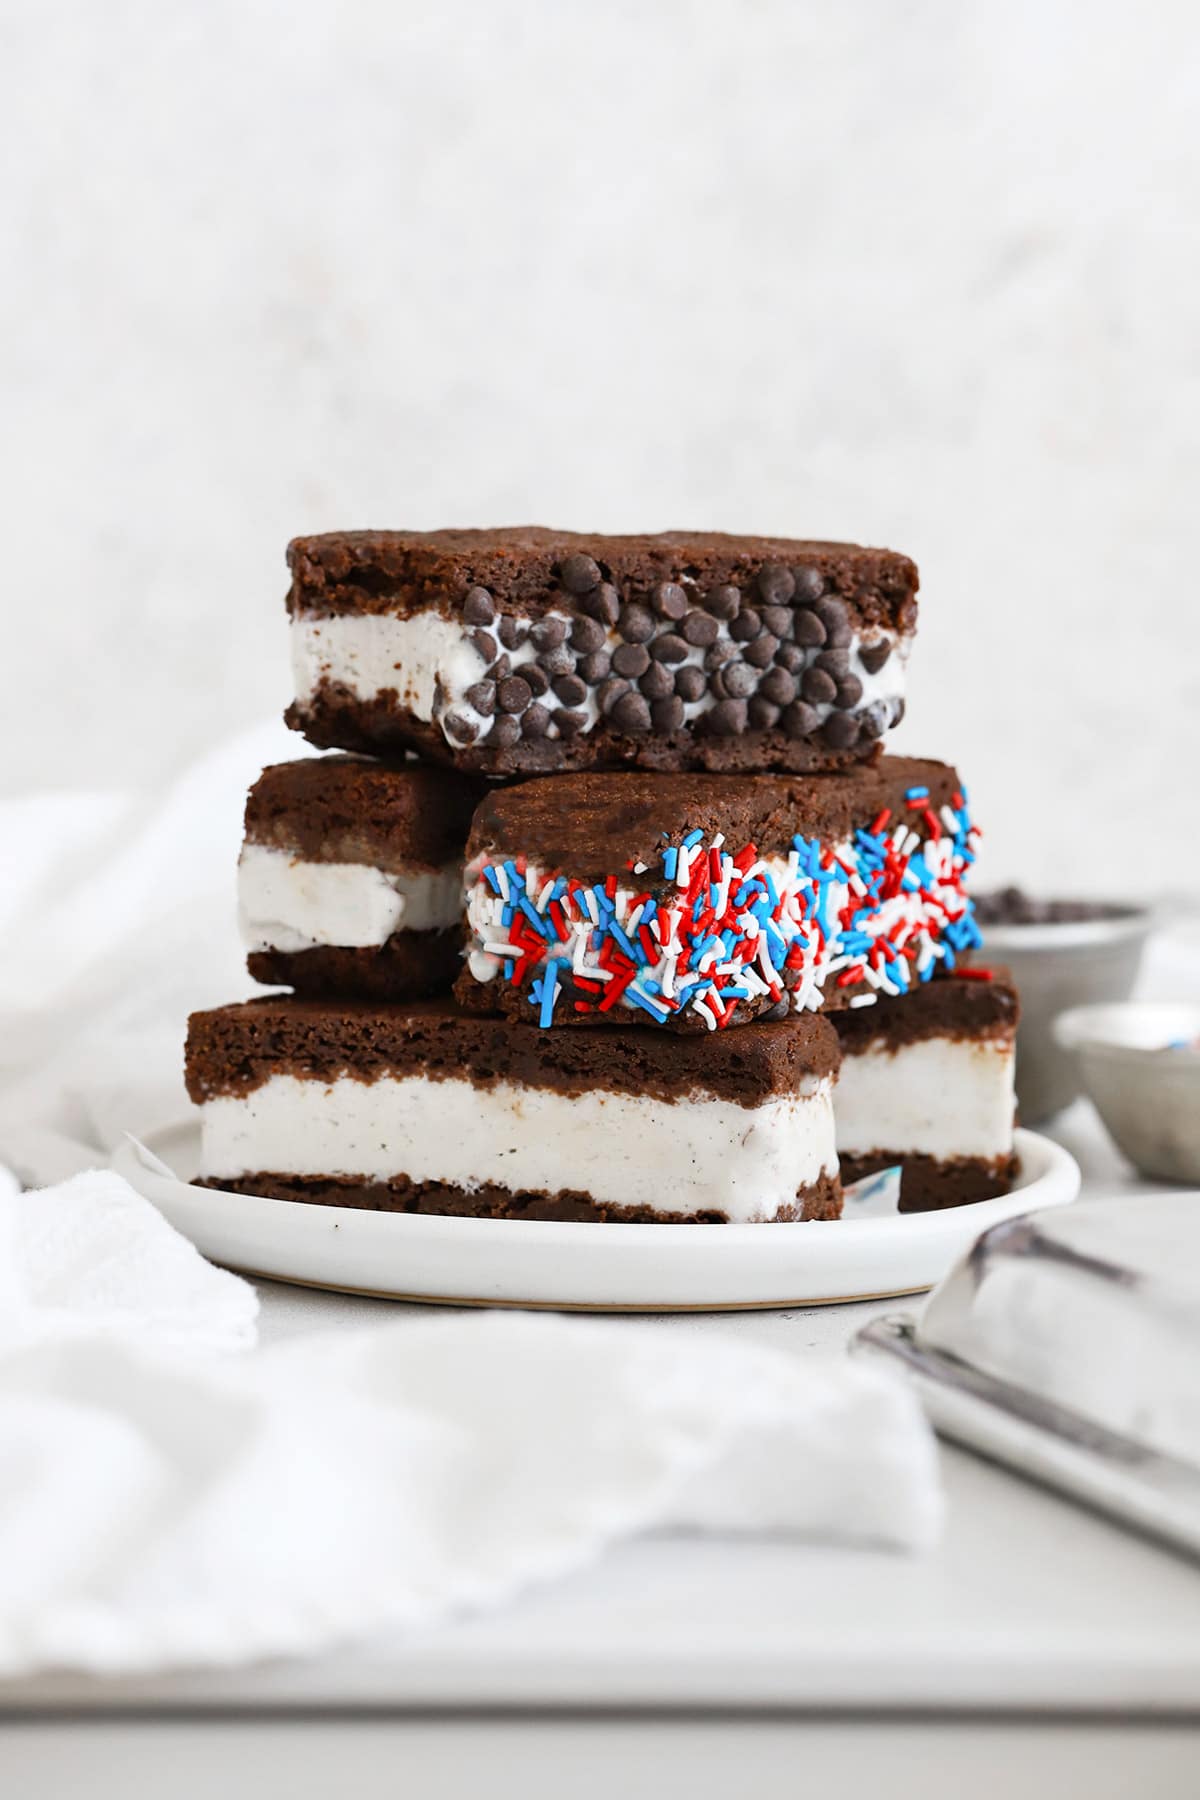
- Slice & Serve. When you’re ready to serve the ice cream sandwiches, use the parchment handles to remove the ice cream sandwiches from the pan and transfer to a cutting board. Use a long, sharp knife (and your muscles!) to slice the brownies into 10-12 rectangles or 9 squares for ice cream sandwiches.
- Store Leftovers. Wrap individual ice cream sandwiches in parchment or press n seal, then store in a freezer-safe bag or airtight container in the freezer up to 1 month. Allow frozen ice cream sandwiches to soften 5-10 minutes before eating.
Yummy Ice Cream Flavors To Try In Your Ice Cream Sandwiches
Brownies pair beautifully with all KINDS of ice cream flavors, so honestly, the trickiest part of making homemade gluten-free ice cream sandwiches is picking the ice cream flavor! Feel free to use your favorite dairy-free ice cream or regular ice cream–just check your labels to make sure it’s also gluten-free! Here are some of our favorite ice cream flavors for ice cream sandwiches:
- Vanilla – A good, classic vanilla will never lead you astray
- Cherry Chocolate Chip – Cherries and chocolate are incredible together!
- Cookies & Cream – Double up on that chocolate-vanilla vibe!
- Chocolate Brownie – This can be rich, but great if you’re a chocolate lover!
- Salted Caramel or Toffee Chip – Chocolate + salted caramel = my love language
- Chocolate Peanut Butter – For the chocolate PB lover!
- Mint Chocolate Chip (My kids’ favorite is Nada Moo coconut milk mint chocolate chip ice cream!)
- Cookie Dough – The little bites of cookie dough add such a nice textural contrast to the creamy ice cream and soft brownie.
I don’t recommend sorbet or soft homemade ice creams (such as no-churn recipes) as they’ll be too soft for ice cream sandwiches at the start, and often freeze too hard to be easily eaten later.
Make Them Pretty! Cute Ways To Decorate Your Ice Cream Sandwiches
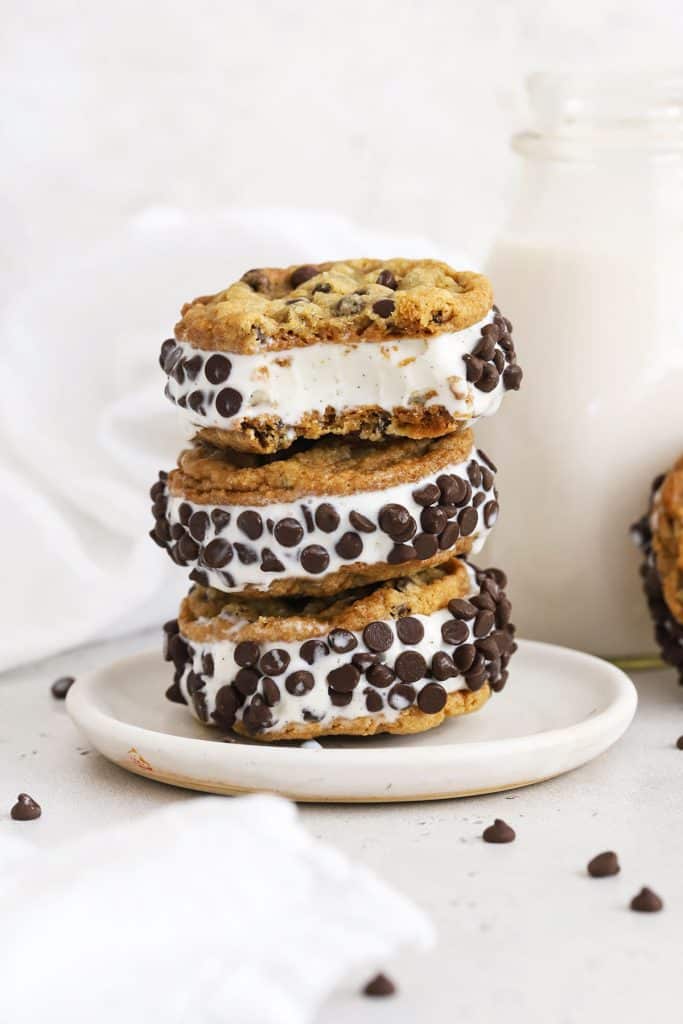
- Roll The Sides In Toppings, such as mini chocolate chips, chopped nuts, colorful sprinkles, toasted coconut, freeze-dried berries, mini M&Ms, etc.
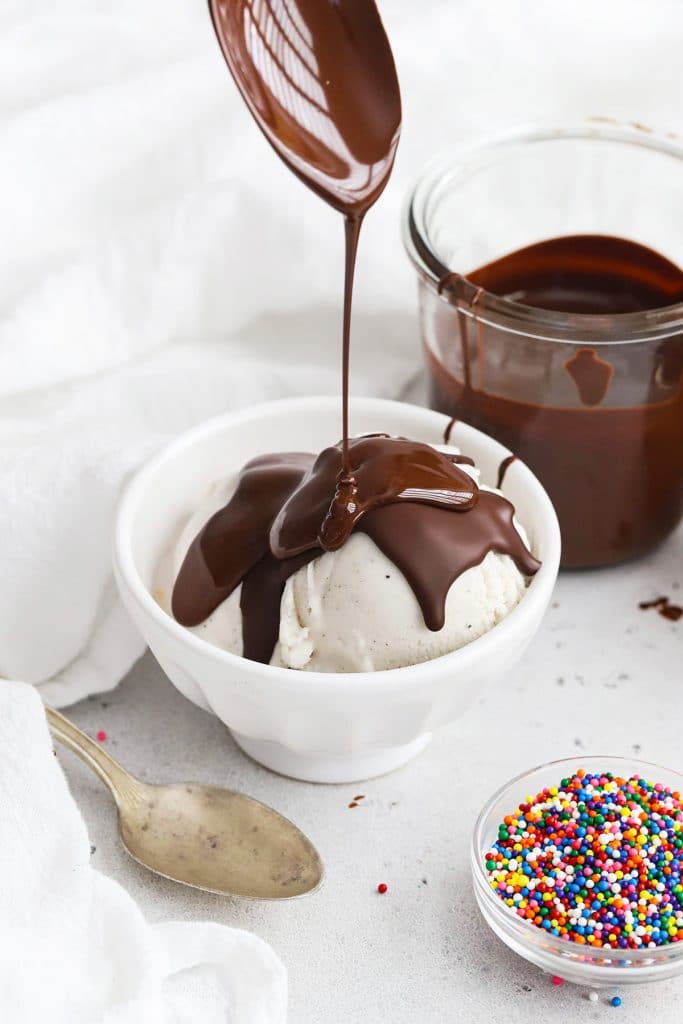
- Dip Them In Chocolate. You can also dip half of the ice cream sandwich in melted chocolate. It’ll freeze hard, but add a pretty touch!
- Marble Or Mix Up The Ice Cream Flavors! You can also mix and match two different pints of ice cream to give your ice cream sandwich a marbled effect. Alternate thin strips of the two flavors across the brownie layer, then smooth out the surface before adding the top brownie. (Make sure the two flavors are complementary!)
FAQ + Tips For The Best Gluten-Free Ice Cream Sandwiches
PLAN AHEAD SO YOU CAN FREEZE THEM LONG ENOUGH! The big trick to getting the best texture & shape in homemade ice cream sandwiches is making sure they have enough time to chill. A full 12 hours is kind of the minimum! Once you pass the 24-hour mark, they’ll get a little harder and you may need to set them out for a minute or two before slicing into them.
How Do You Soften Ice Cream For Ice Cream Sandwiches? You want the ice cream soft but not melty, so I recommend removing the ice cream from the freezer while the brownies are cooling. Additionally, using a butter knife or offset spatula to add thin sections of ice cream to the brownie layer is easier to spread than thick round scoops. (See the video or photos for a visual!)
What Is The Cookie Part Of An Ice Cream Sandwich? Most store-bought ice cream sandwiches use soft chocolate wafer cookies for the “bread” of the ice cream sandwich. While I love that effect, using a thin brownie makes these homemade ice cream sandwiches feel extra fun and delicious!
How To Store Leftover Ice Cream Sandwiches: For the absolute best texture, you can wrap each ice cream sandwich in parchment or waxed paper, Press ‘n’ Seal, or plastic wrap. Then, store the sandwiches in a freezer-safe bag in the freezer up to 1 month. Leftover ice cream sandwiches will likely need a few minutes at room temperature to soften.
WE ♥

🌟 Did you make this recipe?
Leave a star rating below when you try our Gluten-Free Brownie Ice Cream Sandwich recipe! We can’t wait to hear what you think! Sharing it on Instagram? Tag us @sweetsandthankyou so we can see your creations!
Gluten-Free Ice Cream Sandwiches
- Total Time: 6 hours 35 minutes
- Yield: 8–12 ice cream sandwiches 1x
- Diet: Gluten Free
Description
The perfect summer treat! These gluten-free ice cream sandwiches have all the classic flavor you love, simply made gluten-free.
Ingredients
For The Chocolate Cookie Layer:
- 2/3 cup (80 grams) gluten-free measure for measure flour (weighed or scooped & leveled)
- 1/2 cup (55 grams) unsweetened cocoa powder
- 1/2 teaspoon baking powder
- 1/2 teaspoon salt
- 1/2 cup (8 Tablespoons/4 ounces) butter
- 1 1/3 cup (267 grams) granulated sugar
- 2 eggs, room temperature
- 2 teaspoons vanilla extract
For The Filling:
- 2 pints (1 quart/4 cups) of your favorite vanilla ice cream
Instructions
Preheat The Oven & Prep Your Pans Properly
- Preheat The Oven. Start by preheating the oven to 350 degrees F.
- Line two 8×8″ metal pans with parchment, leaving an overhang of parchment paper over the sides of the pan that you can use to lift the brownies out later. (See the photos or video as needed for a visual!). Do NOT use glass pans or the brownies will not bake properly.
- Cut two 8×8″ squares of parchment paper and set these aside. (You’ll use these for the tops of the brownies)
Make The Brownies:
- Measure The Dry Ingredients. In a medium bowl, combine the flour, cocoa powder, baking powder, and salt. Whisk to combine and set aside. (Weigh your flour and cocoa powder for the most accurate results, or at least use the scoop and level method to measure as accurately as you can.)
- Melt The Butter & Combine With Sugar. Start the brownies by melting the butter in a large microwave safe bowl (or in a saucepan on the stovetop). Add the sugar to the melted butter and mix until the mixture looks like wet sand.
- Add Eggs One At A Time, Then Add The Vanilla. Add the eggs to the sugar/butter mixture one at a time, beating 20-30 seconds after each addition. Then, add the vanilla and stir until well combined.
- Add The Dry Ingredients A Little At A Time, mixing until the batter is fully combined. It’ll be on the thick and sticky side at this point.
- Divide The Batter Between The Two Pans. Weigh it to get as accurate as possible, or use a measuring cup to divide and scoop the batter as evenly as you can between the two pans.
- Gently Smooth The Batter. Use an offset spatula or the back of a spoon to gently spread the batter into an even layer. (Again, it’ll be very sticky, so just do your best! Securing the parchment paper to the sides of the pan with chip clips or binder clips while you’re spreading the batter can help. Remember to remove the clips before baking!)
- Gently Press A Parchment Square Onto The Surface of each pan of brownies. This helps the brownies bake into an even layer and makes it easier to gently spread the batter into an even layer.
- Bake & Cool. Pop the brownies into the oven and bake 15-16 minutes, or until still soft but no longer gooey. (You don’t want to over-bake the brownies or they’ll be too hard to bite through when frozen.) While the brownies are hot, carefully remove the top square of parchment from each pan of brownies. Cool the brownies for 5 minutes in the pans, then use the parchment overhang to remove ONE of the batches of brownies from the pan. (This will be the top of your ice cream sandwiches.) Transfer the brownies (leaving them on the base layer of parchment so it’s easier to assemble later) to a wire cooling rack and allow the brownies to cool an additional 10-15 minutes, while your ice cream softens.
Assemble The Ice Cream Sandwiches:
- Add The Ice Cream To The Base Layer. While the brownies are cooling, remove the ice cream from the freezer to soften slightly. Use a butter knife to remove thin sections of ice cream, and place the ice cream on top of the brownie layer that’s still in the pan (the base layer of the ice cream sandwiches). Use gentle pressure with the back of a flexible spatula or an offset spatula to spread the ice cream into an even layer. Be gentle so you don’t smash the base brownie layer!
- Cover With The Top Layer Of Brownies. Use the parchment lining of the top layer of brownies to help you lift and transfer the top brownie layer. Work quickly to turn the top brownie layer out on top of the ice cream. (Work quickly and carefully, as the brownies are soft!) Use gentle pressure to press the top layer of brownies into the ice cream. (If your brownie breaks, don’t panic. You can patch it together as needed. I promise!)
- Freeze Completely. Remove the parchment from the top layer of brownies, and cover the pan with food wrap (plastic wrap, Press ‘n’ Seal, or foil). Then transfer the pan to the freezer. Freeze at LEAST 6 hours, up to 12-18 hours in advance. (Otherwise the ice cream will be too soft when you slice them!)
- Slice & Serve. When you’re ready to serve the ice cream sandwiches, run a thin knife around the edges of the pan. Then use the parchment handles to remove the ice cream sandwiches from the pan and transfer to a cutting board. (Lifting it out of the pan is the hardest part, but don’t give up!) Use a long, sharp knife (and your muscles!) to slice the brownies into 10-12 rectangles or 9 squares for ice cream sandwiches.
- Store Leftovers. Wrap individual ice cream sandwiches in parchment or press n seal, then store in a freezer-safe bag or airtight container in the freezer up to 1 month. Allow frozen ice cream sandwiches to soften 5-10 minutes before eating.
Notes
Only Have One Pan? Try This!
- If you only have one 8×8″ pan, you’ll need to bake the batter in shifts. Line the pan as directed above, filling with half of the batter, and covering with a parchment square as directed. Bake as directed, then cool 5 minutes in the pan before lifting the brownies out to transfer to a cooling rack. Carefully line the warm pan again, fill with the remaining batter (which will have thickened somewhat), cover with parchment paper and bake as directed. You’ll use this second batch of brownies as the base of the ice cream sandwiches.
- Prep Time: 20 minutes
- Chill Time: 6 hours
- Cook Time: 15 minutes
- Category: Dessert
- Method: Oven
- Cuisine: American
