Description
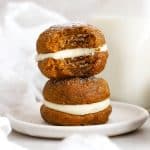
Our homemade Gluten-Free Pumpkin Whoopie Pies are a perfect fall treat! Made from fluffy cake-like pumpkin cookies and a secret-ingredient cream cheese filling, they’re a great alternative to traditional pie!
Ingredients
For The Pumpkin Cookies:
- 3 cups (360 grams) gluten-free measure for measure flour (like King Arthur), weighed or scooped & leveled
- 5 teaspoons ground cinnamon
- 1 teaspoon ground nutmeg
- 1 teaspoon ground ginger
- 1 teaspoon kosher salt
- 1 teaspoon baking soda
- 3/4 teaspoon baking powder
- 1/4 teaspoon ground cloves
- 2 cups brown sugar (400 grams)
- 1 cup oil
- 1 (15 oz.) can unsweetened pumpkin puree
- 3 large eggs
- 1 teaspoon vanilla extract
For The Cream Cheese Filling:
- 1/2 cup butter (1 stick/8 Tablespoons)
- 4 oz. cream cheese (full-fat)
- 3 cups powdered sugar (360 grams), plus more, if needed
- 2 Tablespoons pure maple syrup or caramel sauce
- 2 Tablespoons heavy cream
- pinch salt (less than 1/8 teaspoon)
Instructions
First, Make The Pumpkin Cookies:
-
Preheat The Oven & Prep. Start by preheating the oven to 350 degrees F. Line two baking sheets with parchment paper or a macaron silicone baking mat (aka macaron silpat). Set out a medium cookie scoop or fit a piping bag with a large open tip for portioning out the pumpkin batter later.
-
Combine Sugar & Oil. In a large bowl, combine brown sugar and oil. Whisk until combined. (It will look like wet sand.)
-
Finish The Wet Ingredients. Mix in pumpkin puree, then add eggs one at a time, mixing to fully incorporate each egg before adding the next one. Mix in the vanilla.
-
Add Dry Ingredients. Next, add gluten-free flour blend, baking soda, baking powder, and salt, along with cinnamon, nutmeg, ginger, and cloves. Stir with a spatula until just combined (no floury patches left). Try not to over-mix the batter.
-
Portion Out The Cookies. Using either a medium 2-Tablespoon scoop or a piping bag fitted with an open round tip, measure out the dough into 1.5 inch rounds onto the prepared baking sheet. If needed, use a just barely moist fingertip to smooth out any rough spots. I usually pipe out 9-12 cookies per batch.
-
Bake & Shape. Bake the cookies for 10-12 minutes, or until set all around and a toothpick inserted in the center comes out clean with just a few moist crumbs. (The tops of the cookies should spring back when gently pressed.) If desired, use a round cookie cutter to gently coax the cookies into a more perfect circular shape when they’re hot from the oven.
-
Cool & Repeat. Cool 1-2 minutes on the baking sheet, then transfer to a wire cooling rack to cool completely. Repeat this baking process, alternating cookie sheets with each batch so you don’t put cool batter on a hot cookie sheet. Allow all cookies to cool completely before frosting.
Then, Make The Cream Cheese Frosting:
-
Cream Butter & Cream Cheese. Make sure the cream cheese and butter are softened to room temperature before combining, or they won’t blend well. In a large bowl or the bowl of a stand mixer fitted with a paddle attachment, combine softened cream cheese and butter. Mix together on medium speed with paddle attachment or a hand mixer for 1-2 minutes or until creamy and combined.
-
Add powdered sugar 1/2 cup at a time, mixing on medium-low speed until it’s fully added.
-
Finish Adding Ingredients. Scrape down the sides of the mixer, then add vanilla extract, a pinch of salt, 1 Tablespoon of heavy cream and either 1-2 Tablespoons of caramel sauce or pure maple syrup.
-
Whip The Frosting. Mix on medium-high speed for 1-3 minutes or until smooth and fluffy. If the frosting seems too thin, you can add powdered sugar 1 Tablespoon at a time until it’s more stiff. If it’s too thick, you can add more heavy cream 1 teaspoon at a time to thin it out.
-
Finish The Cookies. Flip over half of the cookies so they are bottom-side up/flat side up. These will be the base of your cookie sandwich. Pipe or spread frosting on the bottom cookies (flat side up), then top with a second cookie (flat side down) on top of the frosting to make a cookie sandwich.
-
Store & Serve. Chill in the fridge until ready to serve. If desired, garnish with a sprinkle of powdered sugar right before serving. Store leftover pumpkin whoopie pies in an airtight container in the fridge up to 3 days, or freeze up to 2 months.
Notes
Frosting Options:
- Plain/Original. Omit the maple syrup or caramel sauce. Add 1/2 teaspoon vanilla extract, and additional heavy cream, as needed.
- Maple Cream Cheese Frosting. Add 1-2 Tablespoons pure maple syrup (not pancake syrup!)
- Caramel Cream Cheese Frosting. Use 1-2 Tablespoons caramel sauce (homemade or store-bought).
- Cinnamon Cream Cheese Frosting. Add 1/4-1/2 teaspoon ground cinnamon to add another layer of spice. Or, just swap for the Cinnamon Cream Cheese Frosting we use in our Gluten-Free Pumpkin Cupcakes.
- Prep Time: 35 minutes
- Cook Time: 55 minutes
- Category: Dessert
- Method: Oven
- Cuisine: American
